
Stretching a canvas painting is all about pulling the canvas taut over a wooden frame—what we call stretcher bars—and securing it with staples. Done right, this process transforms a rolled-up canvas into a drum-tight, gallery-ready piece of art, making sure it hangs beautifully without any sags or wrinkles.
Giving Your Canvas Painting the Display It Deserves

If you've ever purchased a painting that arrived rolled in a tube, you know that feeling—it's just not quite finished. Turning that loose canvas into a taut, beautiful piece ready for your wall is an incredibly rewarding skill to have. Learning to stretch your own canvas doesn't just save a bit on framing costs; it actually connects you more deeply with the artwork itself.
Think of this guide as your friendly workshop manual. I'm here to walk you through the entire process, breaking it down into simple, manageable steps that will build your confidence. We’ll cover everything from gathering the right tools to mastering those tricky folded corners. By the end, you'll have the know-how to give your art the sturdy, polished presentation it truly deserves.
The Rise of DIY Canvas Stretching
You're definitely not alone in wanting to learn this skill. The global market for stretched canvas was valued at a whopping USD 1.12 billion in 2023 and is expected to climb to nearly USD 1.78 billion by 2033.
What’s behind the boom? It’s a mix of a growing love for unique interior decor and a massive surge in DIY projects. In fact, online searches for 'how to stretch a canvas painting' have jumped over 120% in just the last few years. It’s clear that more and more people are rolling up their sleeves and getting hands-on with their art.
Taking on a creative project like this is a fantastic DIY endeavor. And for those who love getting their hands dirty, finding good support for DIY’ers can make all the difference when you're learning the ropes.
Key Takeaway: Stretching a canvas is more than just a finishing step; it's a way to preserve and honor your art. The process protects the painting from damage, ensures it’s displayed correctly, and simply makes it look its absolute best.
Once your canvas is stretched, the next natural step is finding the perfect frame. For tips on that, check out our guide on https://williamtuckerart.com/blogs/interesting-articles/how-to-frame-canvas-paintings, which will help you choose a frame that complements your newly stretched masterpiece.
Prepping Your Space and Tools
Before you even think about stretching your canvas, let's talk about setting up your space. Getting this right from the start is the secret to avoiding a world of frustration. It’s a bit like a chef arranging their mise en place—a little prep work makes the main event go so much smoother.
First, you'll need a large, clean, and totally flat surface. A big dining table works great, as does a clean spot on the floor. The key is to protect both your artwork and your work surface, so lay down a soft, clean blanket or a big piece of felt first. This creates a cushion that will prevent any nasty scratches or dings on the painted surface.
And a quick note on your own well-being: you’re going to be pulling and stapling for a bit, so think about your posture. Setting up an ergonomic workspace can help you prevent repetitive strain injury and keep you comfortable.
Your Essential Canvas Stretching Toolkit
With your workspace ready, it's time to gather your tools. Having the right gear on hand is what separates a professional, gallery-worthy result from a saggy, amateur-looking job.
Here’s a checklist of everything you'll need. We've included notes on what to look for to ensure you get professional, lasting results.
| Tool or Material | What to Look For | Why It's Critical |
|---|---|---|
| Stretcher Bars | Kiln-dried wood (like pine or fir) to prevent warping. For art over 24 inches, choose heavy-duty or braced bars. | This is the skeleton of your artwork. Quality wood ensures your painting stays square and taut for years. |
| Canvas Pliers | A pair with padded, wide jaws and a spring-loaded handle. | This tool is your best friend. It gives you the leverage to pull the canvas drum-tight without damaging the fabric. |
| Heavy-Duty Staple Gun | A powerful manual model is fine, but electric or pneumatic is a lifesaver for big jobs. Use stainless steel staples (1/4" or 3/8"). | Your staples are what hold the tension. A weak gun or rusty staples will fail over time. |
| Tape Measure | A standard retractable metal tape measure. | Precision is non-negotiable. Measure twice, staple once! |
| Scissors or Craft Knife | Sharp, sturdy scissors or a utility knife with a fresh blade. | You'll need this for trimming excess canvas to create a clean, tidy finish on the back. |
This isn't just a niche skill anymore. It's a fundamental part of the art world, which is a massive industry. The global art supplies market, which includes all these materials, was valued at around USD 5 billion in 2022. It’s also a skill being passed down to the next generation—a recent survey found that 70% of art students are now taught how to properly stretch a canvas.
My Two Cents: Always have a staple remover or a small flat-head screwdriver within arm's reach. You will put a staple in the wrong place at some point, or you'll need to readjust. It happens to all of us. Having a tool ready to pop it out cleanly without tearing the canvas will save you a major headache.
The Art of Pulling and Stapling for Even Tension
Alright, this is where the real work—and the magic—begins. The rhythm you develop for pulling and stapling is what will turn that loose piece of fabric into a tight, gallery-ready surface. Think of it less like brute force and more like a careful dance, methodically spreading the tension across the entire painting.
Our main goal here is to sidestep any ripples or distortions. Those are the dead giveaways of an uneven pull. To get that perfect, drum-like finish, we're going to use what’s called the center-out method. This technique is the absolute gold standard for stretching canvas because it builds balanced tension from the inside out.
It’s a bit like tightening the lug nuts on a car tire. You wouldn't just go around in a circle, right? You’d use a star pattern, crisscrossing to make sure the wheel sits flush. We’re applying that exact same principle here, working from the middle of each stretcher bar and moving outwards.
This visual guide breaks down the basic flow of getting your canvas ready to stretch.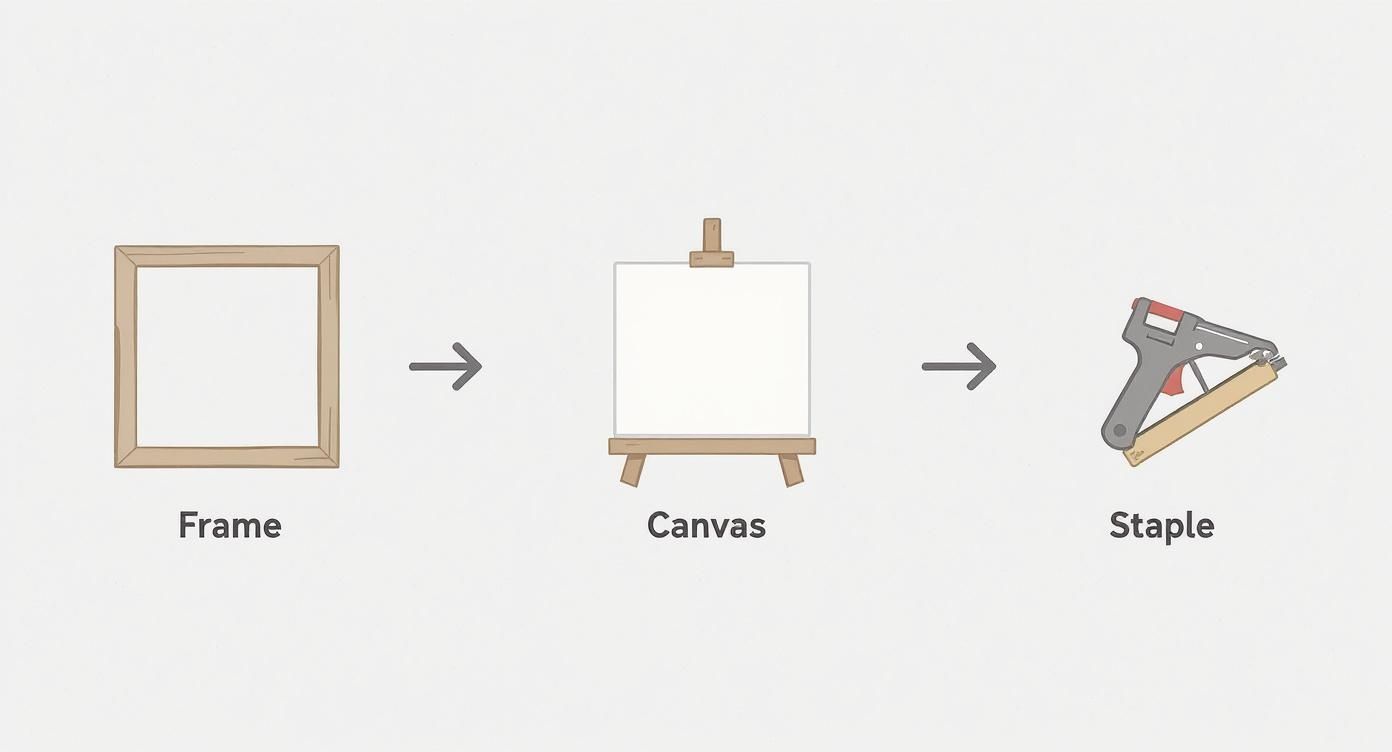
As you can see, it's a simple but crucial sequence: prepare the frame, position the canvas, pull with pliers, and secure it with staples.
Your First Four Staples
Let's get started. With your canvas face-down on your clean, padded surface and the frame perfectly centered on the back, you’re ready to place your first few staples. These four are the most critical, as they set the foundation for everything else.
First, grab your canvas pliers and get a gentle grip on the canvas edge, right at the center of one of the longer bars. Pull it just enough to take out the slack. Don't go crazy with the tension yet; we're just aiming for good alignment right now. Pop a single staple right in the middle of that bar.
Now, go to the directly opposite side. This is the most important part of the technique. Use your pliers to apply similar pressure, pull the canvas taut, and place another staple in the center of that bar. You’ve just set your initial north-south tension. Now, do the exact same thing for the two shorter sides to establish the east-west tension.
Pro Tip: Once those first four staples are in, take a moment to flip the whole thing over and check your work. Is the portrait centered? Is the weave of the canvas running straight, not skewed or pulled into a diamond shape? If anything looks off, this is the easiest time to pull a staple and readjust.
Building Tension Incrementally
With your four main anchor points in place, it’s time to start working your way out toward the corners. This isn't a race; it’s a gradual process. You'll keep following that same crisscross pattern, adding staples on opposite sides to keep the tension perfectly balanced.
Here's the rhythm you want to get into:
- Go back to your first side. Place a staple about two inches to the right of your center staple on the top bar.
- Move directly across. Head to the bottom bar and put a staple two inches to the right of its center staple, pulling just a little bit tighter this time with your pliers.
- Switch to the other axis. Now, move to the left bar and place a staple two inches from its center.
- And finish the pattern. Finally, go to the right bar, place a staple two inches from its center, again pulling with consistent tension.
Keep this sequence going—top, bottom, left, right—placing your staples every couple of inches as you work from the center out to the corners. You'll literally feel the canvas getting tighter and more responsive with each set of staples.
You can stop when you’re about three to four inches from each corner. We'll handle those tricky folds in the next step. For now, your canvas should be firmly secured along all four sides, feeling taut and looking perfectly flat. This methodical approach is the secret to a professional-looking stretch.
Folding Perfect Corners for a Flawless Finish
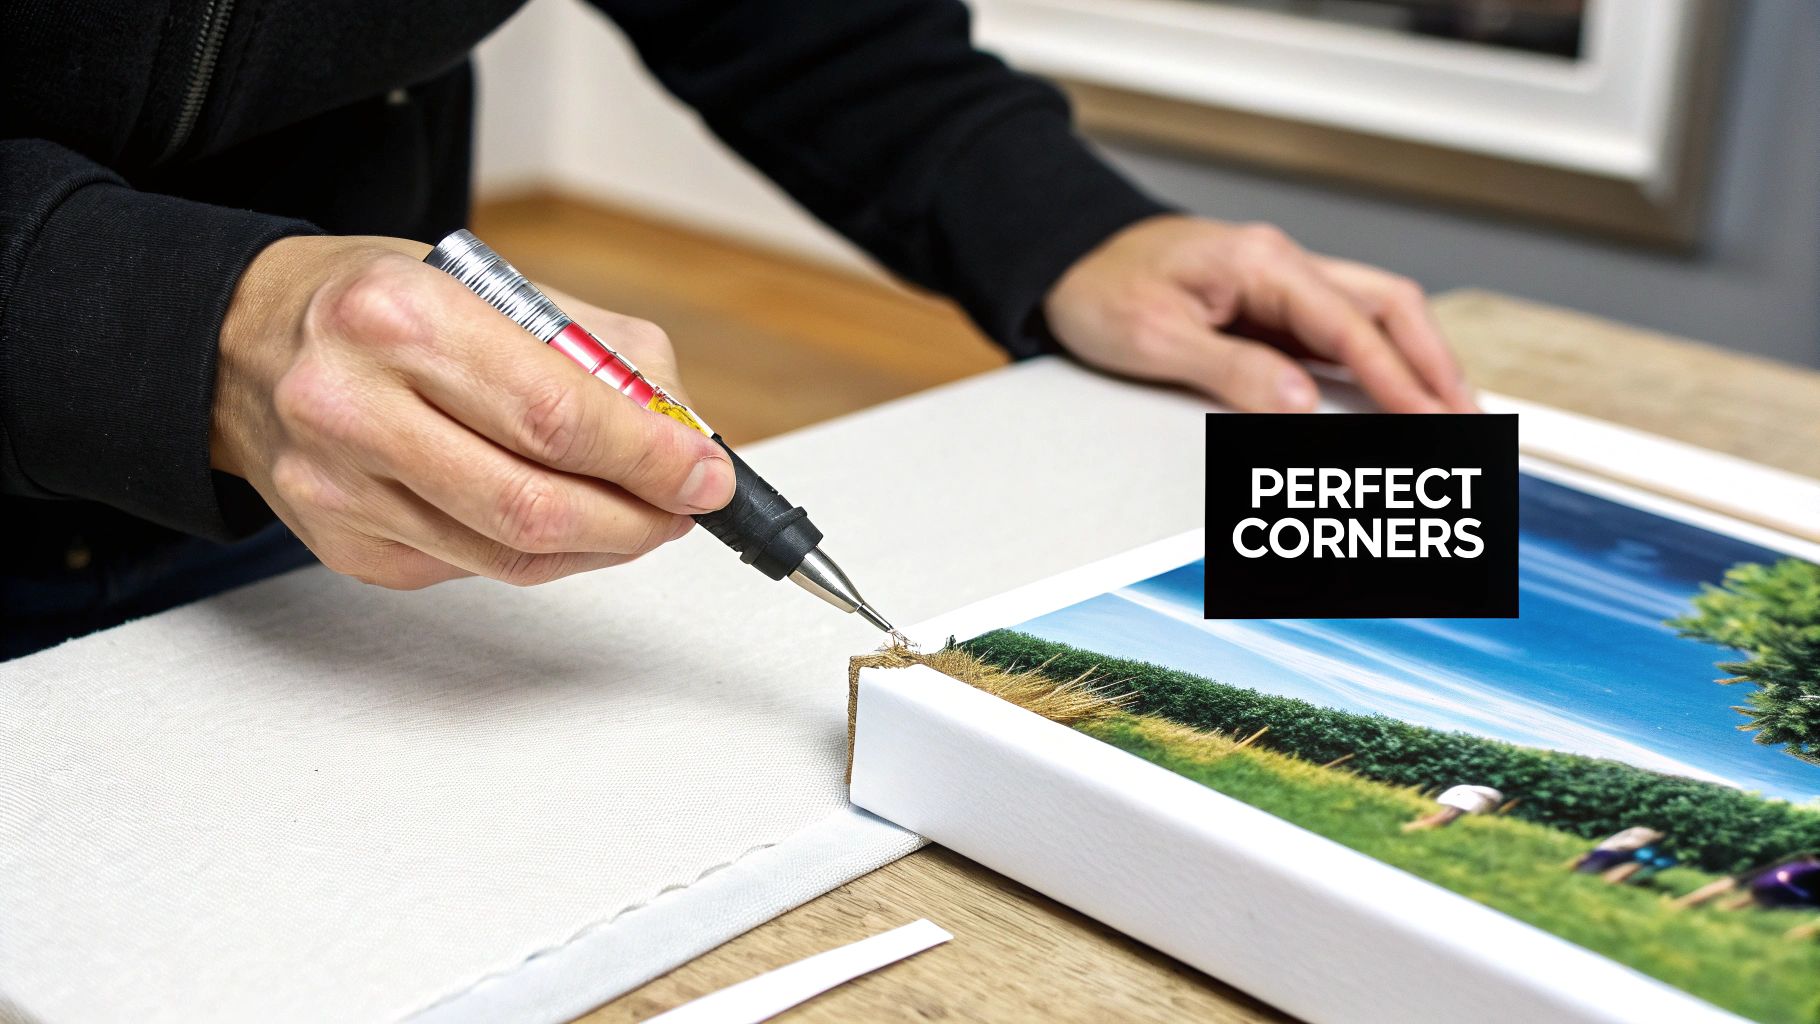
The corners are where the real craftsmanship of a stretching job shines through. Honestly, this final touch is what separates a beautifully finished piece from one that just looks a bit clumsy. A clean, crisp fold not only looks professional but also ensures the canvas will sit perfectly flat if you ever decide to frame it.
At this point, you should have stapled along all four sides, stopping a few inches short of each corner. Leaving that space gives you the slack you need to create a perfect fold without fighting the tension you just created.
There are two main ways to tackle this: the gallery fold and the museum fold. Which one you choose really just depends on how you plan to display the painting.
The Popular Gallery Fold
This is the one you see most often, especially for artwork that will be hung without a frame. The gallery fold creates a tidy, diagonal crease on the back of the stretcher bar, which keeps the sides of the canvas totally smooth and clean. It’s the standard look in art galleries, hence the name, because it keeps the focus entirely on the art.
Let's walk through one corner together.
First, gently pull the corner of the canvas straight out, away from the frame, so you have a little triangular flap.
Now, press down on the canvas along one of the stretcher bars to form a sharp 45-degree angle. Tuck this fold underneath, pulling it taut along the side of the bar. If you’ve ever made a bed with "hospital corners," it’s the exact same idea—you're creating a tight, tucked edge.
With that first part tucked in, fold the remaining flap over it and pull it snugly against the back of the frame. You’ll want to pop in two or three staples here to make sure it holds its tension and lies perfectly flat.
Insider Tip: Canvas fabric, especially a heavy-grade one, can be pretty stubborn. I often use a small, flat-head screwdriver or a bone folder to help guide the fabric into a really sharp crease right before I staple. It just gives you that extra bit of control for a flawless finish.
The Sleek Museum Fold
On the other hand, the museum fold is your best bet if you know the painting is going into a floater frame. This technique gathers all the extra fabric directly on the back, leaving the sides of the canvas completely flat with zero visible folds. This is essential for getting the canvas to sit flush inside the narrow channel of a floater frame.
Here’s how to create a museum fold:
- Pull the corner fabric straight back, directly over the corner of the wooden frame.
- Tuck one side of the excess fabric underneath, making a straight pleat.
- Fold the other side neatly over the top of that first tuck.
- Pull the whole bundle tight and secure it with a staple on the back of the stretcher bar.
This method does create a bit more bulk on the back of the canvas, but it’s the only way to get those perfectly clean edges needed for specific framing styles.
Once you’ve folded and stapled all four corners using your chosen method, take a step back. Your canvas is officially stretched
Troubleshooting Common Problems and Quick Fixes
Even when you do everything right, stretching a canvas can sometimes throw you a curveball. That’s just part of the process, and trust me, every single artist has been there. Don’t get discouraged!
Most of the time, the fix is much simpler than you think. The trick is catching it early, taking a deep breath, and knowing how to make a quick adjustment. Let's walk through the most common hiccups you'll likely run into and how to sort them out.
What to Do About Ripples and Wrinkles
You’ve put in the last staple, you flip the painting over, and... oh no. There's a little wave or wrinkle along the edge. Don't panic! This is hands-down the most frequent issue, and it almost always means the tension is a little uneven.
It’s just a sign that one spot was pulled a bit tighter or looser than its neighbor. The good news is, the fix is straightforward.
- Find the source: Look closely to see exactly where the ripple is. This tells you which staples are the culprits.
- Release the tension: Grab your staple remover and carefully pull out two or three staples on either side of the problem area.
- Re-stretch and secure: Use your canvas pliers to gently pull that section taut again. Try to match the tension of the areas next to it. Once it feels right, staple it back down, smoothing the canvas as you go.
That tiny adjustment is usually all it takes to make the ripple vanish. It's a skill worth learning, especially as more people take a hands-on approach to their art. Learning how to stretch a canvas painting has exploded in popularity—platforms like YouTube saw over 50 million views on tutorials in 2023 alone. You can find more insights on the growing stretched canvas market and its DIY trends.
Correcting an Off-Center Image
There's nothing more frustrating than realizing your masterpiece isn't perfectly centered on the frame. Your beautiful portrait is just a little too far to the left, and now it’s all you can see. This is easiest to fix if you catch it early, but it’s not a lost cause even if you’ve already started stapling.
Use the artwork itself as your guide. If you have a strong horizontal element like a horizon line, make sure it runs perfectly parallel to the stretcher bar.
Here's a little trick I've learned: Before I even begin, I make tiny, light pencil marks on the back of the canvas and on the stretcher bars to indicate the center points. This simple alignment system takes the guesswork out of the equation.
If you’ve already stapled a side or two, you’ll have to remove them, carefully shift the canvas into position, and start over with the center-out technique we talked about earlier.
How to Fix a Canvas That Sags Over Time
What about a painting that was stretched perfectly years ago but has started to look a little loose or saggy? This is completely normal. Changes in humidity and temperature cause the natural canvas fibers to relax over the years.
Fortunately, you have a couple of great options to bring it back to life.
- Use Your Stretcher Keys: If you have a good quality frame, it should have come with small wooden wedges, often called keys. Gently tap these keys into the slots in each corner. This expands the frame just enough to pull the canvas tight again. It's what they're there for!
- Try the Water Mist Trick: For minor sagging, this works like a charm. Lay the painting face down and use a spray bottle to lightly mist the back of the canvas with clean water. As the canvas dries, the fibers will shrink and tighten. Just be careful not to soak it—a fine, even mist is all you need.
With these simple fixes in your back pocket, you can confidently tackle any small challenge that comes your way and keep your art looking fantastic.
Common Questions About Stretching Canvas
Let's tackle some of the most frequent questions that pop up when you're getting ready to stretch a canvas. Think of this as your go-to reference for those little details that can make a big difference.
How Tight Should a Canvas Be?
You're aiming for a "drum-tight" finish. It's a term you'll hear a lot, and for good reason. When you gently tap the surface, it should give a satisfying, low-pitched thump—just like a small drum.
There shouldn't be any visible sags or ripples. The goal is to pull the canvas taut enough to create a perfectly flat plane, but not so tight that you start to distort the image. When you can see the weave of the canvas running in perfectly straight lines, you've nailed it.
Can I Restretch an Old Painting That's Sagging?
Absolutely! Restretching is a fantastic way to breathe new life into an older piece that's lost its tension. The process is pretty much the same, but you’ll want to work with a bit more patience and a delicate touch.
Start by carefully removing the old staples, making sure you don't tear the fragile, aged fabric. If the paint looks brittle or has any cracking, be extra gentle as you pull the canvas. It's an incredibly effective way to restore a beloved painting to its former glory.
Once your artwork is beautifully restored and stretched, preserving it digitally is a smart move. Capturing high-quality images is an art in itself. We cover everything you need to know in our guide on how to photograph artwork for prints, which is the perfect next step for documenting your collection.
What if My Canvas Is Too Small for the Stretcher Bars?
This can be a tough spot, but don't panic just yet. If you're only short by a tiny amount—say, less than a quarter-inch on each side—there's a little trick you can try. Lightly mist the back of the canvas with a fine spray of water. This helps relax the canvas fibers just enough to give you that little bit of extra give you need.
But if there’s simply not enough fabric to wrap around the bars and secure on the back, you’ll have to get smaller, custom-sized stretcher bars. Whatever you do, never staple into the painted sides of your artwork. It causes permanent damage and is something you just can't undo.
Staples or Tacks: Which is Better?
For a professional, long-lasting result, a staple gun is the clear winner. It's the modern standard for a reason. Staples provide a much stronger, more even hold across the entire canvas, and they're far easier and faster to work with.
Plus, staples lie flat against the wood. This is crucial if you ever decide to frame the piece in a traditional or floater frame. Tacks are an older method that can create uneven tension, are tricky to apply consistently, and just don't hold up as well over the long haul. A good staple gun is a worthwhile investment.
At William Tucker Art, we believe every piece of art, from a stunning wildlife painting to a personal pet portrait, deserves to be displayed beautifully. We hope this guide helps you give your collection the professional finish it deserves.