
When it comes to the best wildlife photography camera settings, it's all about a careful balancing act. You need a fast shutter speed to freeze a fleeting moment, a wide aperture to make your subject pop against a blurry background, and the lowest possible ISO to keep your images clean and crisp.
For a solid starting point in broad daylight, I always recommend dialing in a shutter speed around 1/1000s, an aperture of f/5.6, and setting your ISO to Auto with a maximum limit of 6400. This baseline setup gets you in the ballpark so you're ready for whatever nature throws at you.
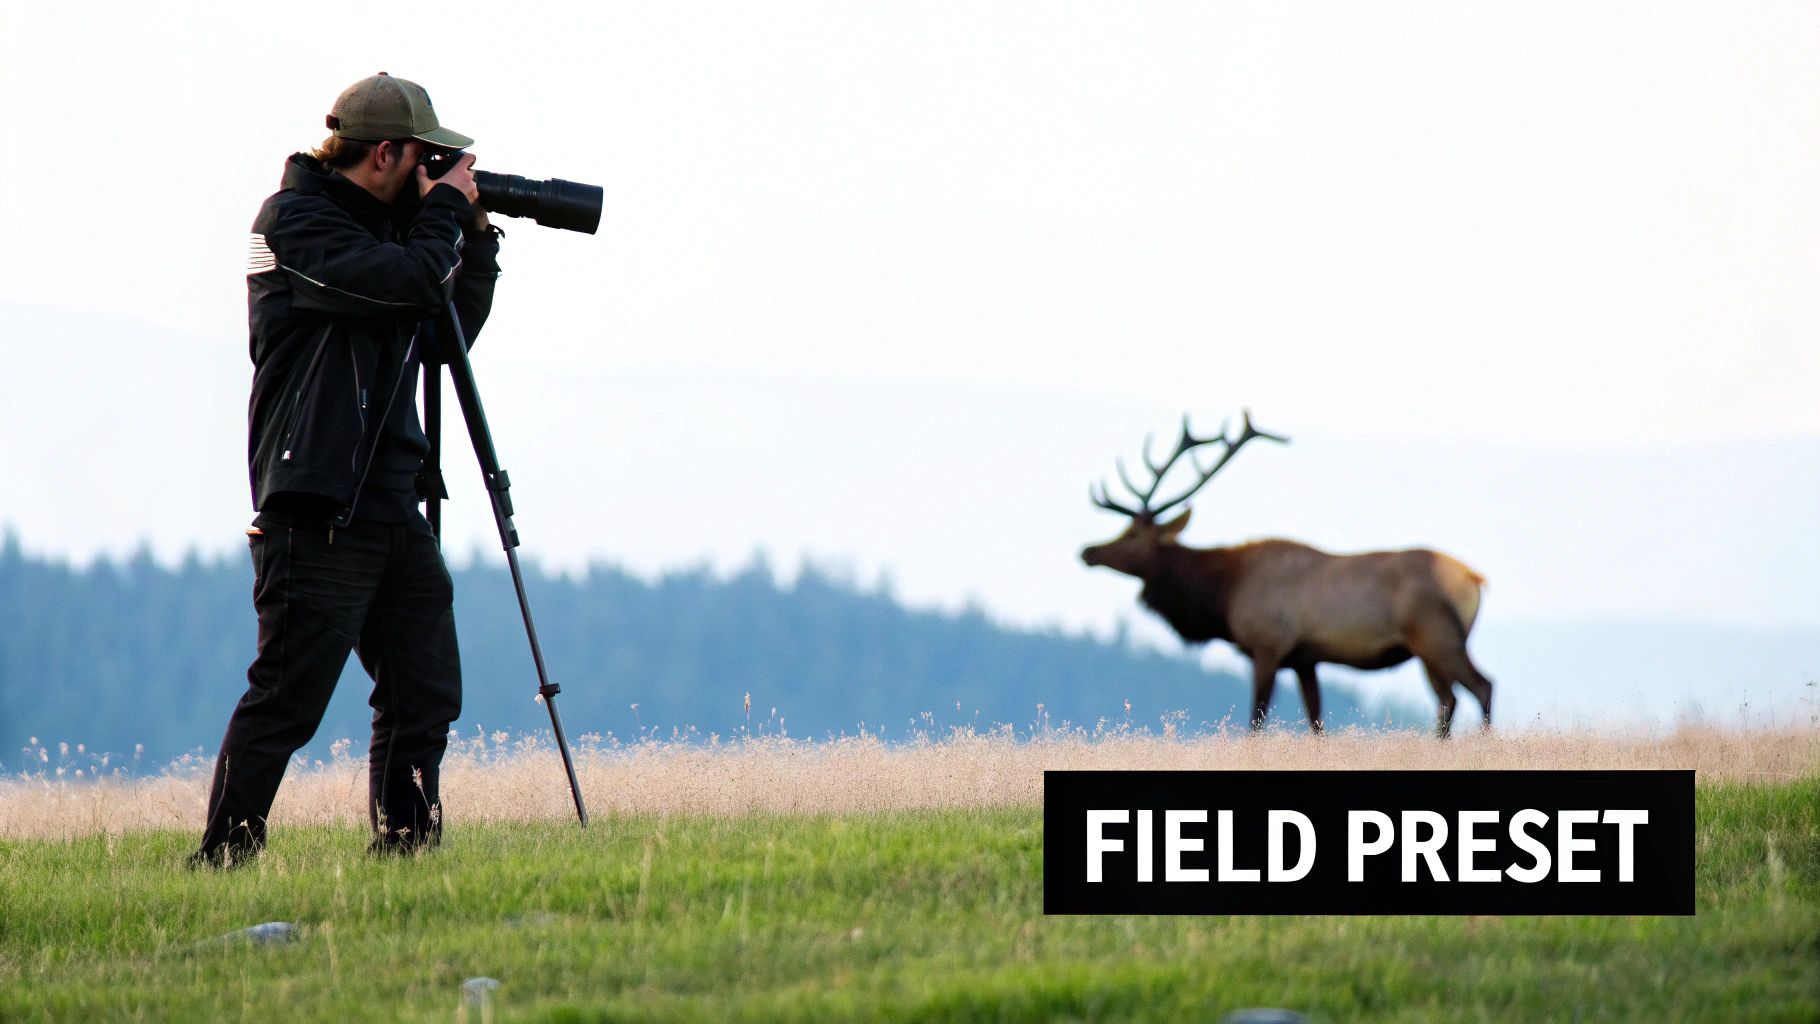
Nailing Your Camera Settings from the Start
Getting into wildlife photography can feel like you're trying to learn a new language, with all the buttons, dials, and menus on modern cameras. But here's the secret: you don't need to master every single function right away. Instead, focus on building a reliable, go-to starting point.
Think of it as your field-ready preset. It’s a combination of settings that gives you the best odds of capturing a sharp, beautifully exposed photo the second an animal appears. The idea is to get out of "Auto" mode and start making conscious decisions. When you set your core settings before you even spot an animal, you spend less time fiddling with the camera and more time actually watching, anticipating, and composing. This is what turns a lucky snapshot into a truly stunning photograph.
This infographic does a great job of showing the relationship between aperture, shutter speed, and ISO—the three pillars that everything else is built on.
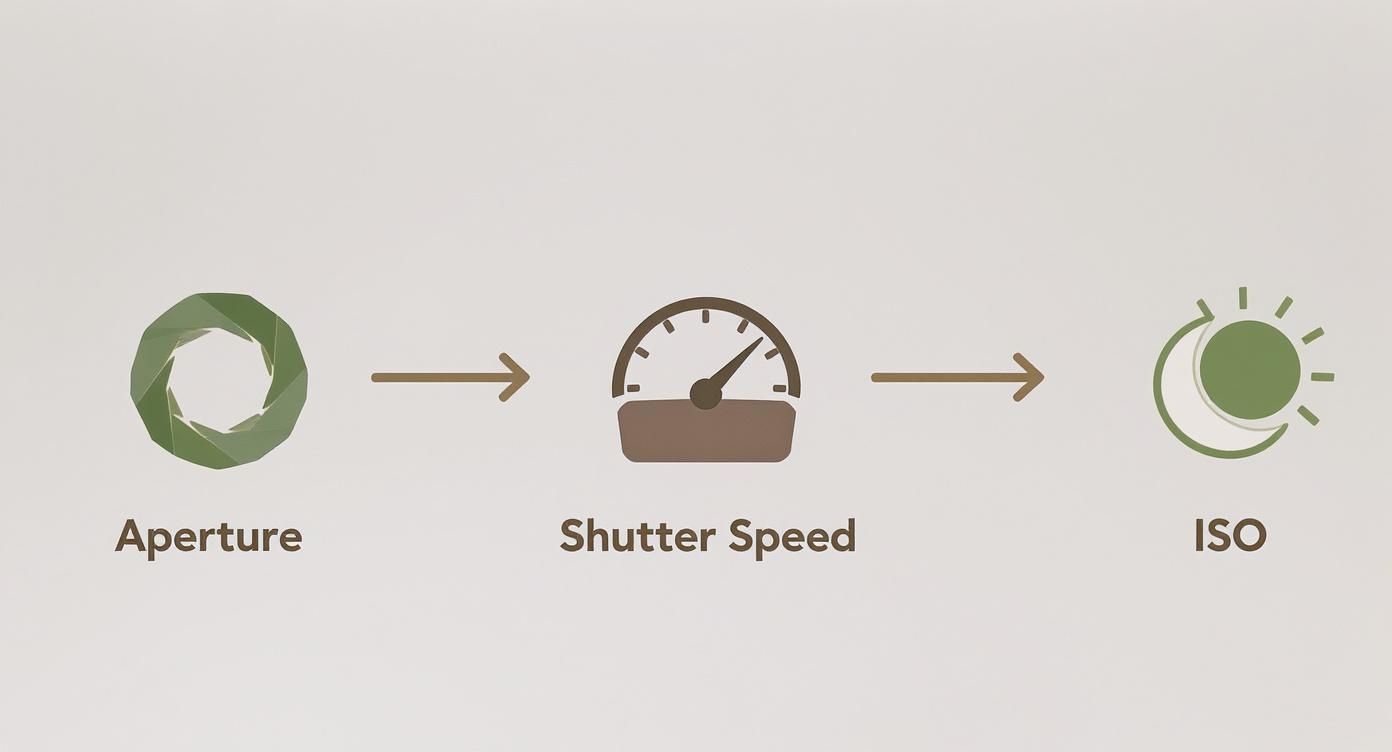
Each one of these settings directly affects the others. Once you get a feel for how they work together, you'll be able to adapt to just about any situation you encounter in the wild.
The Exposure Triangle in Plain English
The exposure triangle is just a fancy term for the three core elements that control how much light hits your camera’s sensor. You'll be tweaking these constantly out in the field.
-
Aperture (f-stop): This is simply the opening in your lens. A wide aperture (a small f-number like f/4) lets in a ton of light and creates that gorgeous, creamy background blur that makes your subject stand out. A narrow aperture (a bigger f-number like f/11) lets in less light but keeps more of the scene in sharp focus.
-
Shutter Speed: This is how long your camera's sensor is exposed to light. For wildlife, a fast shutter speed (like 1/2000s) is your best friend—it freezes action and prevents blur from a fast-moving bird or a running deer. Slower speeds can be used for creative effect, but you risk a soft image if your subject so much as twitches.
-
ISO: Think of this as your sensor's sensitivity to light. A low ISO (like 100 or 200) gives you the absolute best image quality with virtually no grain. As you crank the ISO up, the sensor gets more sensitive, which is great for shooting in low light. The trade-off? You start to introduce digital noise (or "grain") into your photos.
My golden rule has always been this: a sharp photo with a little noise is infinitely better than a blurry, noise-free photo. Don't ever be afraid to push that ISO up to get the shutter speed you need. You can deal with noise in post-processing; you can't fix motion blur.
Your Go-To Starting Settings
Alright, let's get a universal baseline dialed in. Set your camera up with these before you head out the door. This configuration is fantastic for most daylight conditions and lets you adapt on the fly.
Here’s a quick-reference table to get you started. Think of these as your default settings to get you 90% of the way there in most situations.
Universal Starting Settings for Wildlife Photography
| Setting | Recommended Starting Point | Primary Purpose |
|---|---|---|
| Shooting Mode | Manual (M) with Auto ISO | Gives you full control over motion and background blur while letting the camera manage the exposure. |
| Shutter Speed | 1/1000s | Freezes most action and prevents blur from hand-holding a long lens. |
| Aperture | f/5.6 - f/8 | A great sweet spot for a sharp subject and a nicely blurred background. |
| ISO | Auto (Max 6400) | Lets the camera adjust for light changes while keeping noise at a manageable level. |
| Focus Mode | Continuous AF (AF-C / AI Servo) | Absolutely essential for tracking moving animals and keeping them sharp. |
| Drive Mode | Continuous High (Burst Mode) | Fires off a rapid sequence of shots so you don't miss that perfect split-second moment. |
With these settings programmed in, you're ready for action. Modern cameras have made this approach incredibly effective, with sensors that handle high ISOs beautifully and autofocus systems that can lock onto a subject’s eye and not let go. For a deeper dive, be sure to check out our other guide on wild animal photography tips for more practical advice.
Of course, knowing your subject is half the battle. Before you go, it helps to research the animals you hope to see. For example, if you're heading down under, a complete guide to wildlife in Tasmania can give you a huge head start on understanding their behavior and habitat.
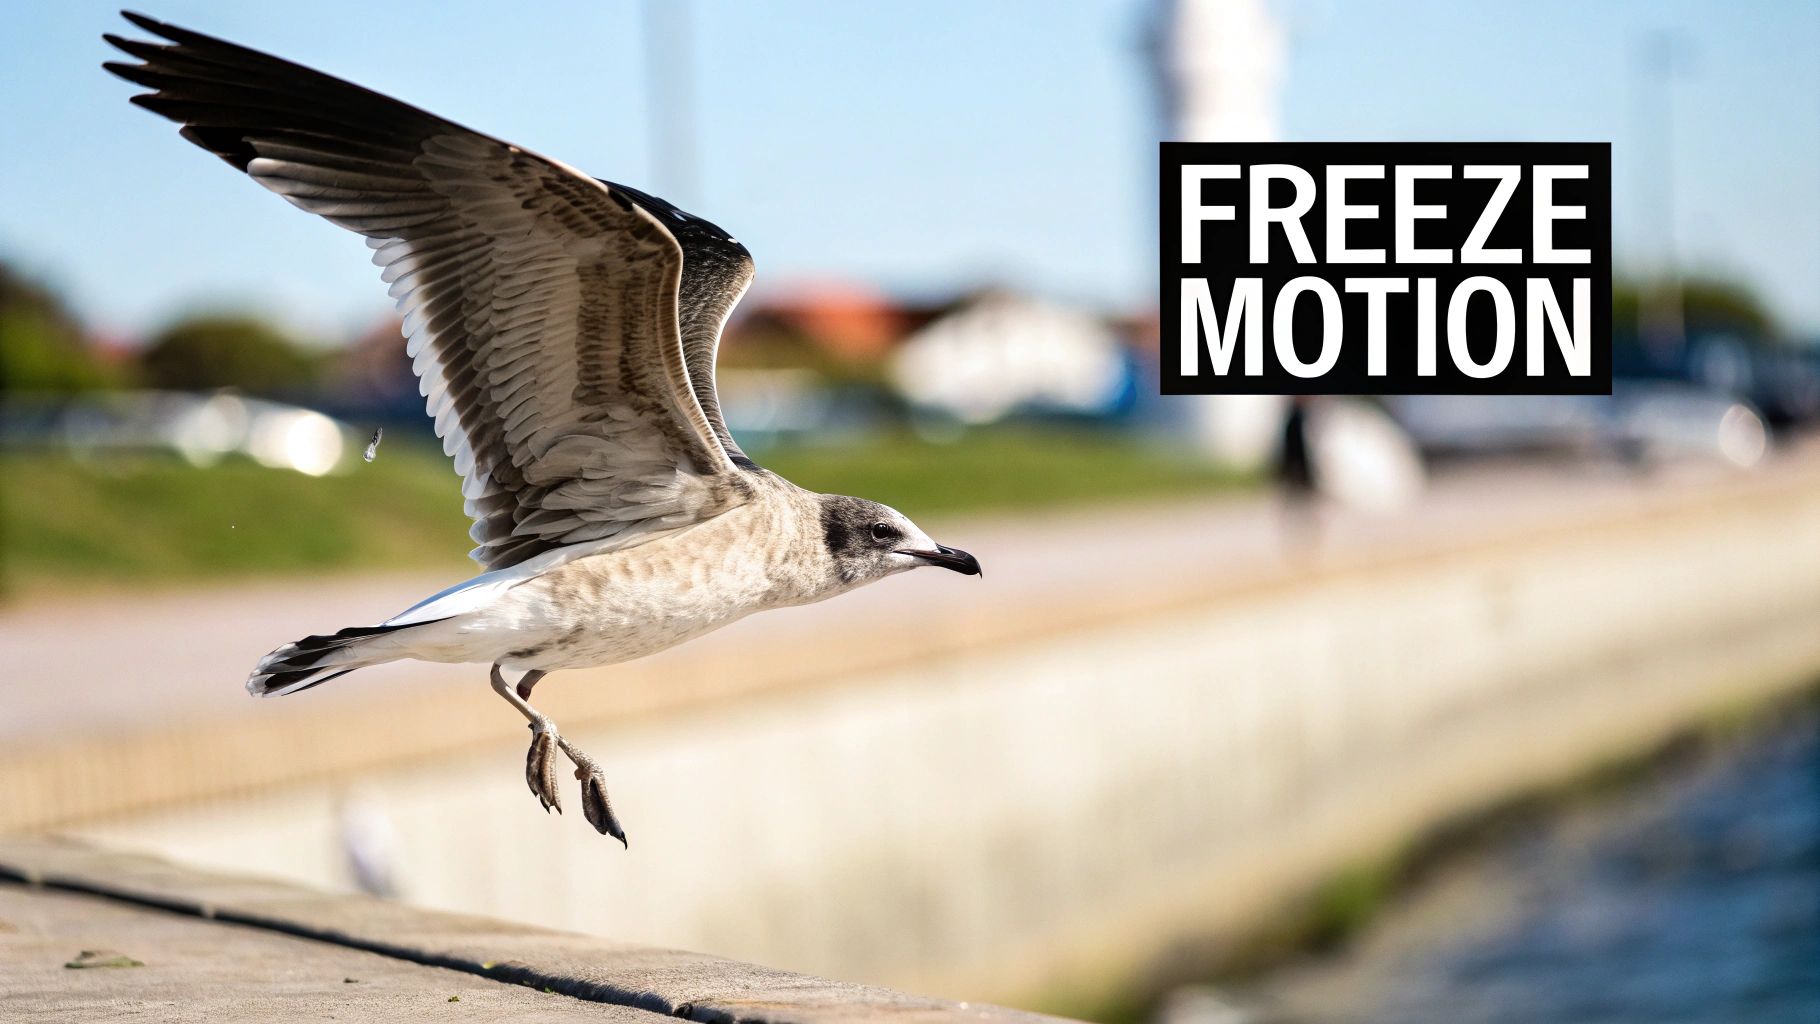
How to Master Shutter Speed for Sharp Action
Shutter speed is what makes your wildlife images pop with clarity or swirl with drama. Dial it in right and you’ll freeze a hawk’s plunge or craft streaking trails behind a charging gazelle.
Take hummingbirds, for instance. To nail every fluttering wingbeat you’re looking at around 1/4000s. Contrast that with a cheetah in full sprint—1/2000s (or faster) is non-negotiable. For subjects lounging in the shade, 1/250s adds just enough mystery without sacrificing focus.
Avoid the all-too-common trap of dragging your shutter too long. That’s a fast track to soft, unusable shots. Read on for practical tips and real-world tricks I’ve picked up over countless shoots.
Choosing Shutter Speed For Fast Animals
Gauge your subject’s pace and set your shutter accordingly. Birds in flight often need 1/3200s or more. For a sprinting mammal, aim near 1/2000s. Slower movers—think grazing elephants—will stay sharp at 1/500s.
- I default to 1/2000s when I can’t predict where action will burst.
- If light levels drop, I bump up ISO rather than dial down the shutter.
- Under bright, midday sun, pushing to 1/5000s gives me breathing room.
| Subject | Shutter Speed | Why It Works |
|---|---|---|
| Racing Cheetah | 1/2000s | Freeze powerful strides |
| Hovering Hummingbird | 1/4000s | Capture wing detail |
| Lion Lying Under Trees | 1/250s | Maintain sharp focus |
Sharp shots beat blurry ones every time.
Using The Reciprocal Rule
When you’re handholding a long lens, the reciprocal rule offers a quick benchmark:
- Identify your lens’s focal length.
- Use a shutter speed at least equal to the inverse of that length (for a 300mm lens, go for 1/300s or quicker).
- For especially fast subjects or shaky hands, bump the speed even higher.
Modern stabilization systems often add two stops of leeway. That means you can slip from 1/600s down to 1/150s and still lock in crisp detail.
Avoiding Soft Images
Most motion blur happens when shutter speed and subject movement don’t match. Even minor camera shake or animal twitch can ruin a frame.
- Turn on lens VR/IS to counteract hand tremors.
- Lean on a beanbag, monopod, or tripod when you can.
- When in doubt, choose a faster shutter over a lower ISO.
Practice in mixed lighting—under leafy canopies or across open plains—and tune on the fly until your frames stay sharp.
Balancing ISO With Shutter Speed
Pushing shutter speeds into the 1/2000s range often means cranking ISO when light wanes. I’ve gone up to ISO 3200 or even 6400 in dawn and dusk shoots just to stay at 1/2500s or faster. The goal? Swap motion blur for manageable noise.
- Let Auto ISO handle shifting light, but cap your top end.
- Watch your histogram to avoid dark, unusable frames.
- Apply noise reduction in post sparingly—you don’t want to lose fine textures.
I’d rather polish out some grain than salvage a blurred memory.
Putting It All Together
Before each shot, run a mental checklist: subject speed, available light and the shutter speed you need. Those thoughts become muscle memory over time.
On foggy mornings or deep woods, I crank ISO first to maintain 1/2000s+. It’s easier to clear noise later than to resurrect detail lost to blur.
Check out our guide on how to start birdwatching for deeper insights on matching gear with avian habits.
With practice, dialing in shutter speed becomes second nature. Your camera settings will translate into pin-sharp wildlife captures—no matter how fast your subject moves.
Now head out, experiment wildly, and watch those action shots come alive. Immediate onscreen reviews will speed up your learning curve.
Practice different focal lengths and motion scenarios until selecting the right shutter speed feels as effortless as breathing.
Using Aperture for Creative Depth and Focus
If shutter speed is all about freezing motion, then aperture is your tool for artistic expression. Your f-stop does more than just control how much light hits your sensor; it’s how you tell the viewer exactly where to look. Mastering aperture is what turns a quick snapshot into a compelling wildlife portrait.
Simply put, aperture controls your depth of field—that is, how much of the scene is in sharp focus from front to back. A wide-open aperture (like f/2.8 or f/4) gives you that creamy, blurred background that makes your subject pop. On the other hand, a narrow aperture (like f/8 or f/11) keeps more of the environment sharp, telling a bigger story.
Wide Apertures for That Classic Portrait Look
Want that iconic wildlife shot with a tack-sharp animal and a beautifully soft, out-of-focus background? A wide aperture is your best friend. In the field, I’m often shooting at the widest setting my lens will allow, like f/4 or f/5.6.
This approach works wonders for a few key reasons:
- It melts away distractions. A messy background of tangled branches or other animals can instantly vanish into a soft wash of color, putting all the focus right on your subject.
- It adds a sense of depth. That clear separation between a sharp subject and a blurry background gives the image an almost three-dimensional quality.
- It’s a lifesaver in low light. Opening up your aperture lets in a ton of light, which means you can keep your shutter speed fast enough to freeze motion even as the sun goes down.
For instance, when photographing a perched eagle, shooting at f/4 will render every feather in stunning detail while the trees behind it become a gorgeous, abstract blur. This is my go-to technique for creating powerful, clean portraits.
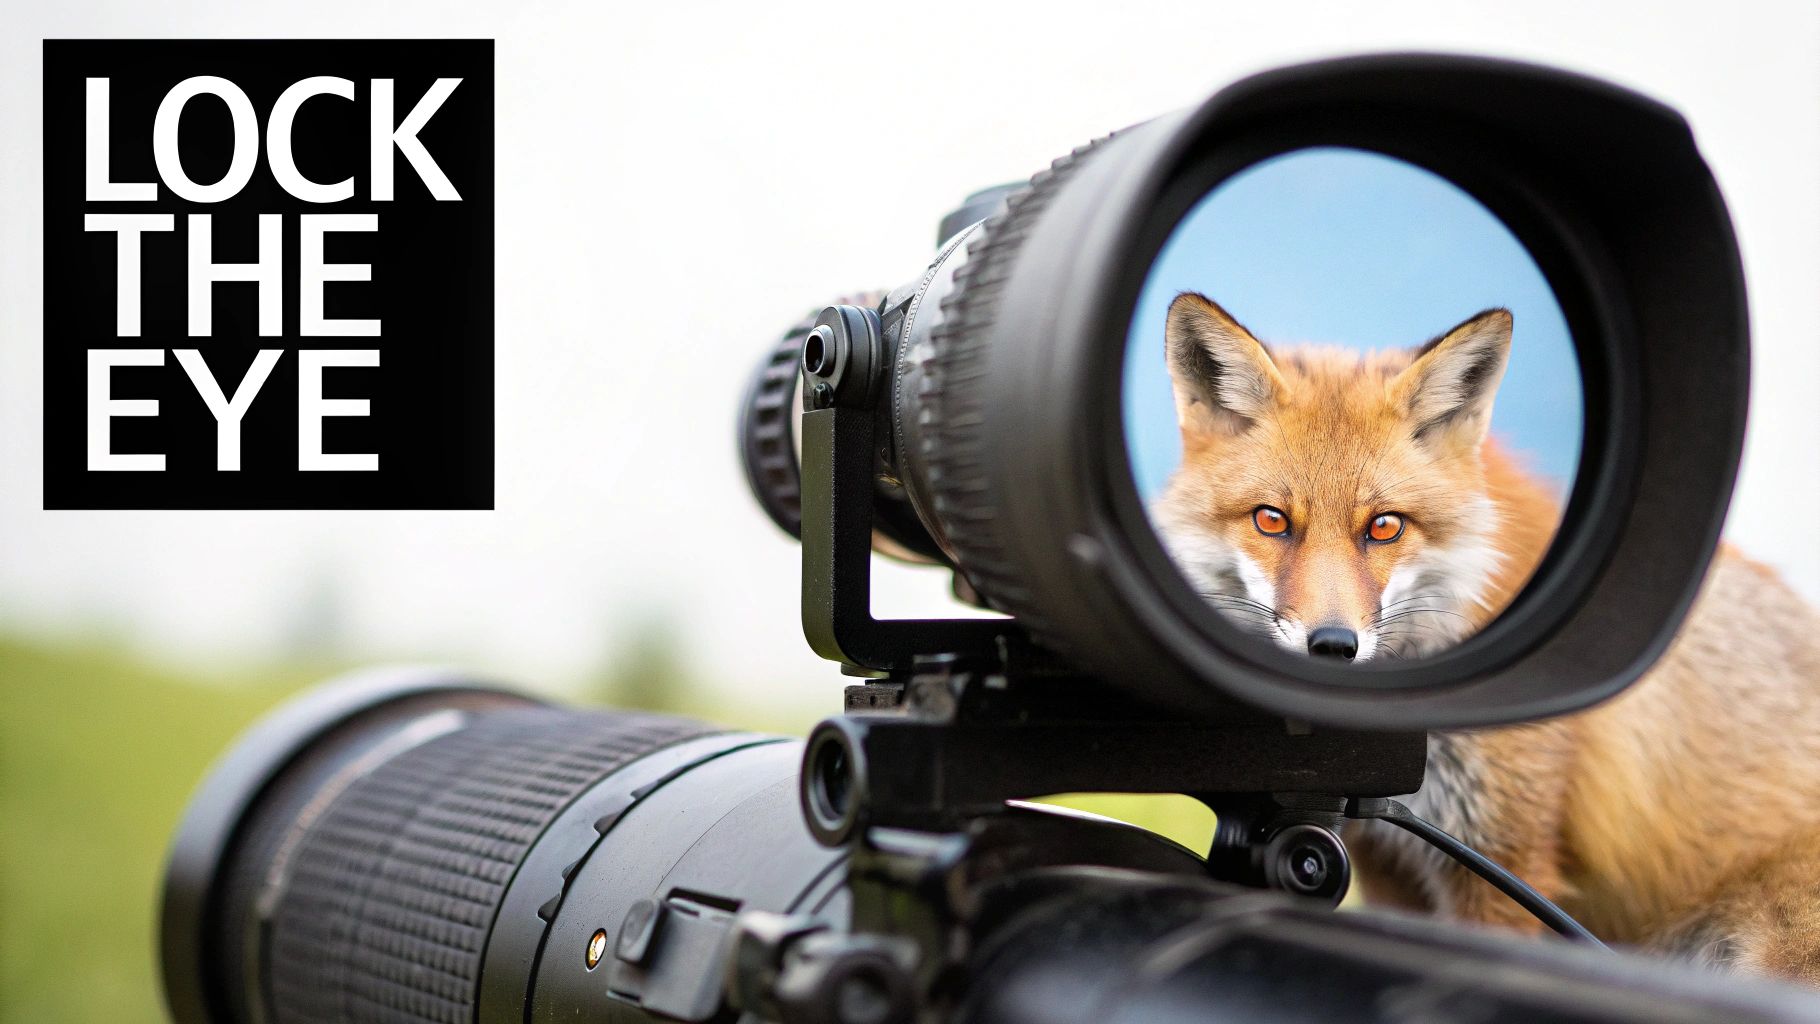
A quick heads-up: when you're shooting wide open, your focus has to be perfect. The depth of field is so thin that if you focus on the nose, the eyes might be soft. I always, always aim for the eye closest to the camera.
Narrow Apertures to Tell the Whole Story
As much as I love a blurry background, sometimes the environment is the story. That’s when it’s time to stop down to a narrower aperture like f/8 or f/11.
By increasing your depth of field, you keep more of the scene in focus. This is the right move when you’re:
- Photographing animal groups. For a wolf pack on the move or a herd of elk, f/8 helps ensure that animals at slightly different distances are all acceptably sharp.
- Showcasing an epic landscape. A shot of a mountain goat on a dramatic cliff is so much more impactful when you can see both the goat and the breathtaking scenery clearly.
- Working up close. When an animal is very near your lens, your depth of field shrinks dramatically. Stopping down to f/9 gives you a bit more breathing room to get more of the animal in focus.
Of course, it’s all a balancing act. In the golden light of dawn or dusk, you need a fast shutter speed, which usually means leaning on wider apertures between f/2.8 and f/5.6 and bumping up your ISO. This constant dance between settings is the heart of wildlife photography. You can find more details on how technology aids this in the wildlife photography camera intelligence report from 360iresearch.com.
Finding the "Sweet Spot" of Your Lens
Here’s a tip that separates the good shots from the great ones: every lens has an aperture where it’s at its absolute sharpest. This is called its "sweet spot," and it's usually about two or three stops down from its maximum aperture.
| If Your Lens's Widest Aperture Is... | Its Sweet Spot Is Probably Around... |
|---|---|
| f/2.8 | f/5.6 - f/8 |
| f/4 | f/8 - f/11 |
| f/5.6 | f/11 - f/16 |
So, if you’re using a 400mm f/5.6 lens, its peak performance is likely around f/11. While I’ll shoot wide open for that background blur, if I have plenty of light and my goal is maximum technical sharpness, I’ll stop down to that sweet spot. It makes a real difference in capturing the finest details in feathers and fur.
Pushing Your ISO in Tricky Light
Let’s be honest, tricky light is where the magic happens in wildlife photography. It’s also where so many incredible opportunities are lost. For years, we were all taught to fear high ISO, treating it like a last resort that would absolutely ruin our shots with digital grain.
Thankfully, those days are long gone. Modern cameras have completely changed the game.
Today, I think of ISO less as a "quality" setting and more as a "flexibility" setting. It's the key that unlocks the fast shutter speeds and creative apertures you need when the light is fading at dawn or dusk, or when you’re deep under a dense forest canopy.
Why You Shouldn't Be Afraid to Crank Up the ISO
Let me be perfectly clear about one thing: a sharp photo with some manageable noise is infinitely better than a blurry, noise-free shot. You can always work with noise in post-processing with amazing tools like Topaz DeNoise AI or DxO PureRAW, but you can never fix motion blur.
Missing the shot entirely because you were too afraid to push your ISO is the biggest mistake you can make out in the field.
The sensor technology in today's cameras is just remarkable. A shot at ISO 6400 on a newer camera can easily look cleaner than an ISO 1600 shot from a model made a decade ago. This rapid progress is a huge driver in the wildlife photography market. In fact, this segment was valued at around $3.1 billion in 2023 and is projected to grow, proving just how much demand there is for cameras that can perform when the light gets tough. You can explore more about the high-speed capture camera market if you're curious about the trends.
Finding Your Camera's Sweet Spot
Every camera has a tipping point where the noise becomes more distracting than you'd like. Your job is to find out where that limit is for your specific camera. Don't just take a reviewer's word for it—see it with your own eyes.
Here’s a simple test you can do at home:
- Put your camera on a tripod in a dimly lit room.
- Focus on something with plenty of texture and fine detail.
- Keeping your aperture the same, take the same shot at various ISO settings. Start at ISO 800 and double it each time: 1600, 3200, 6400, 12800, and so on.
- Pop the images onto your computer and zoom in to 100%.
Look closely at where the noise starts to mush the fine details and where the colors start looking a bit blotchy. This quick test will give you a real-world feel for your personal "red line." For most modern full-frame cameras, ISO 6400 is incredibly clean, and even ISO 12800 is often perfectly usable for a great shot.
My go-to strategy is to shoot in Manual mode with Auto ISO. I set the shutter speed and aperture I need for the creative look I want, then I just let the camera's meter figure out the ISO. The trick is to set a maximum ISO limit you're comfortable with. This gives you full creative control while the camera does the heavy lifting in changing light.
Real-World Scenarios for Pushing ISO
Knowing when to crank the ISO is what separates a missed opportunity from a portfolio-worthy image.
-
Deep in the Woods: You're tracking a fox on the forest floor. To freeze its quick movements, you’ll want at least 1/800s. To get that shutter speed under the dark canopy, you might be looking at ISO 3200 or higher, even in the middle of the day. Don't hesitate.
-
Golden Hour Action: An owl takes flight just as the last glow of sunset is fading. To get a sharp shot of its wings, you need a blistering 1/2000s. This is the moment to push your ISO to 6400 or even 10000 without a second thought. Get the shot.
-
Gray, Overcast Days: A flat, gray sky is a light-killer. To get that beautiful subject separation with a wide aperture like f/4 while still maintaining a crisp, fast shutter speed, a little bump to ISO 800 or 1600 will make all the difference.
Embracing a higher ISO isn't about being careless; it's about being a practical photographer. It’s the tool that ensures you can always get the shutter speed you need to freeze the moment—and in wildlife photography, that's almost always the most important thing.
Nailing Your Focus and Capturing the Action
https://www.youtube.com/embed/7cui2BLI68A
Exposure is only half the battle. We’ve all been there: you get the lighting perfect, but the shot is soft. There's nothing more frustrating in wildlife photography than a beautifully lit but blurry photo.
This is where your autofocus (AF) and drive mode settings become your most trusted allies, working together to make sure every feather and every whisker is tack-sharp. Think of these settings as your camera's reflexes. When a deer suddenly bolts or an eagle dives, you don’t have time to second-guess your gear—you just need to react.
Setting up your AF system properly ahead of time is what separates a missed opportunity from a portfolio-worthy shot. It frees you up to focus on composition and capturing that fleeting, perfect moment.
Continuous Autofocus: Your Go-To Setting
Let's get straight to it: for anything that moves—and let's be honest, most wildlife does—you need to be in Continuous Autofocus mode.
Different brands have their own names for it. On Canon cameras, look for AI Servo. On Nikon and Sony systems, it's called AF-C. This mode tells your camera to constantly re-evaluate and update focus for as long as you're pressing the shutter button (or your back-focus button). It never stops hunting for sharpness.
The alternative, Single-Shot AF (AF-S or One-Shot), is great for static subjects like a sleeping lion or a perched owl. But the moment that lion yawns or the owl takes flight, AF-S is useless. It locks focus once and stays there. In the wild, I’d say 99% of my shooting is done in Continuous AF.
My advice is simple: set your camera to Continuous AF and just leave it there. It's far easier to nail a shot of a still subject in this mode than it is to frantically switch from Single-Shot when action erupts out of nowhere.
This proactive approach means you're always ready. The goal is to build that muscle memory and complete trust in your setup.
Choosing the Right AF Area Mode
Beyond telling your camera how to focus, you need to tell it where to focus. This is where your AF Area Mode comes in, and modern mirrorless cameras give us some incredible options.
-
Single-Point AF: This is your tool for surgical precision. I use this when a subject is relatively still and I need to lock onto its eye, especially if it’s peeking through distracting branches or tall grass. It's my go-to for deliberate portraits where I have a moment to compose.
-
Zone AF / Group AF: This mode activates a small cluster of AF points, creating a larger target area. It’s fantastic for subjects that are moving a bit more erratically, like a fox trotting across a field. It gives the camera a bit of a safety net if your subject drifts slightly from your initial focus point.
-
Wide / Tracking AF: This is where the magic happens. This mode uses the camera's entire sensor to find and track a subject. Paired with today's animal eye-tracking technology, it can feel like cheating. For a bird against a clean sky, the camera finds it, locks onto its eye, and follows it across the frame with unbelievable accuracy.
Here’s a quick breakdown of how I decide which to use in the field:
| Scenario | My Go-To AF Area Mode | Why It Works |
|---|---|---|
| A perching owl partially obscured by leaves | Single-Point AF | Lets me place the focus point precisely on the owl's eye, ignoring the distracting foreground. |
| A wolf walking across an open field | Zone AF or Group AF | Provides a larger target that easily tracks the predictable side-to-side movement. |
| A gull flying against a clear blue sky | Wide / Tracking AF | The camera's intelligent subject detection does all the heavy lifting, locking on and tracking flawlessly. |
The best way to get a feel for these is to get out there and practice. I often start with Zone AF for general action, then switch to Single-Point for precision or unleash Wide/Tracking when I have a clean background.
Why Burst Mode is a Must
Your drive mode controls how many photos your camera takes when you hold down the shutter. For wildlife, you want to set this to Continuous High, what most of us just call "burst mode." This lets you capture a rapid-fire sequence of images.
Action in the wild happens in fractions of a second. A bird’s wings go through a dozen different positions during a single flap. A bear’s expression can shift from passive to aggressive in an instant.
By shooting in a quick burst of 5-10 frames, you dramatically increase your odds of capturing the peak moment—the perfect wing position, the intense gaze, or the splash of water as a kingfisher snags its prey. This isn't about "spraying and praying" by holding the button down for hundreds of shots. It's about shooting in short, controlled bursts right when the action peaks.
Your Questions on Wildlife Camera Settings Answered
After spending countless hours out in the field and teaching workshops, I've noticed the same questions about camera settings pop up again and again. These aren't textbook problems; they're the real-world hurdles every wildlife photographer has to clear.
So, I've put together some straight-to-the-point answers to help you break through those common challenges and get the shots you're after.
What Is the Best Camera Mode for Wildlife Photography?
This is, without a doubt, the question I hear most often. While there's no single "best" mode for every situation, many pros (myself included) have landed on Manual mode with Auto ISO. It really is the sweet spot, giving you a perfect mix of creative control and lightning-fast adaptability.
With this setup, you get to lock in the two things that matter most creatively: your shutter speed to freeze the action and your aperture for depth of field. Then, you just let the camera do the grunt work of adjusting the ISO to nail the exposure as clouds roll in or your subject moves from sun to shade.
If you're just starting to dip your toes outside of full Auto, Shutter Priority (Tv or S) is a fantastic starting point. It lets you focus on what's most important in wildlife—freezing motion. Once you get the hang of that, making the jump to Manual with Auto ISO will feel like a natural next step. It’s a total game-changer.
How Do I Get a Sharp Photo of a Bird in Flight?
Getting that perfectly crisp, tack-sharp shot of a bird on the wing is all about getting three key settings to work together. Master this trio, and you'll see your keeper rate go through the roof.
- A Blazing Fast Shutter Speed: You absolutely have to freeze those fast-moving wings. I recommend starting at 1/2000s as a baseline. For smaller, more frantic fliers like warblers, don't hesitate to push it to 1/4000s or even faster if the light allows.
- Continuous Autofocus (AF-C/AI Servo): Your camera needs to be in a mode where it's constantly tracking the bird as it flies. I usually use a Zone or Wide AF area to give the camera a bigger target to lock onto and follow.
- Burst Mode (Continuous High): Switch your camera to its fastest drive mode. Firing off a rapid burst of frames drastically increases your odds of catching that one perfect moment with the best wing position and sharp focus.
Here's something to remember: a sharp photo with a little grain is always, always better than a blurry, clean one. Don't be afraid to let that ISO climb to get the shutter speed you need.
Should I Shoot in RAW or JPEG for Wildlife?
Let me make this one easy for you: always, always shoot in RAW.
Think of a RAW file as your digital negative. It holds all of the original, unprocessed, and uncompressed data that your camera's sensor captured. This is a huge deal when you get back to your computer.
It gives you an incredible amount of editing latitude. You can pull details out of shadows you thought were crushed or recover highlights that looked completely blown out. You can also fine-tune your white balance perfectly and handle high-ISO noise much more effectively. JPEGs, on the other hand, are "baked in" by your camera, meaning a lot of that precious data gets thrown away forever. That editing power is exactly what you need to make your wildlife shots truly pop.
What White Balance Setting Should I Use?
If you're taking my advice and shooting in RAW, the simplest and most effective strategy is to just leave your white balance set to Auto (AWB). Honestly, modern cameras are fantastic at reading the light and getting the color temperature right most of the time.
The real magic of shooting in RAW is that white balance isn't permanent—it's just a tag on the file. You can change it to any setting you want later in a program like Lightroom or Capture One with absolutely no loss in quality.
Now, if you happen to be shooting JPEGs, getting it right in the camera is much more critical. In that case, you'll want to use the specific presets like 'Cloudy' or 'Shade' to match the lighting conditions you're in.
At William Tucker Art, we believe that every wildlife photograph tells a story of the natural world. Capture your own stunning moments and find inspiration in art that celebrates the wild. Explore our collections and bring the beauty of nature into your home by visiting https://williamtuckerart.com.