Before you even think about cleaning an oil painting, the first step is always the same: stop. Take a deep breath and just look. The most important tool you have at this stage is your own careful observation.
Cleaning an oil painting isn't like dusting a piece of furniture. It’s a delicate process, and jumping in without a plan can cause real, irreversible harm. The goal here is to lift away years of accumulated dust and grime without touching the fragile paint layer beneath.
Assess Your Painting Before You Begin Cleaning
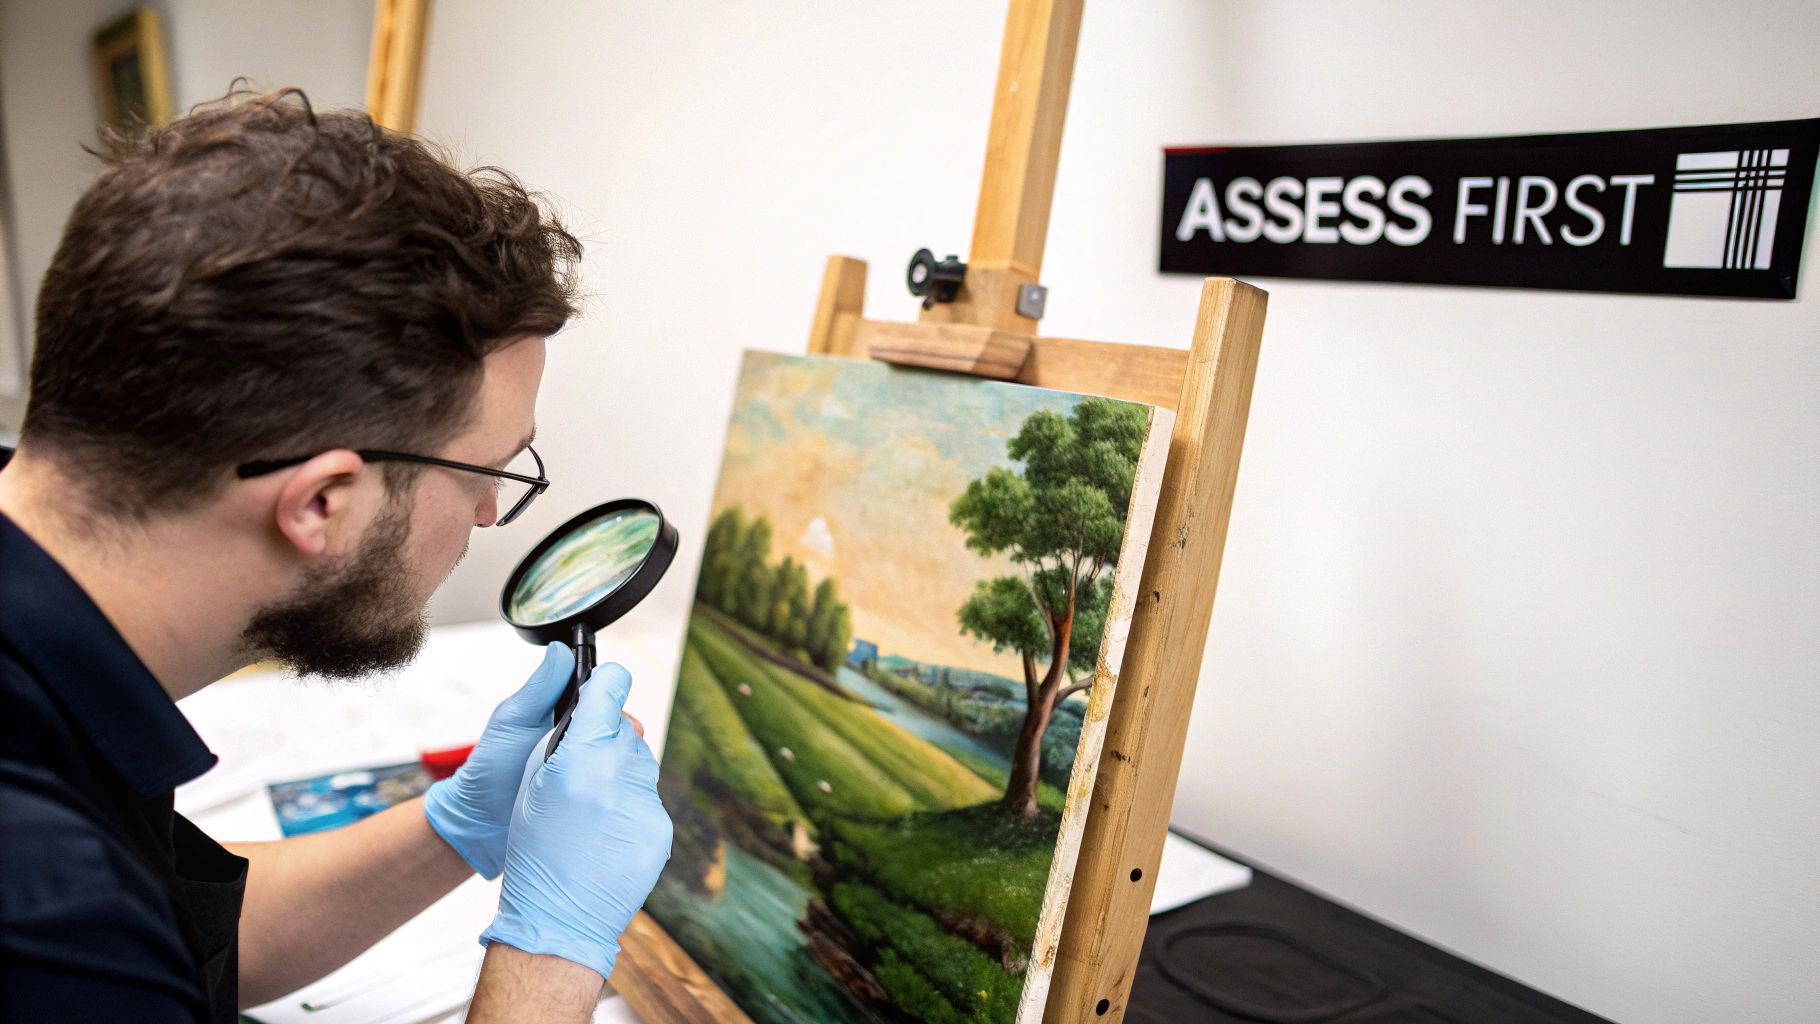
Think of yourself as a detective for a moment. Before a single drop of water or a cleaning swab touches that canvas, your job is to understand exactly what you’re dealing with. This initial examination is, without a doubt, the most crucial part of the entire process.
Is the surface just covered in a light layer of household dust? Or are you looking at decades of built-up, stubborn grime? Is the varnish itself yellowed and cloudy, or is the paint cracked and lifting? Each of these scenarios demands a completely different approach.
Identifying the Type of Grime
Get yourself some good, bright light—natural daylight from a window is perfect. If you have a magnifying glass, now’s the time to use it. You’re looking for a few distinct things:
- Loose Dust and Debris: This is the best-case scenario. It will look like a fine, fuzzy layer sitting on the surface.
- Embedded Grime: This is more serious. It often looks like a dull, hazy, or even slightly sticky film that has become one with the varnish over time. It won't just brush off.
- Yellowed Varnish: Old natural resin varnishes can darken dramatically over the decades, casting a brownish-yellow tint over the entire painting and hiding the true colors.
- Mold or Mildew: Look for small, dark spots, sometimes clustered together. This is a serious red flag, usually from being stored in a damp place, and it’s a job for a professional.
Key Takeaway: A good rule of thumb is: if the dirt is on top of the varnish, you can probably handle it. If the problem is the varnish, you need to call a professional art conservator.
Figuring out what you're dealing with can feel tricky. This little guide should help you decide whether to proceed on your own or bring in an expert.
When to DIY and When to Call a Professional
Use this quick guide to decide if your painting's cleaning needs are a safe home project or require an expert's touch.
| Type of Grime | Recommended Action | Risk Level |
|---|---|---|
| Light surface dust | DIY: Gentle dusting with a soft, natural-bristle brush. | Low |
| Embedded dirt, soot, or grime | DIY (with caution): Spot-test with distilled water and a cotton swab. | Medium |
| Yellowed or darkened varnish | Professional: Requires solvent-based varnish removal by a conservator. | High |
| Mold, mildew, or dark spots | Professional: Requires specialized treatment to kill spores and prevent spread. | Very High |
| Paint is flaking or cracking | Professional: Needs consolidation before any cleaning can be attempted. | Extreme |
As you can see, anything beyond simple dust or light grime quickly moves into territory best left to the pros.
Checking for Structural Damage
Now, look beyond the dirt. You need to check the painting’s physical health. Gently examine the surface for any signs of instability.
Are there any chips? Is paint flaking off? Do you see any "tenting," where small areas of paint are lifting up from the canvas like a tiny tent? These are all stop signs. The paint layer is too fragile for any DIY cleaning. Even the slightest pressure or moisture could cause these delicate pieces to break off for good.
The Critical Importance of Age
Knowing how old your painting is isn't just for fun—it directly affects how you should (or shouldn't) clean it. Recent research into 20th- and 21st-century art has shown that over 60% of modern oil paints have unpredictable sensitivities to water and common solvents.
That’s a huge jump compared to older works, where only about 20% show similar issues. Why the difference? Modern paint formulas are just not the same as the old masters' were. You can learn more about these fascinating discoveries from the University of Pisa's research on modern paint conservation.
This makes the spot test—which we’ll get to next—an absolutely non-negotiable step, especially if you’re working with a more contemporary piece. A technique that’s perfectly safe for a 19th-century landscape could be a complete disaster for a painting made in the last 50 years.
Gathering Your Conservation-Safe Supplies
Before a single drop of water touches that canvas, let's talk about your toolkit. Getting your supplies right is just as crucial as the cleaning technique itself. I’ve seen well-meaning attempts go wrong simply because someone used the wrong brush or cleaner. Think of this process less like house cleaning and more like a delicate surgical procedure—every tool must be chosen for its gentleness and chemical neutrality.
The good news is you don’t need a high-tech conservation lab to get this done safely. The essentials are surprisingly basic and easy to find. The trick is knowing exactly what to grab and, just as importantly, what to leave on the shelf.
The Foundation of Safe Cleaning
Your mission is simple: lift away the grime without touching the paint or the protective varnish layer. This means anything abrasive, acidic, or alkaline is completely off-limits. Your entire cleaning arsenal should be built on softness and purity.
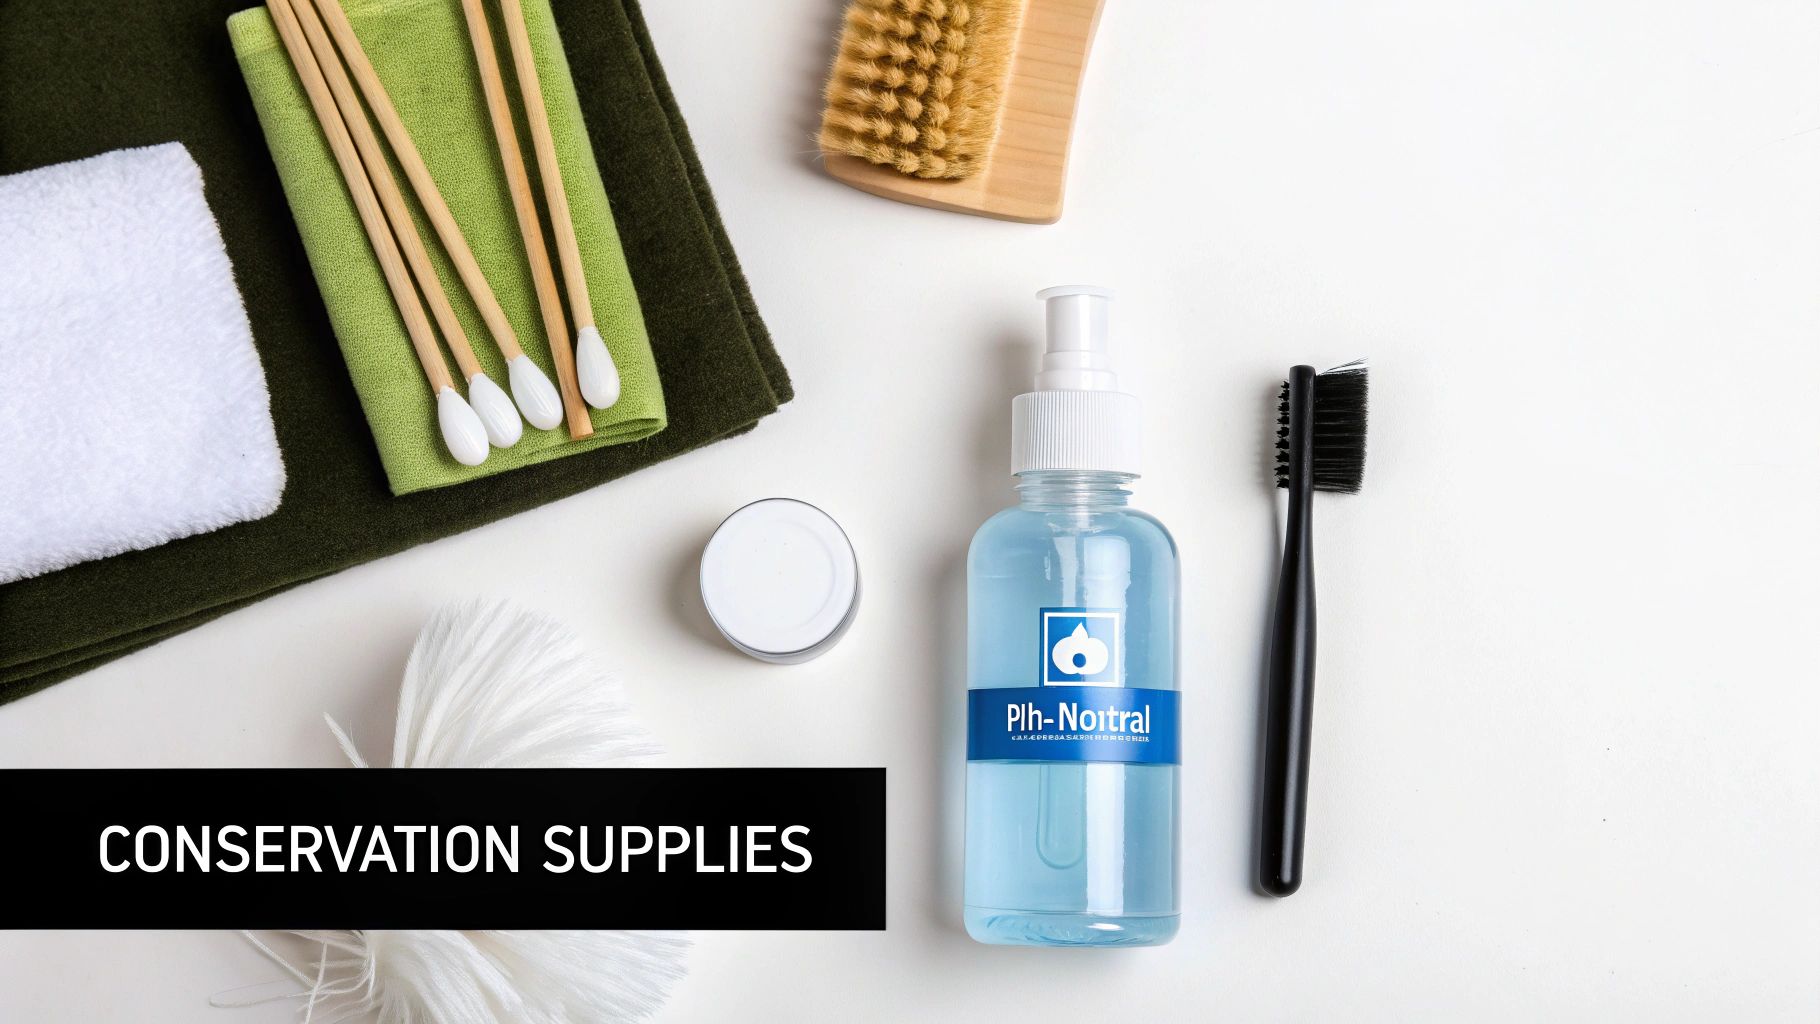
Here are the non-negotiables for your kit:
- Soft, Natural-Hair Brushes: I’m talking about brushes made from sable, goat, or badger hair. They are incredibly soft and won't put microscopic scratches in the varnish. Please, avoid synthetic or hog bristle brushes for this task; their stiffness can easily cause permanent damage.
- Distilled Water: This is an absolute must. Tap water is full of minerals and chlorine that can leave a hazy film or, worse, react with the pigments over time. Distilled water is pure H₂O, which means you get a clean, residue-free result.
- Professional-Grade Cotton Swabs: Don't just pull these from your bathroom cabinet. Art supply stores sell long-stemmed, tightly wound cotton swabs for a reason. They are far less likely to snag and leave behind tiny fibers that get trapped in the paint's texture.
I can't stress this enough: a "gentle" household cleaner is not safe for your artwork. These products almost always contain ammonia or alcohols that can instantly dissolve varnish and strip the paint right off the canvas. Stick to the basics.
Beyond the Basics: What You Might Need
Sometimes, decades of accumulated grime won't budge with water alone. This is where you can introduce a mild cleaning agent, but you have to proceed with extreme caution. A spot test in an inconspicuous corner is absolutely essential before you go any further.
You might consider adding these to your supply list:
- pH-Neutral Artist's Soap: Only use a soap specifically formulated for conservation. These are free of harsh detergents and have a neutral pH of 7.0, so they won't trigger a chemical reaction with the paint.
- Lint-Free Microfiber Cloths: A clean, high-quality microfiber cloth comes in handy for gently patting an area dry. It’s also great for handling the painting itself without getting skin oils on the surface.
- A Clean, Stable Workspace: Find a well-lit spot where you won't be disturbed. Lay down a soft, clean blanket on a sturdy table to cushion the painting and protect the frame while you work.
Putting together the right kit is your first real step toward a successful cleaning. If you're building out your general art supplies, it's also worth checking out a guide on the top 10 must-have art supplies for beginners for some foundational knowledge.
Preparing Your Cleaning Solutions
If you’ve done a spot test and decided a mild soap solution is necessary, the mixture has to be incredibly weak. A good rule of thumb is to add just one tiny drop of your pH-neutral soap to about a cup of distilled water. You should barely see any suds form.
Always keep a second container of pure distilled water on hand. As soon as you clean a small section with the soap solution, you'll want to rinse it immediately with the plain water. This prevents any soap residue from drying on the painting. When it comes to cleaning oil paintings, the golden rule is always "less is more."
The Gentle and Effective Cleaning Method
Alright, you've got your supplies lined up and have given the painting a good look-over. Now for the satisfying part: carefully bringing that original glow back to the surface. Patience is your best friend here. We're going to start with the safest, least invasive technique and only move on if absolutely necessary.
Think of yourself as an archaeologist, not a janitor. You’re gently revealing a treasure, not pressure-washing a sidewalk.
First Pass: A Simple Dry Dusting
Before a single drop of water touches that canvas, you need to get rid of any loose dust and debris. This is a non-negotiable first step. If you add moisture to a dusty surface, you just end up with a thin layer of mud, making your job ten times harder.
Grab your soft, natural-hair brush—sable or goat hair works beautifully. Start at one of the top corners and gently sweep your way down. Use light, feathery strokes and let the bristles do the work. Don't press down. Pushing too hard can grind tiny particles into the paint or varnish, which is the last thing you want.
Work your way across the entire painting in a consistent pattern, making sure you hit every inch. Pay special attention to the corners and the little gap where the canvas meets the frame—that’s where dust loves to hide. You might be surprised how much brighter the painting looks after just this one simple step.
Mastering the Gentle Wet Clean
If your spot test gave you the green light and the dry dusting didn't quite cut it, it's time for a gentle wet cleaning. This is where your distilled water and professional-grade cotton swabs come in. The whole point of this technique is to lift away grime without scrubbing or soaking the surface.
The secret is all in the rolling motion.
- Barely dampen a cotton swab with distilled water. It should be moist, not dripping wet. Squeeze any excess out on the side of your container.
- Pick a tiny, one-inch square to start. Place the tip of the swab on the surface and gently roll it across the paint.
- As you roll, you'll see the grime transfer right onto the cotton. The swab will start to look dirty.
- Lift the swab, turn it to a clean spot, and repeat the roll. Whatever you do, don't scrub back and forth.
Once a swab is dirty, toss it and grab a new one. It might take you a handful of swabs to clean even a tiny section, but this meticulous process is what keeps your painting safe. You’re lifting the dirt away, not just pushing it around.
Pro Tip: As soon as you finish a small section with a damp swab, immediately go over the same area with a clean, dry swab. Use the same rolling motion. This picks up any leftover moisture and stops water from sitting on the surface for too long.
When Distilled Water Isn't Quite Enough
Sometimes, you'll come across more stubborn, ingrained grime that just laughs at plain water. In that case, you might need an extremely mild, conservation-grade solution. Only try this if you’ve already done a spot test with the solution itself and seen zero negative reactions.
To make it, add a single, tiny drop of pH-neutral artist's soap to about a cup of distilled water. You want this to be incredibly diluted. From there, you'll use the exact same rolling-swab technique, working in small, manageable sections.
But this time, there's an extra step in the sequence:
- First, clean a small patch with a swab lightly dampened with your soap solution.
- Immediately follow that with a new swab dampened with only distilled water. This "rinses" the spot and removes any soap residue.
- Finally, blot the area with a dry swab.
This clean-rinse-dry cycle is critical. It makes sure no cleaning agents get left behind, which could cause problems for the painting down the road.
Why This Isn't a One-And-Done Job
It’s easy to think of cleaning as a one-time event, but preserving an oil painting is an ongoing commitment. Even in the best of homes, the environment takes its toll. Oil paintings are tough, but historical data shows that between 70% and 90% of oil paintings in major museum collections have needed at least one cleaning treatment in the last century.
Cleaning is just part of a painting’s lifecycle. Most experts suggest a professional cleaning is needed every 40 to 80 years, depending on how much light and pollution it's been exposed to. Think about paintings on continuous display, like those in the ‘Casa dos Patudos’ museum in Portugal. They're constantly battling dust and humidity, and often need attention within just a few decades. You can read more about the long-term conservation of these collections in this detailed study on museum preservation.
This really drives home why being so careful with at-home techniques is vital. Every cleaning, no matter how small, becomes part of the painting's history. By taking your time and doing it right, you're helping ensure it can be safely preserved for generations to come.
Common Cleaning Mistakes and How to Avoid Them
Knowing what not to do is just as important as knowing what you should do when it comes to cleaning an oil painting. Honestly, a single wrong move can cause damage that’s impossible to undo, turning a simple cleaning into a restoration nightmare. Let’s walk through the most common—and destructive—blunders I’ve seen over the years so you can sidestep them entirely.
Most of these mistakes come from well-meaning but misguided advice, often treating a delicate piece of art like a piece of furniture. What works on your kitchen counter will absolutely devastate a centuries-old paint surface. Understanding these pitfalls from the start will help you give your painting the respect it deserves.
The Myth of Food-Based Cleaners
I can't tell you how many times I've heard the old "use a slice of bread" or "a cut potato" trick. Please, don't do this. While it might sound like a gentle, old-fashioned remedy for lifting dirt, it's one of the worst things you can do.
Why? Because you're literally smearing organic material all over your artwork. These foods leave behind a sticky, invisible residue of starches and sugars. This film doesn't just attract more dust; it becomes a feast for mold and pests over time. You’re essentially trading a simple dust problem for a potential biological infestation.
Crucial Insight: The entire point of cleaning is to remove foreign material from the painting, not to add more. Any method that leaves a residue behind is actively harming the piece's long-term health.
Instead of reaching into the pantry, stick with the right tools for the job: a soft-bristled brush for light dusting or a bit of distilled water for a more thorough (but still gentle) clean.
This infographic breaks down the safe, foundational steps for tackling the job.
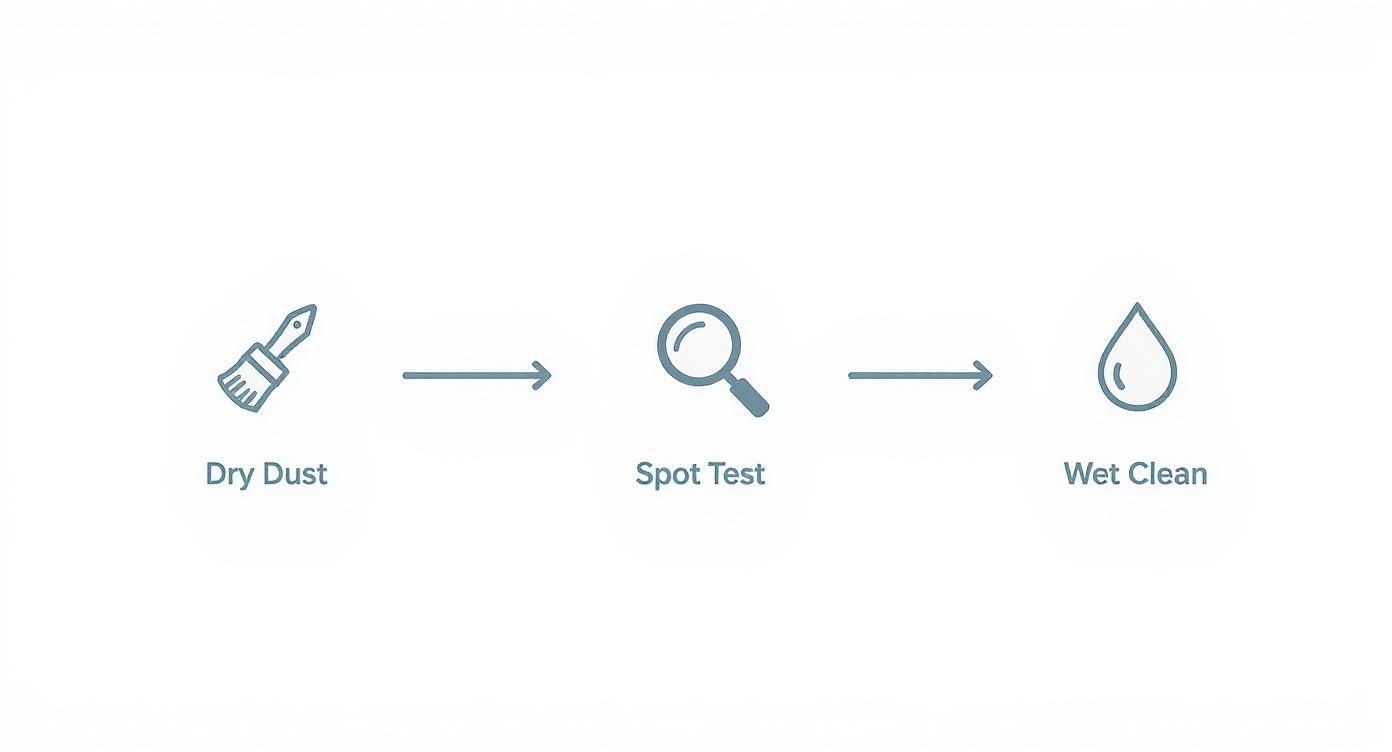
Notice how it moves from the least invasive method to the next. That’s the golden rule here—start gentle and only escalate if absolutely necessary.
Dangers of Household Chemicals
It’s so tempting, I know. You see a stubborn spot and think, "A little Windex or rubbing alcohol will lift that right off." Stop right there. These cleaners are designed to be aggressive, and they'll attack your painting’s varnish and even the paint itself with the same force.
There are a handful of repeat offenders that seem to pop up a lot. Here’s a quick look at why they’re so dangerous.
Harmful Cleaning Methods and Their Consequences
A clear look at popular but unsafe cleaning methods and the irreversible damage they can cause to your oil painting.
| Harmful Item | Potential Damage | Safe Alternative |
|---|---|---|
| Rubbing Alcohol | Can dissolve aged varnish and soften the oil paint itself, leading to smearing or flaking. | Distilled water on a cotton swab. |
| Ammonia Cleaners (Windex) | Highly alkaline, causing chemical changes to pigments that result in discoloration and brittleness. | Distilled water or a pH-neutral conservation soap. |
| Oils & Waxes (Furniture Polish) | Adds a sticky layer that darkens over time and becomes nearly impossible to remove professionally. | Gentle dusting with a soft, natural-hair brush. |
| Potato or Bread | Leaves a sticky, organic residue that attracts pests, dirt, and can promote mold growth. | Light dusting or a careful clean with distilled water. |
These aren't just suggestions; using the wrong chemical can permanently alter the artist's original work. The only liquids that should ever touch your painting are distilled water and, in very specific cases, a conservation-grade, pH-neutral soap. Anything else is a gamble.
Applying Too Much Pressure or Water
Finally, let's talk about technique. The two easiest mistakes to make are simply being too rough or using too much water. A heavy hand can be just as bad as a harsh chemical.
When you press too hard with a brush or swab, you risk grinding dirt deeper into the paint's texture. You can also create microscopic scratches in the varnish or, even worse, flake off brittle, aged paint. Always use a feather-light touch.
Likewise, drenching the canvas in water is a huge no-no. Water can find its way through tiny cracks in the paint, causing the canvas fibers underneath to swell. When they dry and shrink back, this movement can lead to widespread cracking and flaking. Your cotton swabs or cloths should always be damp, never dripping wet. This careful, patient approach is what separates a safe cleaning from a disaster.
Long-Term Care and Preservation Tips
You did it. You’ve successfully cleaned your oil painting, and it looks incredible. But the job isn't quite over. The real win is keeping that masterpiece looking its best for years, even decades, to come.
Long-term preservation is all about creating a safe, stable home for your artwork. It’s about minimizing the need for another deep clean anytime soon. Think of it as playing defense against the dust, grime, and environmental stress that caused the problem in the first place. A little foresight now can protect your painting for generations.
The Ideal Environment for Your Artwork
Where you hang your painting matters more than almost anything else. The wrong spot can prematurely age the piece, fade brilliant colors, and even cause the canvas to crack. Your mission is to find a location that is as stable as possible when it comes to light, temperature, and humidity.
Here are the biggest enemies of an oil painting:
- Direct Sunlight: UV rays are the arch-nemesis of oil paints. They are relentless, bleaching vibrant pigments until they're a dull, faded ghost of what they once were. Always hang your art where the sun’s rays can’t touch it directly, at any time of day.
- Extreme Heat Sources: Please, don't hang a painting above a radiator, fireplace, or heat vent. It’s a recipe for disaster. The constant hot-and-cool cycle forces the canvas and paint to expand and contract over and over, which inevitably leads to cracking and flaking.
- High Humidity: Damp areas like basements or even bathrooms are totally off-limits. Humidity encourages mold and mildew to grow and can make the canvas itself swell and warp. The sweet spot for a home with art is keeping the humidity between 40-50%.
A Quick Tip from the Field: If you regularly see condensation on your windows, the humidity in that room is likely too high for your painting. It's a simple but surprisingly effective way to gauge the environment.
Framing Is More Than Just Decoration
A great frame does so much more than just make the artwork look good—it’s a first-line defense. It acts as a shield, protecting the vulnerable edges of the canvas from accidental bumps and scrapes, adding crucial structural support, and even helping to create a stable micro-environment for the art itself.
When you're choosing a frame, think about these protective features:
- A Sturdy Backing Board: This adds a solid layer of defense against dust, pests, and any accidental pokes from behind the canvas.
- UV-Protective Glazing: For a piece you truly treasure, consider framing it behind museum-quality glass or acrylic. This can filter out up to 99% of harmful UV rays and is the single best investment you can make to prevent color fading over time.
Of course, sometimes art needs to be moved or put into storage. That requires a whole different level of care, which you can learn about in this excellent guide on fine art packing and shipping.
The Future of Art Preservation
Beyond just dusting and smart placement, the world of art conservation is making incredible leaps. Major institutions aren't just reacting to damage anymore; they're using sophisticated technology to predict when a piece might need attention, long before any issues are visible to our eyes.
For example, AI-powered systems are now being used in museums to identify cleaning needs with up to 85% accuracy before problems arise. By analyzing infrared and ultraviolet images, conservators can spot the earliest warning signs of decay. This proactive approach has been shown to reduce the need for intensive cleaning interventions by as much as 30%.
You can bring this same forward-thinking mindset home. One of the most valuable things you can do is simply document your artwork’s condition. Our guide on how to photograph artwork for prints has some great tips that apply here, too (you can read it at https://williamtuckerart.com/blogs/interesting-articles/how-to-photograph-artwork-for-prints). By taking detailed photos every year or so, you create a visual timeline. It makes it so much easier to spot subtle changes in the color, varnish, or surface. This careful, regular monitoring is the heart of modern preservation.
Got Questions About Cleaning Your Oil Painting? We’ve Got Answers.
It's completely normal to feel a little nervous before you start cleaning a cherished piece of art. Even with all the steps laid out, you probably have a few "what if" scenarios running through your mind. I get it.
Let’s tackle some of the most common questions I hear. Think of this as our final chat before you get started, just to make sure you feel confident and ready.
Can I Really Use Saliva to Clean My Painting?
It sounds bizarre, I know, but this is a real technique in the professional conservation world. The enzymes in human saliva are surprisingly effective at breaking down certain kinds of surface grime, which is why "spit cleaning" has been a tool in the restorer's kit for ages.
But—and this is a big but—this is absolutely not a DIY method. A trained conservator knows how to apply it with incredible precision and, more importantly, how to neutralize it afterward. If you leave saliva on a painting, you’re introducing biological material that can cause serious problems down the road. Stick with distilled water; it's the safest bet for at-home care.
A Little Insider Knowledge: The effectiveness of saliva cleaning can actually vary based on a person's diet! Professionals use it with surgical-style cotton swabs on tiny test patches. It's a fascinating bit of conservation science, but it’s definitely one to leave to the experts.
How Often Should I Be Cleaning My Painting?
Honestly, less is more. For most oil paintings hanging in a typical home, a light dusting with a very soft brush once or twice a year is plenty. You should only be thinking about a "wet" cleaning when you can see a layer of grime that a simple dusting won't touch.
A deep clean, like the one we've talked about with distilled water and cotton swabs, is a once-in-a-blue-moon event. We’re talking maybe once every 20 or 30 years, if ever. Cleaning too often can slowly wear away the protective varnish and put the paint itself at risk.
What if My Painting Doesn't Have Varnish?
Cleaning an unvarnished oil painting is extremely risky and something I'd almost always hand over to a professional conservator. Without that clear coat of varnish, you're touching the paint itself. Every pigment particle is exposed and vulnerable.
Even dabbing gently with distilled water can lift or smudge the paint. This is especially true for more modern paintings where the paint might not be fully cured or is made from more sensitive formulas. If you think your painting is unvarnished, the only safe thing to do yourself is a very gentle dry dusting. Anything more needs an expert's trained hand.
I Spotted Flaking Paint While Cleaning. What Now?
Stop. Immediately. If you see any paint that is lifting, cracking, or flaking, put your cotton swabs down. This is a clear signal that the paint layer is unstable. Any more pressure or moisture, no matter how gentle, could cause a piece of the original artwork to pop off for good.
At this point, it’s no longer a cleaning project; it’s a structural repair. A conservator would need to perform consolidation, a process where they use special adhesives to secure the loose paint back to the canvas. Only after the painting is stable can anyone even think about cleaning it.
Proper storage and handling are also key to preventing this kind of damage, especially if you ever need to move your art. For more on that, take a look at this expert's guide on how to store artwork.
At William Tucker Art, we believe every piece of art tells a story worth preserving. Whether you're caring for a family heirloom or a new addition to your collection, our passion for art extends to helping you keep it beautiful. Explore William's wildlife and pet portraits to find your next masterpiece. https://williamtuckerart.com