
Before you even think about mixing colors or making that first brushstroke, the success of your animal portraits painting hinges on two things: a fantastic reference photo and the right gear. Getting these fundamentals right from the start makes the entire process smoother and far more enjoyable. It's the groundwork that lets the real magic happen.
Choosing the Right Tools and Reference Photo

The journey to a captivating animal portrait starts well before paint meets canvas. We’re part of a long tradition here. Back in the 18th and 19th centuries, as more people in Europe welcomed pets into their homes, the demand for animal portraits exploded. Artists like Sir Edwin Landseer became famous for capturing the spirit of these beloved companions, cementing the pet portrait as a truly special art form.
Finding the Perfect Reference Photo
Think of your reference photo as your roadmap. It’s easily the most critical tool you'll use. A blurry, badly lit picture is a recipe for frustration and will almost always result in a flat, uninspired painting. You just can't paint what you can't see.
So, what makes a photo great for painting?
- Clear, Sharp Focus: The eyes and nose absolutely must be crystal clear. This is the secret to capturing a true likeness and bringing the portrait to life.
- Good Lighting: I always look for photos taken in natural light. It casts soft shadows and beautiful highlights that define the animal's shape and the texture of its fur. Harsh camera flash is the enemy—it washes out all that lovely detail.
- Personality and Expression: The best portraits freeze a moment in time that feels authentic to that animal. It could be a curious head tilt, a sleepy gaze, or a goofy, open-mouthed grin. That’s what tells their story.
A great reference photo does more than just show you what the animal looks like; it gives you a peek into their soul. Capturing that glint in their eye is what elevates a simple painting into a treasured memory.
For a deeper dive, I've put together more professional tips on picking the best images right here: https://williamtuckerart.com/blogs/interesting-articles/animal-reference-photos-for-artists.
Gathering Your Essential Painting Materials
Once you’ve got that perfect photo, it’s time to assemble your toolkit. The paints and brushes you choose will have a huge impact on your workflow and the final look of your artwork.
The big question for many artists is whether to use acrylics or oils. Each has its own personality, and what works for one person might not for another. There's no right or wrong answer, just what's right for you and the look you're after.
Choosing Your Painting Medium
This table breaks down the key differences to help you decide.
| Feature | Acrylic Paint | Oil Paint |
|---|---|---|
| Drying Time | Dries quickly (minutes to an hour), which is great for building up layers fast. | Dries slowly (days to weeks), giving you plenty of time for blending and creating soft edges. |
| Flexibility | Once it's dry, it's dry. This makes blending a bit of a race against the clock. | Incredibly forgiving. You can come back and rework areas for a long time. |
| Cleanup | A breeze. Just simple soap and water. | Needs solvents like mineral spirits, so you'll need good ventilation. |
| Color Shift | Can dry a little bit darker than they look when wet. It's something you get used to. | Colors stay true and vibrant even after they've fully cured. |
If you ever feel stuck and want to spark some new ideas, you can always explore AI image models for creative inspiration to get the creative juices flowing.
In the end, whether you go for the speed of acrylics or the buttery blend of oils, choose the medium that feels most intuitive for your style. The goal is to work with your materials, not against them.
Laying the Groundwork on Canvas
Alright, you've got your reference photo picked out and your art supplies are calling your name. It's time to get that initial drawing onto the canvas. This is the blueprint for your entire painting, so taking the time to get it right now will save you a world of frustration later. A solid foundation is everything.
It's pretty amazing to think that artists have been tackling this for centuries. Pet portraits really boomed back in the Victorian era, especially in Britain, where Queen Victoria’s love for her own animals made it fashionable to have your furry family members immortalized on canvas. If you're a history buff, you can dive deeper into the story of pet portraits and their modern comeback over at Portrait My Pet.
Nailing the Initial Sketch
This is arguably the make-or-break moment for capturing a true likeness. If the sketch is off—the eyes are a bit too wide, or the snout is a fraction too short—the final painting will always feel a little "off," no matter how beautifully you render the fur.
A fantastic, time-tested way to ensure accuracy is the grid technique. It sounds technical, but it's really straightforward. You just draw a grid over your reference photo and a larger, proportional grid on your canvas. Then, you tackle the drawing one square at a time. This little trick forces you to see shapes and lines instead of "an eye" or "a nose," which is a game-changer for getting proportions spot-on.
The grid method isn't cheating; it's a classic tool artists have used for ages to guarantee accuracy. It lets you relax and focus on the fun parts of painting, knowing your underlying drawing is solid as a rock.
Composing for a Powerful Portrait
Composition is just a fancy word for how you arrange things on your canvas. It's how you lead the viewer's eye and evoke a certain feeling. A great composition can turn a simple painting of an animal into a truly captivating piece of art. It’s less about what you paint and more about how you place it.
Here are a few ideas to play with:
- The Rule of Thirds: Try to resist the urge to stick your subject right in the middle. Imagine your canvas is divided by a tic-tac-toe grid. Placing key features, like the eyes, on one of the intersecting lines creates a much more engaging and natural look.
- Let It Breathe with Negative Space: The empty space around your animal is just as important as the animal itself. Leaving some room to breathe can make your subject stand out, creating a real sense of focus and calm. Simplicity can be incredibly powerful.
- Get in Close with Cropping: Don't be afraid to zoom in! Sometimes a tight crop that focuses just on the animal's face creates a much more intimate and emotional portrait. It pulls the viewer right into their world and connects them with the animal's personality.
Once you’ve got a precise sketch and a composition you love, you're officially ready for the fun part: mixing colors and bringing that portrait to life.
Bringing Fur and Feathers to Life with Texture
This is where the magic really happens. It’s the moment your painting transforms from a flat, two-dimensional image into something you feel like you could reach out and touch. Capturing the unique texture of fur or the delicate structure of feathers is all about patient layering and smart brushwork. I know it can seem intimidating, but if you break it down, it's absolutely achievable.
The core idea is to build everything up gradually. You don't just jump in and start painting tiny, individual hairs. Instead, you lay down a solid foundation of color and value that gives the fur its overall shape, depth, and softness. Think of it like you're sculpting with paint—starting with the big forms and slowly working your way down to the finest, most delicate details. This methodical approach is the real secret behind a texture that looks and feels authentic.
This infographic breaks down the essential early steps that really set you up for success, from getting your image onto the canvas to finalizing the sketch.
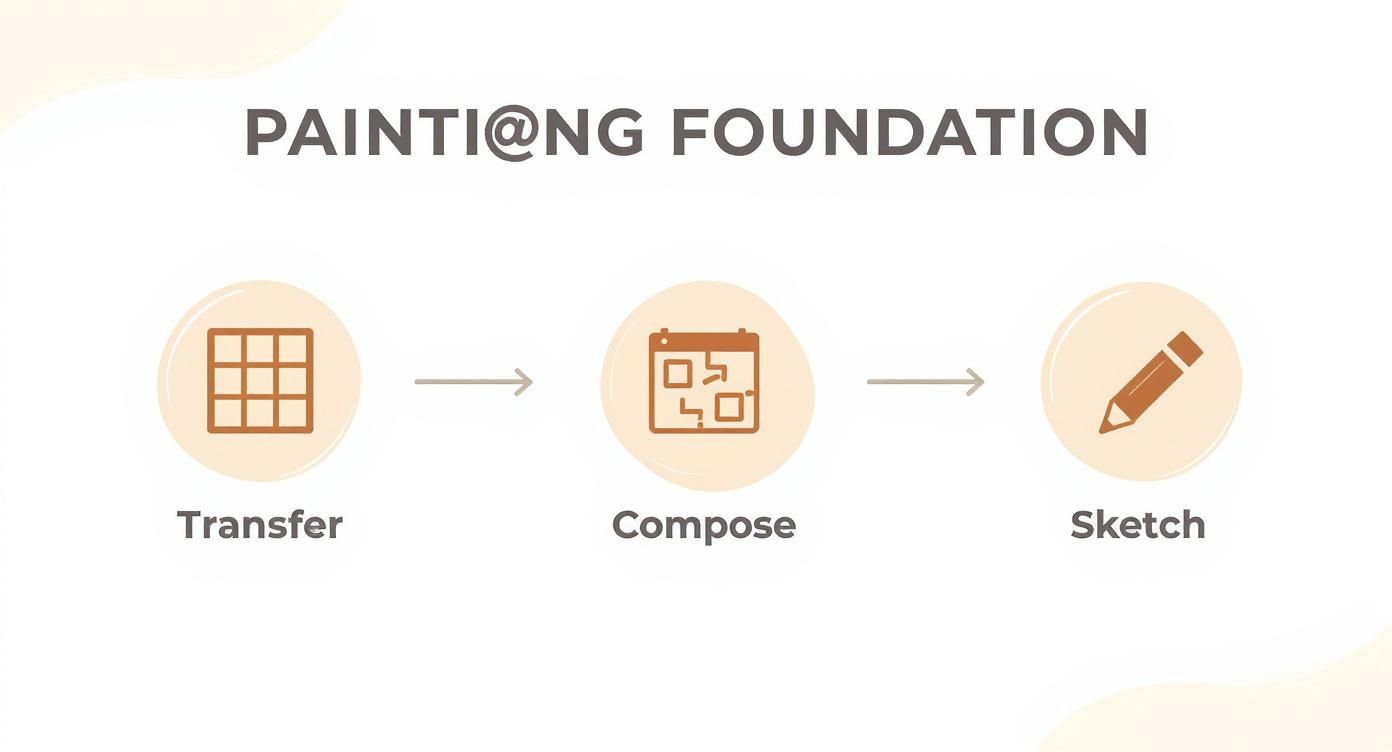
As you can see, a strong start—with an accurate transfer, a thoughtful composition, and a solid sketch—is non-negotiable if you want a lifelike finish.
Mastering the Art of Layering
I always begin by blocking in the darkest areas first with a thinned-down base color. This initial layer establishes your main shadow shapes and basically creates a map for the animal's form. Don't even think about details at this stage; just focus on getting the general flow and direction of the fur.
Once that base is dry, you can start building up your mid-tones. Use slightly thicker paint and a whole variety of related colors—never just one flat brown or gray! For instance, a black dog’s coat might have hints of deep blues, purples, and rich browns to give it dimension. Mix these on your palette, but don't overmix; letting those slight variations show through is what keeps it from looking flat and uniform.
Pro Tip: Keep your brushstrokes light and always follow the direction the fur grows. It's much better to think in terms of clumps and sections of hair, rather than trying to paint every single strand. This is what keeps a portrait from looking stiff and overworked.
Brush Techniques for Realistic Fur
Using the right brush can make all the difference. Different brushes are designed to create specific effects, and having a few key types in your toolkit is a game-changer. I find that a good rigger brush, for example, is absolutely perfect for adding those final, delicate whiskers or a few stray, fine hairs.
Here are a few of my go-to's for different coat types:
- Short, Sleek Coats (like a Boxer or Doberman): Grab a soft, flat brush and apply thin, smooth layers of paint. You'll want to blend the edges seamlessly to create that velvety texture. The key here is subtlety and making smooth transitions between your lights and shadows.
- Long, Flowing Fur (like a Golden Retriever or a lion's mane): A filbert or a small round brush works beautifully for this. Use confident, sweeping strokes that follow the natural curve of the body. Don't be afraid to overlap your strokes to really build up that sense of volume and movement.
- Coarse or Wiry Fur (like a Terrier): A stiffer bristle brush or even a fan brush with its bristles slightly separated can be great. You can use stippling or dry brushing techniques to create a much rougher, more tangible texture.
Ultimately, rendering fur is all about observation. Pay close attention to how the light hits the coat, creating those bright highlights that define its texture. For a more detailed look at the entire process, especially when painting animals in acrylic, you can find some fantastic guidance that breaks it down even further. Just remember to be patient with yourself and enjoy watching that animal's personality emerge with every layer you add.
Capturing the Soul Through Eyes and Expressions
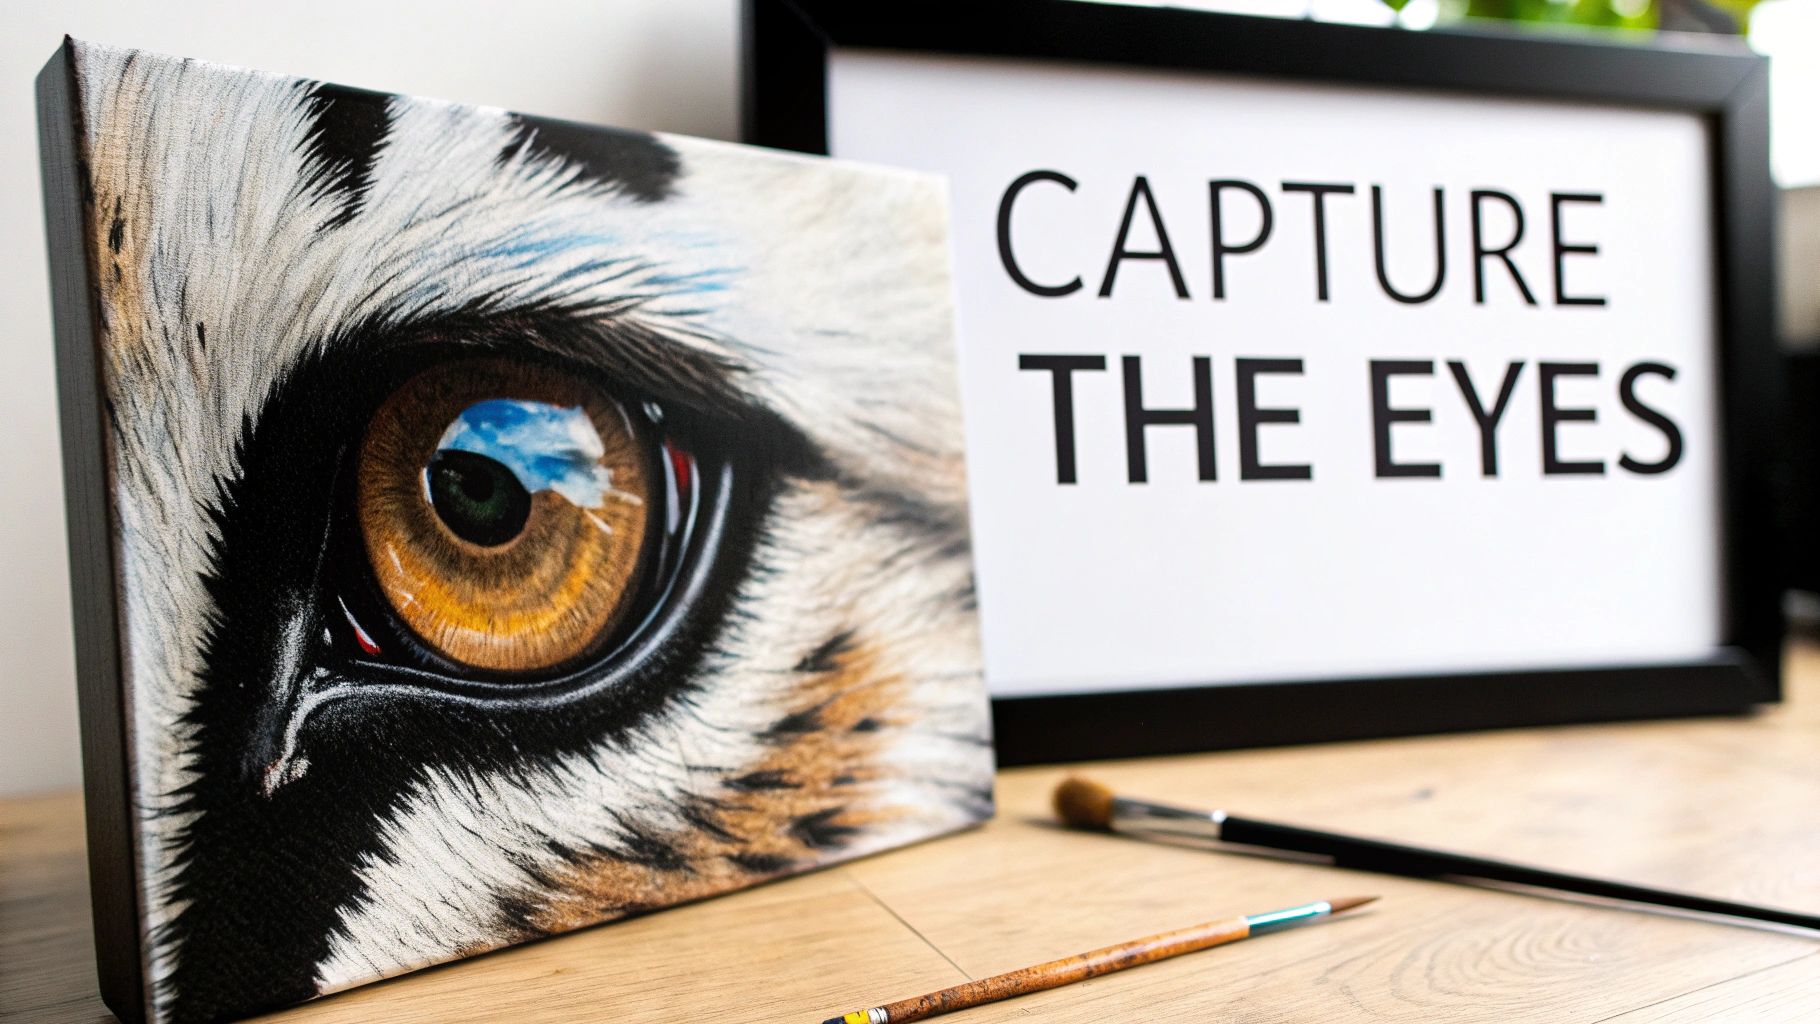
If the fur gives an animal portraits painting its texture, the eyes are what give it a soul. This is where your painting truly connects with the viewer, where you can show off the animal’s unique personality. Honestly, getting the eyes right is everything—they’re the focal point that will either make or break the entire piece.
Paying attention to these details is what elevates a simple likeness into something truly moving. It's all about patient observation and delicate brushwork, slowly building up layers to create that sense of depth, emotion, and life. Let's dig into how to handle these incredibly expressive features.
Painting Eyes That Sparkle
The magic of a realistic, lively eye comes down to three things: the pupil, the iris, and that all-important catchlight. I’ve found the best way to start is by painting the entire eye socket with the darkest color first, usually a rich blend of black and a deep brown. This immediately carves out that sense of depth.
Once that’s down, I block in the color of the iris. I like to let it blend just a little bit with the still-wet pupil to soften the edge and create a more natural transition. Keep in mind, irises are never just one flat color. I love dabbing in tiny flecks of lighter and darker shades to build up that beautiful complexity you see in a real eye.
But the final touch, the one that makes it all pop, is the catchlight—that tiny speck of bright white reflecting a light source. This is probably the single most important brushstroke for bringing an eye to life.
Place that catchlight carefully. Its position tells the viewer where the light is coming from and instantly gives the eye a wet, rounded look. Without it, the eye just falls flat.
Tackling Noses and Whiskers
Of course, it’s not just about the eyes. Other features are just as crucial for capturing an animal’s character. The nose, for example, needs a completely different approach depending on the animal. A dog’s wet nose calls for glossy, sharp highlights, whereas a cat’s nose has a much more leathery, textured feel.
For that wet-nose look, I lay down my base colors and shadows first. Then, I’ll grab a tiny brush and add a few small, crisp highlights with an off-white or even a pale blue to give it that tell-tale glisten of moisture.
Whiskers can also be a little tricky, but they add so much. My secret weapon for this is a rigger brush. Its long, thin bristles are perfect for creating those fine, elegant lines with one smooth stroke.
Here are a few tips I've picked up for painting natural-looking whiskers:
- Vary Your Pressure: Don’t press down with the same force for every whisker. A lighter touch for a thinner line and a bit more pressure for a thicker base will look much more organic.
- Thin Your Paint: I mix a little bit of water or painting medium into my paint to get a fluid, inky consistency. This helps it glide right off the brush.
- Save Them for Last: Always, always paint whiskers as one of your final steps. They need to sit on top of the finished fur to look right.
Mastering these small but vital features is what will take your animal portraits painting from good to truly unforgettable. These are the details that tell the animal’s story.
Let's Talk Backgrounds: Making Your Subject Shine
The background of your painting is more than just filler space; it’s the stage for your star performer. A great background makes your animal portrait pop, adding depth and setting the mood without ever stealing the show. Think of it as the supporting actor that makes the lead look even better.
So, what story are you trying to tell? Often, the simplest approach is the most powerful. A soft, muted background keeps the focus locked on the animal's unique features and personality. This creates a classic, timeless portrait that pulls the viewer's eye right where you want it.
Keeping It Simple and Abstract
If you want to give your portrait a truly professional feel, try creating a soft, out-of-focus background. Photographers call this effect "bokeh," and it works wonders in painting, too. It creates a gorgeous sense of depth that makes your subject feel three-dimensional.
The trick is to use large, soft brushes. Blend your colors together smoothly and avoid any hard edges or distracting shapes. You're suggesting an environment, not rendering one.
A great way to choose your colors is to think about complements. This little bit of color theory can make a huge difference. For example:
- A dog with warm, golden-brown fur will look absolutely stunning against a backdrop of cool blues or deep greens.
- A sleek gray cat can be beautifully set off by soft, subtle pinks or lavenders.
Playing with these complementary colors creates a visual harmony that makes your subject leap off the canvas.
The background isn’t an afterthought. It’s your secret weapon for controlling the painting's mood and directing the viewer's eye. A well-designed background leads the viewer straight to the heart of your subject—those soulful eyes, that wet nose, that unique personality.
Telling a Story with a Detailed Setting
Sometimes, the animal’s environment is part of its story. Painting a dog in its favorite sun-drenched field or a cat curled up on a familiar windowsill can add a powerful layer of emotion and personality to the portrait.
If you go this route, the key is balance. Keep the background details softer and less defined than your subject. Use looser brushstrokes and muted colors. This ensures the setting adds context without competing for attention.
This is also something to consider if you're thinking about painting professionally. The market for custom animal portraits is surprisingly strong. And while there's definitely more competition these days, the massive global pet population means there's a huge pool of potential clients. This steady demand gives you the freedom to explore different styles, including these more involved environmental portraits. If you're curious about this side of the art world, you can discover some insights on the pet portrait market from other working artists.
Ultimately, whether you opt for a simple color gradient or a loosely suggested landscape, just remember the background's job. It’s there to support and enhance your subject, completing the beautiful story of the animal you’ve brought to life.
Bringing It All Home: The Final Touches
You're on the home stretch now, and these last few steps are where the real magic happens. This is how a good painting becomes a great one.
But first, do the most important thing: walk away. Seriously. Give it a day or two, then come back to your painting with a fresh perspective. You’ll be amazed at what you notice. That little break helps you spot exactly where a shadow needs to be a bit deeper or where a tiny, bright highlight will make your animal's eyes truly come alive.
These aren't huge changes. We're talking about those tiny, final adjustments—the last 10% of the work that makes 90% of the impact. A flick of the brush to add a stray hair, a subtle glaze to push a shadow back. These are the details that breathe life into your portrait.
Protecting Your Hard Work with a Coat of Varnish
Once you’re truly happy with every last detail, it's time to seal the deal. But you have to be patient here. Your painting needs to be completely, bone-dry before you even think about varnish. For acrylics, that might just be a few days. For oils, you could be waiting months. If you jump the gun, you can trap moisture underneath and ruin all that effort.
Choosing your varnish finish is one last creative decision. Each one gives a totally different vibe:
- Gloss Varnish: This gives you that classic, wet-paint look. It makes colors pop with incredible depth and vibrancy.
- Satin Varnish: My personal favorite for most pieces. It offers a beautiful, subtle sheen that enhances color without any harsh reflections.
- Matte Varnish: If you're going for a modern, soft look, matte is the way to go. It has zero reflection, giving the surface a velvety feel.
My Two Cents: Always apply varnish in a dust-free, well-ventilated space. Use a wide, soft brush and go for thin, even coats. Don't try to slather it on all at once! This gives you a flawless, protective seal that will defend your art against dust and UV damage for years to come.
With your masterpiece complete and protected, it's time to show it off! A great next step is learning how to build a portfolio website to share your incredible work with the world.
Got Questions? Let's Talk Animal Portraits
Diving into animal portrait painting always brings up a few questions, especially when you're starting out. I get asked these all the time, so let's clear up some of the most common ones to help you feel more confident as you get started.
The Big Debate: Oils or Acrylics?
So, which paint is better for animal portraits? The honest answer is that both oils and acrylics are brilliant choices. The "best" one really boils down to how you like to work and the effect you're going for.
- Acrylics: If you're someone who likes to build up your painting in layers, you'll probably love acrylics. They dry fast, which is fantastic for creating textured fur without turning your colors into a muddy mess. Plus, cleanup is super easy—just soap and water.
- Oils: On the other hand, if you live for smooth blending and want more time to play with the paint, oils are your best bet. They stay wet for days, giving you all the time you need to create those soft, seamless transitions that make fur look incredibly real.
How Do I Actually Capture My Pet’s Personality?
This is the magic question, isn't it? Moving beyond just a likeness and truly capturing the spirit of an animal is what it's all about. This really comes down to two things: careful observation and picking the right reference photo. Look for that one picture where their expression is just so perfectly them.
The secret to painting personality is all in the little things. It’s that quirky tilt of their head, the specific sparkle in their eyes, or the way one ear always flops over. You're not just painting a generic animal; you're painting the one you know and love.
What Should I Charge for My Artwork?
Putting a price on your art can feel like one of the hardest parts. There's no single right answer, as pricing for a custom painting depends on things like the size of the canvas, the medium you're using, how complex the piece is, and, of course, your own level of experience.
A great way to start is by figuring out your material costs and then adding an hourly rate that feels fair for your time and skill. It also helps to see what other artists with a similar style are charging to get a sense of the going rate. For reference, prices can range anywhere from $150 for a small, simple piece to well over $1,000 for a large, highly detailed oil painting from a more established artist.
Ready to commission a portrait that truly captures the heart and soul of your pet? I’d love to create a timeless piece for your home. Come explore my collections at William Tucker Art and let's bring your vision to life. You can see my work at https://williamtuckerart.com.