
Alright, let's get into the fun stuff: gathering your tools. Before you even think about putting brush to canvas, you need to make sure you have the right gear. Think of it like cooking a great meal—the quality of your ingredients and tools makes all the difference. Having a solid set of paints, brushes, and a good canvas will make the whole process of painting pet portraits feel less like a struggle and more like a joy.
Gathering Your Essential Painting Supplies
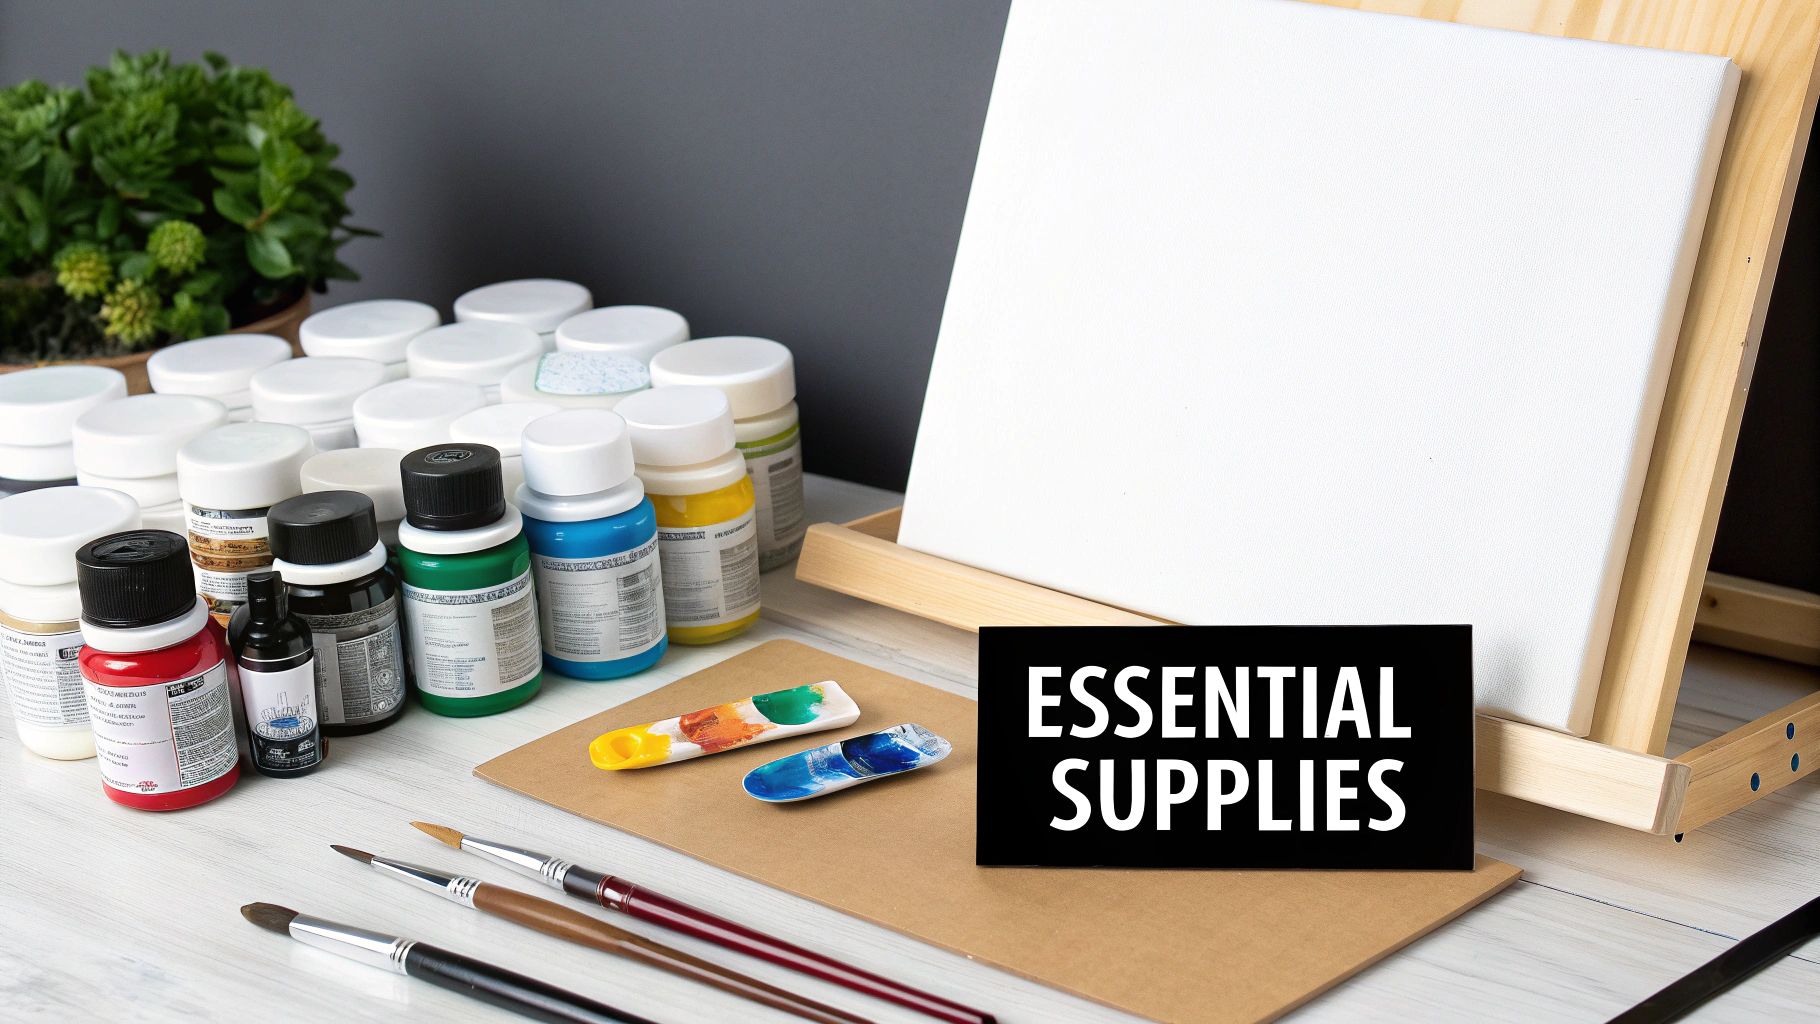
Your journey into pet portraiture doesn’t start with a brushstroke. It starts with a trip to the art store (or your supply closet). Getting everything in order first means you won't be scrambling for a tool mid-painting. Trust me, you don’t want to be fighting your materials when you should be focused on capturing that goofy little smirk your dog has.
Choosing Your Paints: Acrylics vs. Oils
This is the classic debate, isn't it? The truth is, there’s no single "right" answer. It really boils down to your personal style and how patient you are. Both mediums have their own magic when it comes to painting fur and fluff.
-
Acrylic Paints: If you're just starting out, I almost always recommend acrylics. They're water-based, a breeze to clean up, and they dry super fast. That quick-drying nature is a lifesaver when you're building up layers of fur—you can add new highlights or shadows without turning everything into a muddy mess.
-
Oil Paints: Oils are just luxurious. They have this rich, buttery feel and stay wet for a long time. This is fantastic for blending, letting you create those soft, seamless transitions you see in realistic fur. The downside? They take forever to dry and require solvents for cleanup, so you need a bit more patience.
For your first go, acrylics are probably the more forgiving choice.
Selecting the Right Brushes
You really don't need a giant jar full of brushes to get started. In fact, it's better to have just a few good ones you know how to use. A small, well-chosen set will serve you far better than a hundred cheap, scratchy ones.
A common mistake I see is artists trying to paint fine details with a brush that’s way too big for the job. Do yourself a favor and invest in at least one quality, fine-tipped detail brush. It will absolutely transform how you paint eyes, noses, and those delicate little hairs that bring a portrait to life.
Here are the three I’d recommend starting with:
- A Fine Detail Brush (Size 0 or 1): This is non-negotiable. It's what you'll use for the glint in an eye, individual whiskers, and the finest strands of fur.
- A Small Round Brush (Size 4 or 6): This is your all-around workhorse. It's great for blocking in smaller shapes and defining areas like the ears or mouth.
- A Medium Flat Brush (1/2 inch): Perfect for laying down base coats, filling in the background, and making broad strokes on the body.
If you want a more comprehensive list, check out our guide on the top 10 must-have art supplies for beginners.
The Perfect Canvas and Palette
Your canvas is literally the foundation of your artwork, so it’s worth getting a decent one. A pre-stretched cotton canvas that's already been primed with gesso is an excellent, no-fuss option. Gesso is just a primer that gives the surface a bit of "tooth" so the paint sticks properly instead of just sliding around.
Lastly, you'll need a palette for mixing your colors. This doesn't have to be fancy—a traditional wooden one is great, but a disposable paper palette pad or even an old ceramic plate works just fine. The goal is just to have a clean, non-absorbent surface with enough room to create your color mixes. A little organization here goes a long way in keeping your colors consistent as you paint.
Finding the Perfect Reference Photo
Alright, you've got your supplies laid out and you're ready to go. The next, and arguably most important, step is picking the right photo to work from. Let's be real: a pet portrait is only ever as good as its reference photo. Skimp on this part, and you'll be fighting an uphill battle the entire time.
Think of your photo as the road map for your painting. A blurry, dark picture is like a map with half the streets missing—you'll spend more time guessing and correcting than actually painting. But a sharp, well-lit image? That’s your crystal-clear guide to capturing a likeness that feels real.
Lighting is Everything
If I could only give one piece of advice, it would be this: pay attention to the lighting. It’s the single most critical element in a reference photo. Good lighting carves out the shape of your pet's face, creates depth, and shows off all the beautiful, subtle colors in their fur. Bad lighting, on the other hand, can turn the most expressive face into a flat, washed-out blob.
The best light you can find is almost always soft, natural, and coming from one direction. Try taking photos near a big window, maybe on a day with some light cloud cover. This kind of light wraps around your pet's features, creating gentle shadows that define their bone structure without being harsh or unforgiving. Whatever you do, avoid the built-in flash on your camera like the plague. It blasts the subject with flat light, creates weird glowing eyes, and wipes out all the wonderful details you want to paint.
Pro Tip: Always look for the "catchlight" in your pet's eyes. It's that tiny glint of light reflecting off the surface of their eyeball. A photo without a catchlight can make the final portrait feel a bit empty and lifeless. That little spark makes all the difference.
If you're looking for some fresh ways to approach your pet photoshoot, checking out some creative portrait photography ideas can be a huge help. You'd be surprised how a few simple photography tricks can elevate your reference shot from "okay" to "perfect."
Let Their Personality Shine Through
Beyond the technical stuff, a great reference photo captures who your pet really is. You know them better than anyone. What are those little quirks that make them so special?
- Is it that goofy, tongue-out grin they get when they're excited?
- What about that soulful, intense stare when a treat is on the line?
- Or maybe it's that adorable, quizzical head tilt when they hear a strange noise.
These are the moments you want to capture. An expression tells a story and transforms a simple painting into a piece of art that’s packed with emotion and memories.
My Go-To Tips for Taking Great Pet Photos
You don't need a fancy professional camera! Your smartphone is more than powerful enough to get the job done. It's all about how you use it.
-
Get Down on Their Level. This is a game-changer. Stop taking photos from way up high. Crouch down so your camera is right at your pet's eye level. It creates a much more personal and engaging portrait, almost like you’re seeing the world from their perspective.
-
Bribes are Your Best Friend. Let’s be honest, treats and squeaky toys are essential tools. Hold a favorite treat or toy right over your camera lens. This little trick gets them to look right at you with that perfect, alert expression you’re looking for.
-
Focus on the Eyes. The eyes are the soul of the portrait. Use your phone's focus feature and tap right on your pet's eyes to make sure they are tack-sharp. If the eyes are in focus, the rest of the image just seems to fall into place.
Once you’ve snapped a few good options, don't hesitate to do a little light editing. Just bumping up the contrast or sharpening the image a tiny bit can make a world of difference, revealing details that will be much easier to see when you start painting. For an even deeper look at what makes a great reference, check out our guide on selecting animal reference photos for artists.
With a fantastic photo in hand, you're all set for the next step: getting that image onto your canvas.
Bringing Your Pet to Life on Canvas
Okay, you've picked the perfect photo and all your supplies are laid out. It's time to face that intimidating blank canvas. Don't worry! This is the fun part—where the magic really starts to happen and a simple surface transforms into a tribute to your best friend. Remember, this isn't about perfection on the first try. It's about building up layers, making little adjustments, and just enjoying the process.
It's no surprise that people are crazy about getting art of their pets. The global pet photography market, which is a close cousin to what we're doing here, was recently valued at around USD 1.1 billion. It’s even expected to hit nearly USD 2.4 billion by the mid-2030s! That just shows how much we love immortalizing our furry family members. You can discover more insights about the growing pet art market to see just how popular this creative field has become.
Laying the Groundwork: Sketching and Blocking In
Every great painting starts with a solid plan. Before you even think about mixing colors, you need a confident sketch on your canvas to serve as your roadmap. I like to use a simple graphite pencil to lightly draw my pet's main shapes and outline. The key word here is lightly—if you press too hard, those pencil lines can be a real pain to cover up with paint later.
Once your sketch feels right, it's time for the "blocking in" stage. This is where you ignore all the tiny details and just focus on the big picture. Mix a good mid-tone for the main fur color, a darker shade for the shadows, and a lighter one for the highlights. Apply these colors in flat, simple shapes, almost like you're making a paint-by-numbers version of your pet. This step is huge because it gets rid of that scary white canvas and helps you see the overall lighting and composition right from the start.
I see so many beginners make the same mistake: they jump right into painting individual hairs. Please, resist that urge! If you establish your main color blocks first, you'll create a much more convincing sense of form and depth. The details will look so much better when they're layered on top of a strong foundation.
Building Realistic Fur with Layers
Now for the part that everyone loves—the fur. The secret to painting fur that looks soft enough to touch is all about layering. You aren't actually painting every single hair. Instead, you're creating the illusion of fur with clever texture and color variations.
Start with that mid-tone base you just blocked in. Once it’s dry, you can begin adding your darker tones to carve out the shadows and define where the fur clumps together. Grab a smaller brush and make sure your strokes follow the natural direction of the fur growth. For a Golden Retriever, your strokes will be long and flowing. For a shorthaired cat, they’ll be much tighter and more controlled.
Next up, the highlights! This is where the light hits the fur and makes it shine. A quick tip: don't just grab pure white. Mix a lighter version of your base fur color for a much more natural look. These lighter strokes should sit right on top of your darker layers, which is what creates that beautiful, believable depth.
A few things I've learned over the years:
- Vary Your Brushstrokes: Use a mix of thin, sharp strokes and some slightly thicker, softer ones. This mimics the natural way a coat of fur looks.
- Don't Over-Blend: It's tempting to smooth everything out, but letting some of the underlying layers peek through creates a much more realistic texture.
- Think in Shapes: Instead of getting lost in individual hairs, try to see and paint clumps and sections of fur. This will help you build form and volume much more effectively.
This little guide breaks down what to look for in your reference photo. It's a lifesaver for making sure you start with a strong visual foundation.
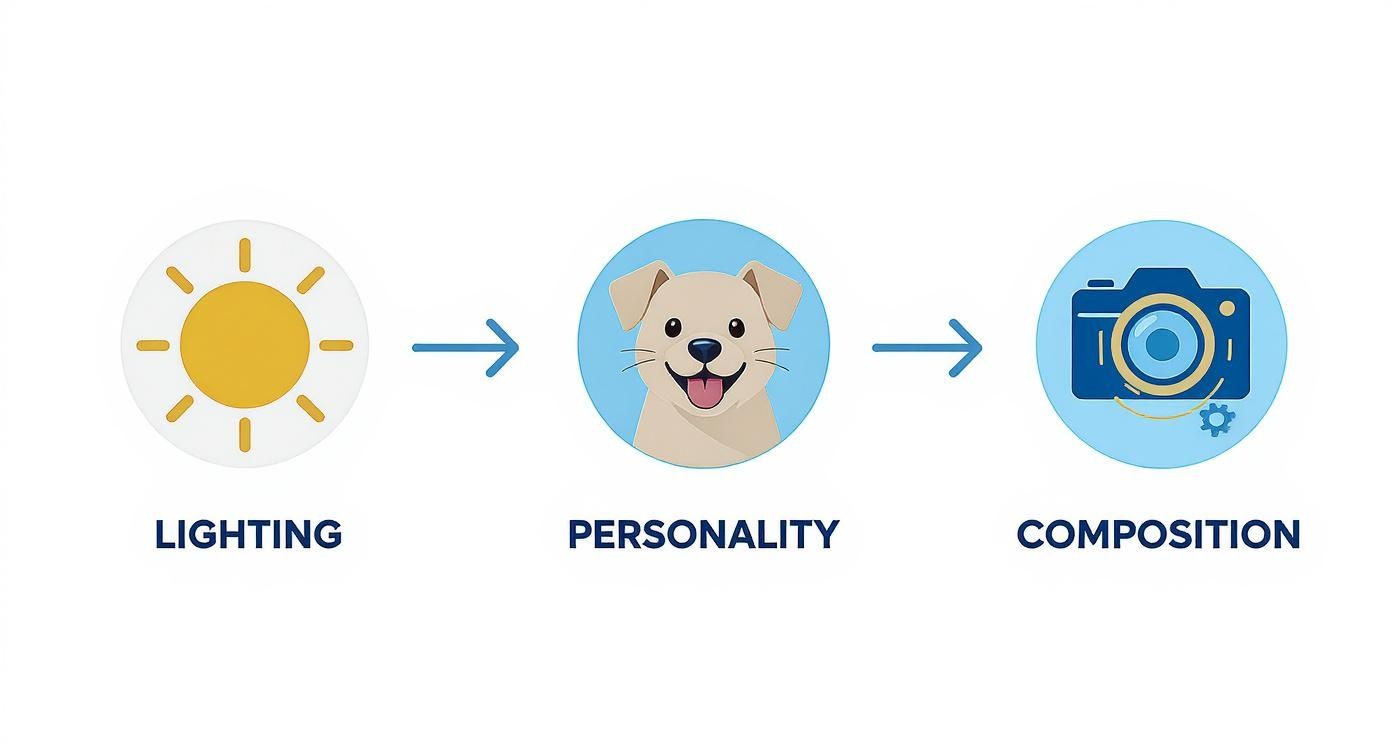
As you can see, getting the lighting, personality, and composition right in your photo makes a world of difference when it's time to paint.
Capturing the Soul Through the Eyes
If the fur gives the portrait its texture, the eyes give it a soul. Seriously. This is the one area where you need to slow down and really nail the details. The eyes are the absolute focal point of your painting, and getting them right is what makes a portrait feel truly alive.
First, paint the whole eyeball with its base color. A common mistake is using pure white, but it's almost always a light gray or even a pale, cool blue, especially in the shadowed parts. Next, fill in the iris with its main color, whether it's a rich chocolate brown or a piercing green.
Now for the two details that change everything: the pupil and the catchlight.
- The Pupil: This needs to be a deep, dark black. A crisp, well-defined pupil gives the eye an immediate sense of focus and intensity.
- The Catchlight: This is that tiny reflection of a light source, like a window or a lamp. It’s usually just a small dot of pure white. Look at your reference photo to see exactly where it should go. A portrait without a catchlight feels flat and lifeless; adding this one tiny speck of light is like flipping a switch.
Perfecting Noses, Ears, and Other Features
With the fur and eyes taking shape, it's time to give some love to the other features that make your pet's face so unique.
For the nose, look closely. It's not just a flat black triangle, right? It has slick highlights where it's wet and deep shadows in the nostrils. I start with a dark base and then add subtle lighter tones to give it that three-dimensional, leathery texture. A tiny, well-placed dot of white or light gray works wonders for creating that "wet nose" look.
Ears are all about conveying form and texture. For floppy ears, I focus on the shadows created by all the folds. For perky, upright ears, I pay close attention to the soft, fuzzy hairs along the edges. Always think about where the light is coming from and how it hits the inside of the ear versus the outside.
Finally, the whiskers. This should be one of the very last things you do. Use your finest detail brush and thin your paint down a bit with water or medium. Then, with a quick, confident flick of the wrist, add them in. Less is almost always more here—just a few perfectly placed whiskers provide the perfect finishing touch.
Adding Backgrounds and Finishing Touches
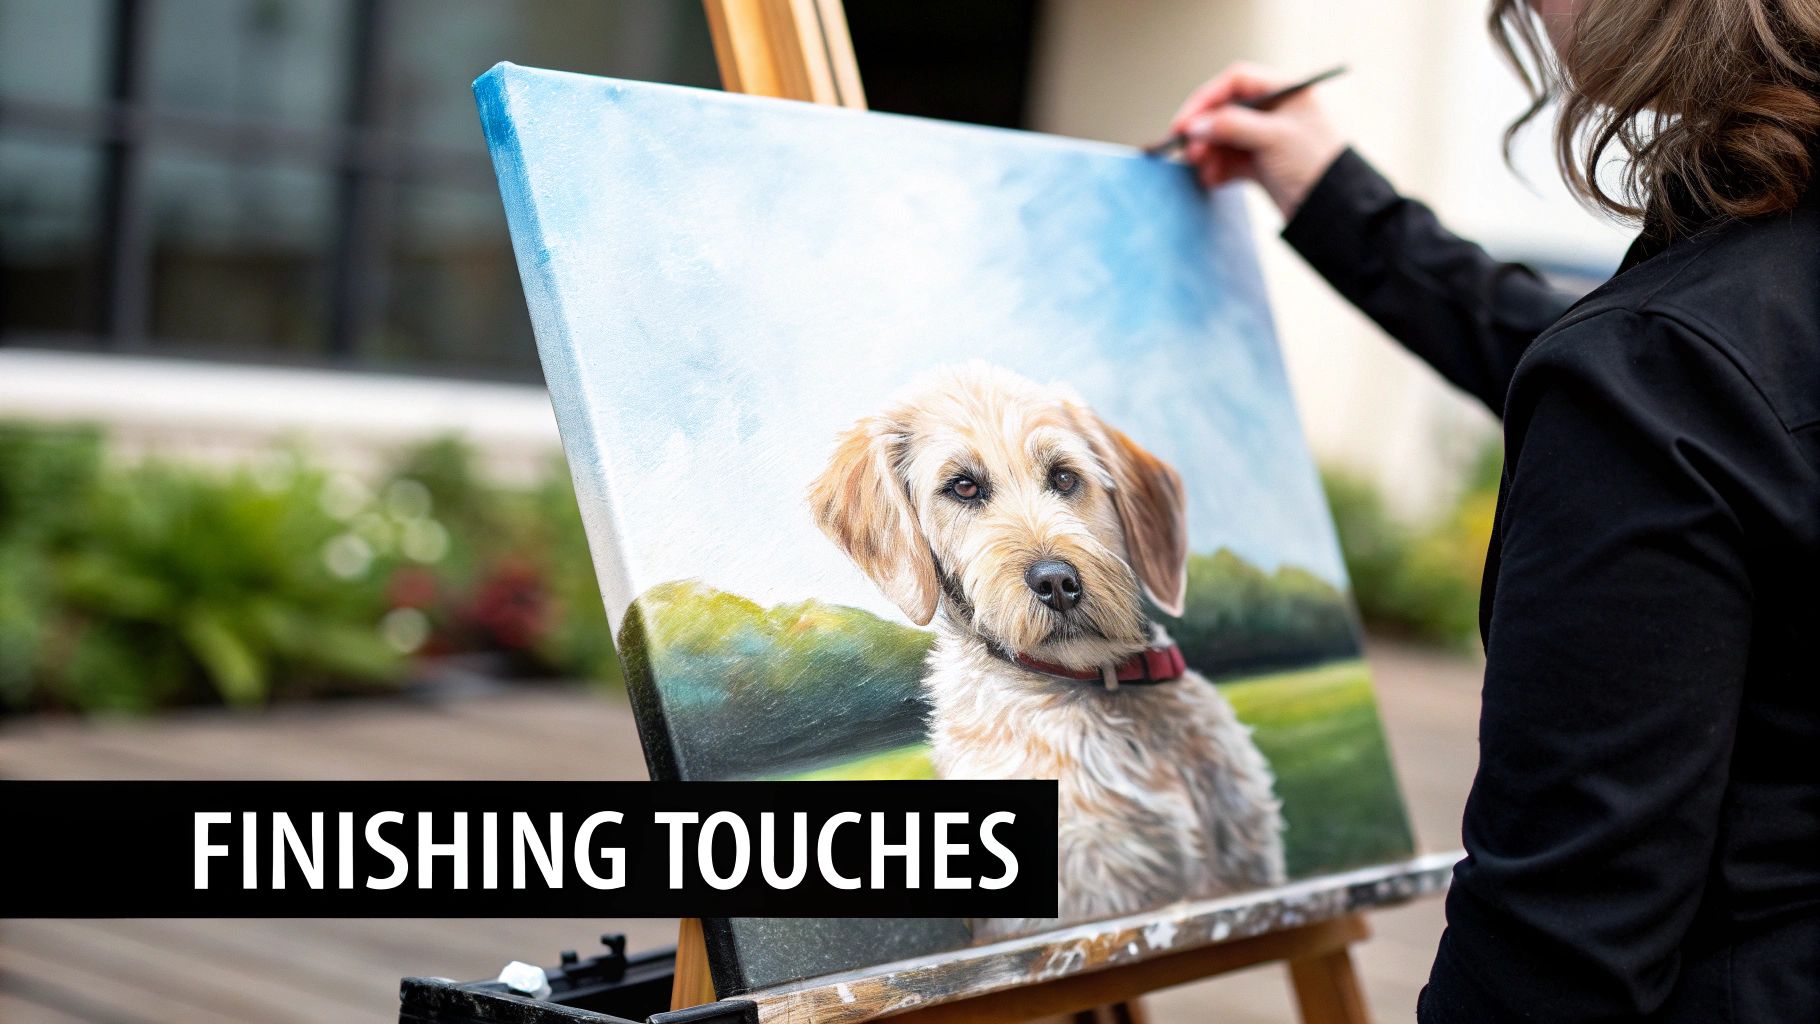
You’ve poured your heart into capturing that perfect expression, and the canvas is really starting to come alive. Now for the fun part: framing that beautiful face with a background that makes the whole piece pop and adding the tiny details that truly sell the illusion.
A background does so much more than just fill empty space. It sets the mood and makes your pet the undeniable star of the show. Likewise, those last few touches—the delicate whiskers, the final glint in the eye—are what elevate a painting from good to genuinely great. This is where the magic really happens.
Choosing the Right Background Style
The background you choose can completely transform the feeling of your pet portrait. Think of it as creating an atmosphere that perfectly complements your pet’s unique personality. What story are you trying to tell?
For a clean, modern, and punchy look, a simple, solid color background can be incredibly effective. Imagine a bright, sunny yellow for a playful pup or a deep, moody navy for a regal cat. This approach keeps the focus exactly where it should be: on your pet.
If you’re after something a bit softer, a blended gradient offers a touch of elegance without being distracting. You could gently fade two or three complementary colors to create a subtle, atmospheric effect. For instance, a soft transition from a light sky blue to a gentle cream can create a peaceful, dreamy vibe.
We're seeing a real shift in what people want from pet portraits. It's not just about strict realism anymore. More and more, art lovers are drawn to expressive, personalized styles with abstract touches, bold brushstrokes, and simplified shapes that capture a pet's essence rather than just their likeness. Learn more about the latest trends in pet portrait art and see how you can tap into this modern demand.
This trend is great news for us artists, as it opens the door for so much more creativity, especially with backgrounds.
Creating an Abstract and Expressive Background
Inspired by the Tucker style, an abstract background injects a layer of energy and emotion that can perfectly mirror your pet's spirit. The trick is to create something visually interesting that doesn't steal the spotlight from your subject. It should feel like a supporting character, not the lead actor.
Here are a few of my go-to techniques:
- Keep Your Palette Tight: Pull two to four colors directly from your pet’s fur or eyes to use in the background. This is a surefire way to create a cohesive, harmonious look.
- Build Up Some Texture: Don't be afraid to get physical with the paint! Apply it with a palette knife or a dry brush to create interesting textures that add a dynamic, tactile quality to the piece.
- Think in Shapes, Not Blends: Instead of smoothly blending colors, lay down bold, confident strokes and shapes. Let the colors bump up against each other and overlap. This creates a wonderful sense of movement and spontaneity.
The goal here is all about balance. The background needs to be expressive enough to be interesting on its own, but simple enough that your beautifully rendered pet remains the clear hero of the piece.
Let's look at how to pick the perfect style.
Background Style Comparison
Choose the best background to complement your pet's portrait.
| Background Style | Best For | Technique Tips |
|---|---|---|
| Solid Color | Modern, minimalist portraits where the pet is the sole focus. Great for high-energy animals. | Use a large, flat brush for even coverage. Mix more paint than you think you'll need to ensure a consistent color. |
| Gradient Blend | Creating a soft, dreamy, or elegant mood. Works well for calm or regal pets. | Work wet-into-wet, blending the colors on the canvas with a soft brush before they have a chance to dry. |
| Abstract/Textured | Adding energy, emotion, and a contemporary artistic flair. Perfect for pets with big personalities. | Use palette knives, sponges, or even old credit cards to scrape and build up layers of paint. |
Ultimately, the best background is one that feels right for the specific pet you're painting.
Applying the Final Details
With the background done and dry, it’s time for the tiny, delicate touches that pull everything together. These small details add a stunning level of realism and finesse that really makes the portrait sing.
Adding Whiskers and Fine Hairs
This should be one of the very last things you do. Grab your thinnest detail brush and thin your paint just a little with some water or medium until it has a smooth, ink-like consistency. Then, with a quick, confident flick of the wrist, paint each whisker. Remember, they aren't perfectly straight—give them a slight, natural curve for a more realistic look.
Final Highlights
Take a step back from the easel for a moment. Squint your eyes and see where the light hits most intensely. Add tiny, bright dabs of paint to the very tip of the nose, the wet part of the eyelids, and the brightest spots on the fur. This final pop of light is what gives the portrait that incredible three-dimensional feel.
Signing Your Masterpiece
You did it! Your signature is your mark of pride. Find a discreet spot, usually in a bottom corner, and sign your name or initials with a fine brush.
Protecting Your Work with Varnish
Varnishing is the final, non-negotiable step in painting pet portraits. It’s not just about making it look pretty; it protects the paint from dust, UV light, and everyday grime. It also unifies the sheen of the painting, evening out any spots that dried too glossy or too matte.
Before you start, make sure your painting is completely dry. For acrylics, this usually takes a few days, but for oil paintings, you need to wait several months.
Choose a varnish that suits your personal preference (gloss, satin, or matte) and apply it in a thin, even layer with a clean, wide brush. Always do this in a well-ventilated area. This final protective coat ensures that the portrait you’ve worked so hard on will be a treasured piece for a lifetime.
Turning Your Passion into a Business: Selling Pet Portraits
Okay, so you've put in the hours, honed your skills, and you're ready to take the plunge. Turning this passion into a real-deal business can feel daunting, but it’s an amazing next step. With a bit of planning, you can start taking on commissions and sharing your incredible talent with fellow pet lovers.
The most important thing to remember is what you're actually selling. It’s not just paint on a canvas; it's a deeply personal, emotional keepsake. People are trusting you to capture the very soul of a family member, and that's a huge honor.
Your Portfolio is Your Handshake
Think of your portfolio as your most powerful sales tool. It's the first thing a potential client will look at, and it needs to convince them you're the artist for the job. You don't need a massive gallery, just a handful of your absolute best pieces.
What you're aiming for is a mix of quality and variety. A knockout portfolio should showcase:
- Different Breeds and Species: Prove you can tackle anything from a fluffy Persian cat to a sleek Doberman.
- A Range of Mediums: If you work in both acrylics and oils, show them off! This opens you up to a wider client base.
- Crisp, Clear Photos: Your art deserves to be seen. Photograph your finished paintings in bright, even light to let the true colors and details shine.
A huge mistake I see artists make is waiting for commissions to build their portfolio. Don't be afraid to paint popular breeds from fantastic reference photos you find. These passion projects often end up being your strongest work because you have total creative freedom.
Let's Talk Money: Pricing Your Art
Pricing is where so many artists get stuck, but it doesn't have to be a nightmare. The biggest pitfall is undervaluing your own work. You're not just selling supplies; you're selling your expertise, the countless hours you’ve practiced, and the professional-grade materials you use.
Do a little homework. See what other artists with a similar style and experience level are charging. This gives you a solid baseline and helps you set prices that are both competitive and fair. I recommend creating a simple price list based on size, medium (oils usually command a higher price than acrylics), and how many pets are in the portrait.
It's also worth noting that custom pet portraits have exploded in popularity. They've gone from simple headshots to a major home decor trend. People are commissioning creative pieces, like their cat dressed as a duchess, turning portraits into unique conversation starters. This is a fun market to explore.
Creating a Smooth Commission Experience
A professional and clear process is the key to happy clients and great reviews. Always kick things off with a detailed conversation to set expectations right from the start. Go over your timeline, explain your artistic process, and be very clear about what you need from them—especially when it comes to reference photos.
And this is non-negotiable: always take a deposit. A 50% non-refundable deposit is the industry standard. It protects your time, covers your initial material costs, and shows the client is serious.
If you really want to build a sustainable career, you need to market your work. A great way to do this is to learn how to start an art blog where you can showcase your process, share finished pieces, and attract your ideal clients.
Got Questions? Let's Talk Pet Portraits.
It's totally normal to have a few questions rattling around in your head, even after you've got your brushes and canvas ready to go. In fact, it’s a good sign—it means you’re thinking like an artist! Let's dive into some of the most common things people ask when they're just starting out.
What's the Easiest Paint for a Beginner to Use?
This is, without a doubt, the number one question I get. While you'll find die-hard fans for every medium, my honest advice for newcomers is to start with acrylic paint. It's just the most forgiving and approachable option out there.
The biggest reason? It dries fast. Really fast. When you’re trying to build up all those lovely layers of fur, you don’t want to wait days for the paint to set. With acrylics, you can lay down shadows and pop in highlights in the same sitting without turning everything into a muddy mess. Plus, cleanup is a dream—just soap and water.
Here’s a quick rundown of your main options:
- Acrylics: They dry quickly, are great for layering, and cleanup is simple. Perfect if you want to work at a good pace and build up that furry texture.
- Oils: These are slow-drying, which makes them absolutely fantastic for blending soft fur transitions. The colors are incredibly rich. This medium is better for artists with a bit more patience who enjoy a longer, more meditative process.
- Watercolors: Stunningly beautiful, but famously unforgiving. Watercolors require a ton of planning because you have to work from light to dark and mistakes are very difficult to cover up.
For your first few paintings, sticking with acrylics will let you focus on your technique and build confidence, instead of fighting with your materials.
How on Earth Do I Paint Black or White Fur?
Ah, the classic challenge! Painting solid black or white fur trips a lot of people up. The trick is to get one key idea into your head: solid-colored fur is never just one flat color.
If you use black or white paint straight from the tube, your portrait will look flat and lifeless. The secret lies in weaving a rich variety of undertones into the coat to create depth and believable form.
When I'm painting black fur, I almost never use pure black paint. My go-to is a custom-mixed dark made from Ultramarine Blue and Burnt Umber. From there, I look for cool highlights (which I’ll mix with blues and purples) and warm reflected light from the surroundings (which I’ll mix with browns and reds). This is what gives the coat that realistic, beautiful sheen.
For white fur, pure, unmixed white is used only for the absolute brightest, sharpest highlights—and even then, very sparingly. The rest of the fur is a gorgeous tapestry of subtle grays, cool blues, and even pale yellows or pinks, all depending on the lighting in your photo.
A huge pitfall I see artists fall into is over-blending these subtle colors. You actually want to let the distinct cool and warm tones sit next to each other. That subtle contrast is what tricks the viewer's eye into seeing a vibrant, three-dimensional white coat instead of just a patch of gray.
Seriously, How Long Does a Pet Portrait Take?
This is a real "how long is a piece of string?" question. The time it takes can vary wildly, and it really comes down to a few key things:
- Size and Complexity: A simple 8x10 headshot is going to be a much quicker project than a huge 24x36 full-body portrait with a crazy detailed background.
- Your Medium: An acrylic painting can often be finished over a few dedicated sessions. An oil painting, on the other hand, needs serious drying time between each layer, which can easily stretch the whole process out over weeks.
- Your Personal Style: Some artists are fast and intuitive, painting with bold, quick strokes. Others are more methodical, taking their time with every single detail. Neither is wrong!
As a ballpark figure, a small acrylic portrait might take somewhere between 6-10 hours of focused painting time, probably spread across a few days. A more complex oil painting? That could easily run you 20-40 hours or more, spread over several weeks. My best advice is to forget the clock. Don't rush it—just enjoy the incredible journey of bringing a beloved pet to life on the canvas.
Ready to turn your passion into a timeless piece of art? At William Tucker Art, we celebrate the unique bond between pets and their people through vibrant, expressive portraits. Explore our collections or commission your own custom pet portrait today.