
The most straightforward way to price a commission is with a simple formula: (Your Hourly Rate x Hours Worked) + Cost of Materials. This isn't just a starting point; it's the bedrock that ensures you're paid fairly for your time and that every tube of paint or sheet of paper is covered before you even think about profit. It takes the guesswork out of pricing.
Building Your Foundational Pricing Formula
Let’s be real for a moment—pricing your art can be more nerve-wracking than facing a blank canvas. But it doesn't have to feel like you're pulling numbers out of thin air. The key is to build a solid, repeatable formula that truly values your work and builds a business where every project is a financial win.
This is about creating a clear process. By the time we're done here, you'll have a core formula you can use to confidently price any commission that comes your way.
H3: Start with a Fair Hourly Rate
Your hourly rate is the heart of your pricing. This number isn't random; it’s a reflection of your experience, your skill, and the quality you deliver. A beginner might set their rate near a local living wage, while an established artist with a six-month waitlist can—and should—charge a premium.
Not sure where to start? Think about these things:
- Your Skill Level: Are you just starting out, an emerging artist with a few shows under your belt, or an established professional? Be honest about your current standing in the market.
- Your Desired Income: What do you need to make per year? Work backward from that goal to figure out a realistic hourly wage.
- Market Research: Take a look at what artists with a similar style, medium, and experience level are charging. Don't copy them, but use it as a benchmark.
H3: Track Your Time Accurately
Next, you need to track every single minute you spend on a piece. This is so much more than just the time you have a brush in your hand. The real project time includes all the back-and-forth emails with the client, the initial sketching and research, prepping your materials, making revisions, and even carefully packaging the final piece for shipment.
A simple spreadsheet or a time-tracking app can be a total game-changer here. For a recent pet portrait, I spent 10 hours painting, but my time log showed another four hours on consultations, creating digital mockups, and applying the final varnish. If I hadn't tracked that extra time, I would have undercharged myself by nearly 30%.
To get a better handle on how all these numbers come together, you might find a dedicated online profit calculator tool incredibly helpful.
This visual flow shows how each component builds upon the last to form a complete and fair price.
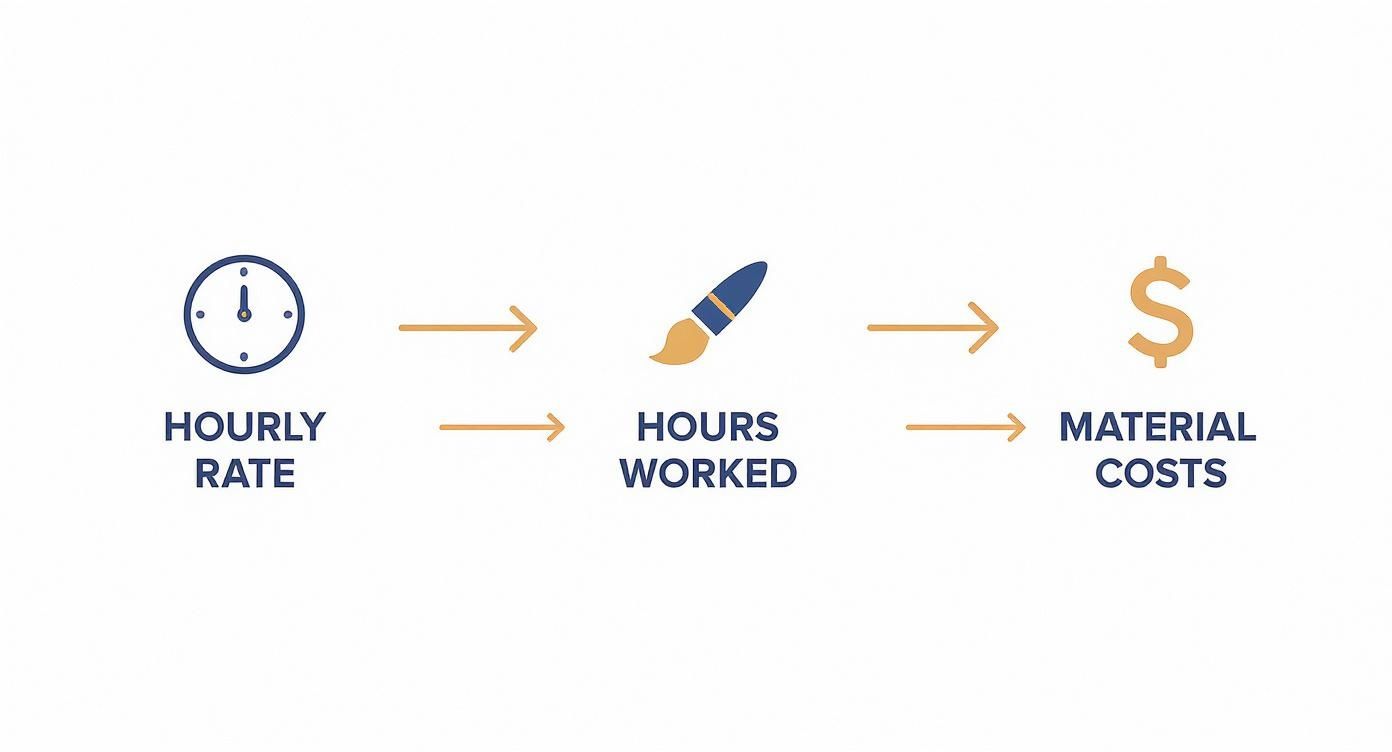
This process ensures no element of your effort or expense is overlooked, from your initial idea to the final product.
H3: Account for All Costs
Finally, add up every single material and overhead expense. This is where so many artists accidentally lose their profit. The canvas, paints, and brushes are obvious, but don't forget the hidden costs: studio rent, software subscriptions (like Adobe Creative Cloud), shipping supplies, and even a percentage of your utility bills.
Getting this right is crucial, especially with the online art market booming. It was valued at around $10.98 billion and is projected to climb to $18.9 billion by 2033. With paintings leading the charge in this space, accurate cost calculation is the only way to ensure you're actually profitable.
Your Core Pricing Formula at a Glance
Before we move on to adding surcharges and profit, let's recap the non-negotiable foundation of your pricing. This table breaks down the essentials that every artist needs to account for.
| Component | What It Covers | Real-World Example |
|---|---|---|
| Hourly Rate | Your skill, experience, and time investment. | An artist with 5 years of experience sets a rate of $40/hour. |
| Hours Worked | All time spent on the project, from emails to painting to shipping. | A small portrait might take 8 hours total, not just the 5 hours of painting. |
| Material Costs | All direct and indirect supplies used for the commission. | Canvas, paint, brushes, varnish, packing materials, and a portion of studio utilities. |
Think of these three components as your break-even point. This is the absolute minimum you must charge to run a sustainable business, not just an expensive hobby. Everything else—complexity fees, licensing, and your actual profit—gets added on top of this solid foundation.
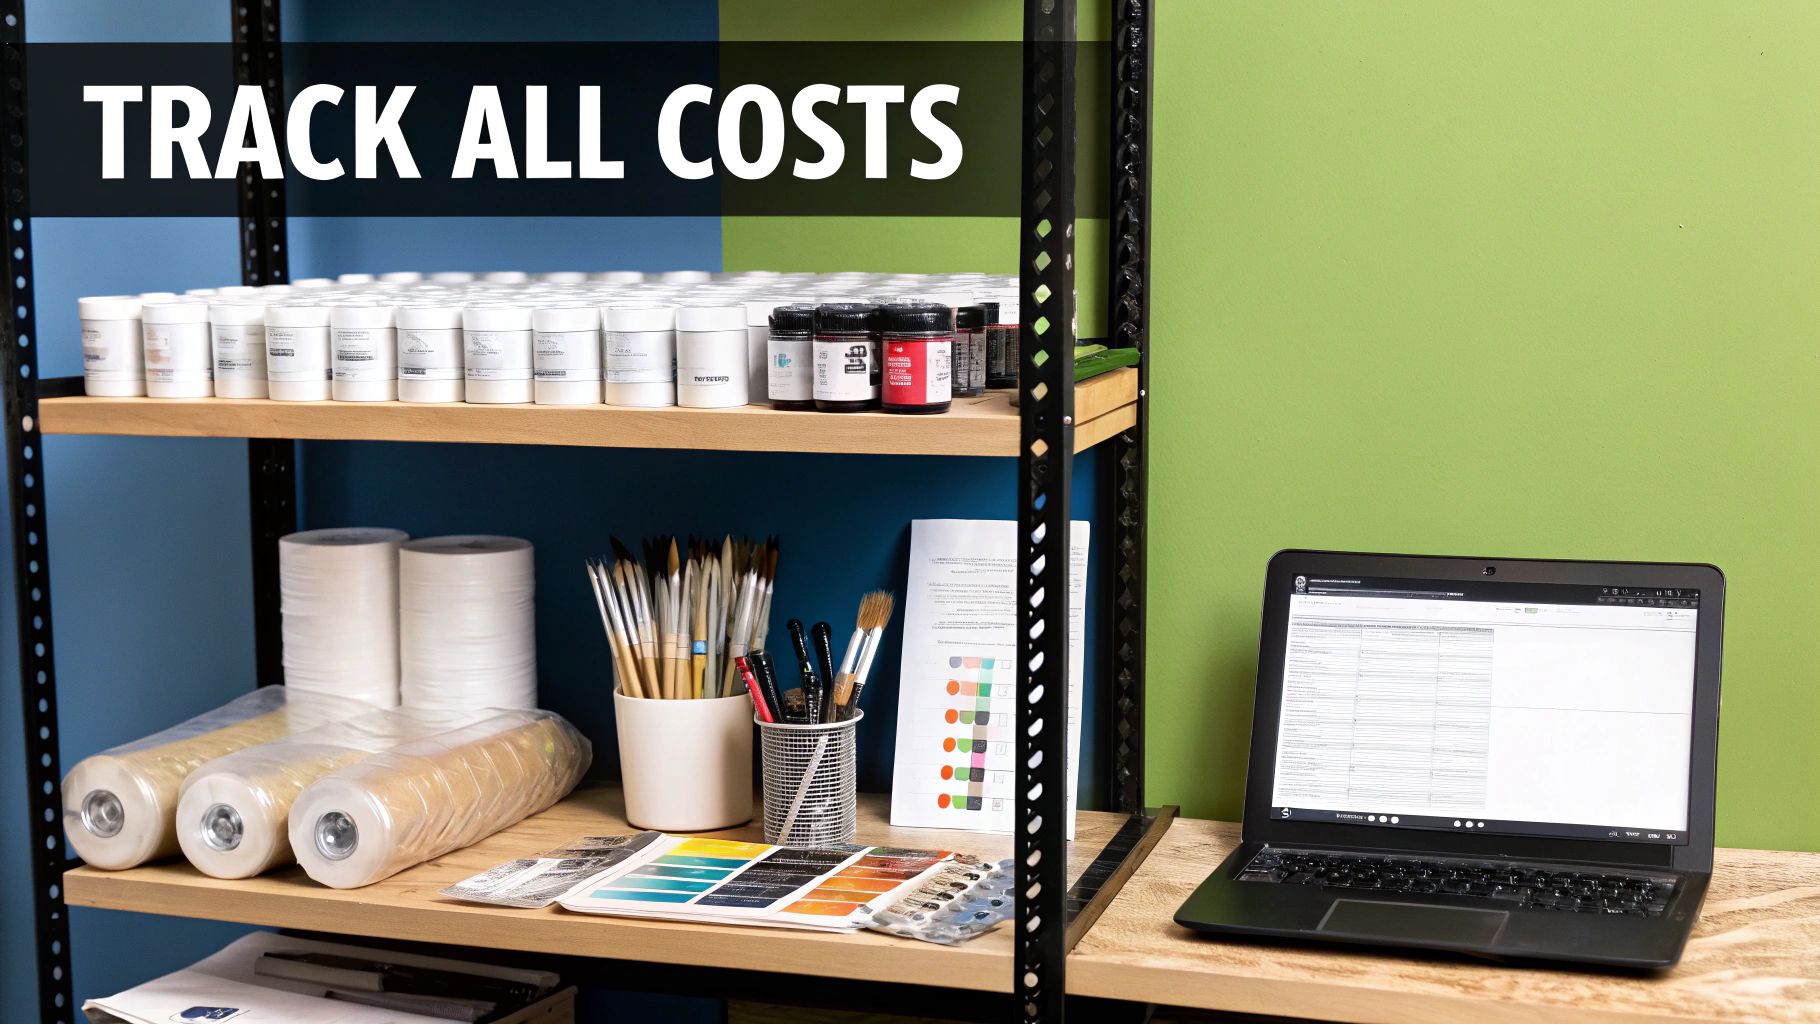
Getting a Grip on Your Real Material and Overhead Costs
This is where so many artists get it wrong. The difference between running a profitable art business and just having an expensive hobby often comes down to the small, forgotten expenses. To really nail your commission pricing, you have to look beyond the obvious cost of paint and canvas.
Profitability gets lost in the little details. That specialty brush you bought for one specific texture? The roll of bubble wrap for shipping? It all adds up, and if you're not tracking it, you're losing money.
Nailing Down Your Direct Material Costs
Let's start with the easy stuff: the direct costs for creating a specific piece. These are the tangible items you use up for one particular painting. The most foolproof way to track this is to keep a running log for every single commission you take on.
As soon as you start a new project, jot down every single consumable item you use.
- Your Surface: What's the exact cost of that canvas, wood panel, or sheet of fancy archival paper?
- Your Mediums: You need to get a feel for how much paint, ink, or charcoal you're using. You could weigh your paint tubes before and after a project or figure out a rough cost per milliliter for your most-used colors.
- The Finishing Touches: Don't let things like varnish, fixatives, or custom framing slip through the cracks.
- Shipping Supplies: This is a big one. Boxes, packing tape, bubble wrap, and the actual postage—these costs can pile up and absolutely must be passed on to the client.
Getting this granular means you're not just guessing. It gives you a hard number that represents your direct financial investment in that client's piece. This becomes the foundation of your price.
Taming the Beast: Your Studio Overhead
Now for the silent killer of an artist's income: overhead. These are all the indirect costs of simply being in business. They're the expenses that are there whether you have one commission this month or ten. Ignoring them is the fastest way to undercharge and realize you’ve basically been working for free.
Overhead is everything that keeps the lights on in your studio. For a digital illustrator, a big chunk of this might be their $59.99/month Adobe Creative Cloud subscription. For a sculptor, it could be the $800/month rent for their workspace. The numbers will look different for everyone, but the principle is the same.
To figure out your overhead, add up all your art-related business expenses for an entire year—everything that isn't tied to a single, specific artwork.
- Studio Space & Utilities: A fair percentage of your rent, electricity, and internet for your workspace.
- Software & Subscriptions: Your Adobe suite, website hosting, accounting software, etc.
- Marketing & Promotion: Business cards, social media ads, or fees for art fairs.
- Tools & Equipment: Think about the wear and tear (depreciation) on your easel, computer, or camera.
- Professional Development: Any online courses, workshops, or art books you invest in.
- Fees & Insurance: Business insurance and those pesky payment processing fees from services like Stripe or PayPal (e.g., 2.9% + $0.30 per transaction).
Once you have a grand total for your annual overhead, you can break it down into a simple hourly figure to add to every project.
How to Turn Annual Overhead into an Hourly Rate
The idea here is to spread these background costs fairly across all the work you do. Calculating an hourly overhead rate is a straightforward way to do this.
First, be realistic about how many hours you actually spend making art for commissions in a year. Let's say you work on art 20 hours a week for 50 weeks of the year. That gives you 1,000 "billable" hours.
Now, grab your total annual overhead. If your yearly studio expenses come out to $4,000, you've got what you need.
Here’s a quick example:
Annual Overhead: $4,000
Annual Billable Hours: 1,000
Hourly Overhead Rate: $4,000 / 1,000 hours = $4.00 per hour
What this means is that for every single hour you work on a commission, you need to add $4.00 to your price just to cover your background business costs. It might not sound like much, but on a 20-hour project, that’s an extra $80 you would have otherwise paid for out of your own pocket. This one step turns hidden, stressful costs into a predictable number, ensuring every piece you create actually contributes to keeping your business healthy and running.
Choosing Between Hourly and Flat Fee Pricing
Alright, you've crunched the numbers on your costs. Now comes one of the biggest forks in the road for any commission artist: do you charge by the hour, or quote a single, all-in flat fee?
This decision really shapes the whole dynamic with your client and how you manage your time. There's no single "right" answer that fits every artist or every project. It's all about understanding where each model shines so you can pick the one that makes the most sense for you.
Think of it this way: an hourly rate protects you from the unexpected, while a flat fee gives your client peace of mind and rewards you for being efficient. Let's break down the real-world situations where you'd use one over the other.
When to Use an Hourly Rate
Charging by the hour is your safety net. It's the perfect choice for projects where the scope is a bit fuzzy, highly experimental, or you just know it's going to evolve. This method guarantees you're paid for every single minute you put in, which is a lifesaver with complex or indecisive clients.
Imagine a startup asks you for an experimental animation. They have a rough idea but need you to figure out the character style, storyboard, and motion from the ground up. You can bet there will be tons of feedback and changes along the way. Slapping a flat fee on that project is a huge gamble—you could easily end up working for pennies if the revisions start piling up.
An hourly rate creates a direct and honest link between your time and your client’s investment. It’s the ultimate protection against scope creep and ensures that even the most complex, revision-heavy projects remain profitable and fair.
An hourly rate is your best bet for:
- Projects with an unclear final vision: If a client ever says, "I'll know it when I see it," your only sane response is an hourly rate.
- Highly collaborative work: Perfect for when you'll be working closely with the client through multiple rounds of development and feedback.
- Experimental or new mediums: If you're trying a technique for the first time, you have no real way of knowing how long it will take. Don't guess—charge hourly.
The main downside? Some clients get nervous about an open-ended budget. You can put them at ease by giving a detailed time estimate upfront and promising to send regular progress updates. No one likes a surprise invoice.
When a Flat Fee Makes Sense
A flat fee, or project-based pricing, is brilliant for work you can predict. It gives clients the comfort of knowing the final cost right from the start, which is a massive selling point. For you, it's a chance to be rewarded for your efficiency.
If you know a certain type of portrait takes you about eight hours, but your flat fee is built on a ten-hour estimate, that extra two hours of value becomes pure profit. You got faster and better, and you deserve to earn more for it.
This model is king when you have a system down. Let's say you specialize in 8x10-inch pet portraits from photos. You've done hundreds. You know exactly how long the sketching, painting, and finishing touches take. Offering a flat fee of, say, $450 for this makes the whole transaction clean, simple, and incredibly appealing to a customer.
Go with a flat fee when:
- The scope is crystal clear: You and the client have agreed on every single detail—size, subject, style, background—before a single brushstroke is made.
- You have a repeatable process: You’ve done this type of project so many times you could do it in your sleep. You know your timing inside and out.
- The risk of major revisions is low: Your contract should clearly state your revision policy, like including one round of minor tweaks for free.
Of course, the risk is all on you. If you underestimate your time or a "simple" project suddenly gets complicated, you have to eat those extra hours. That’s why you should only offer a flat fee when you are absolutely confident you can nail the time estimate.
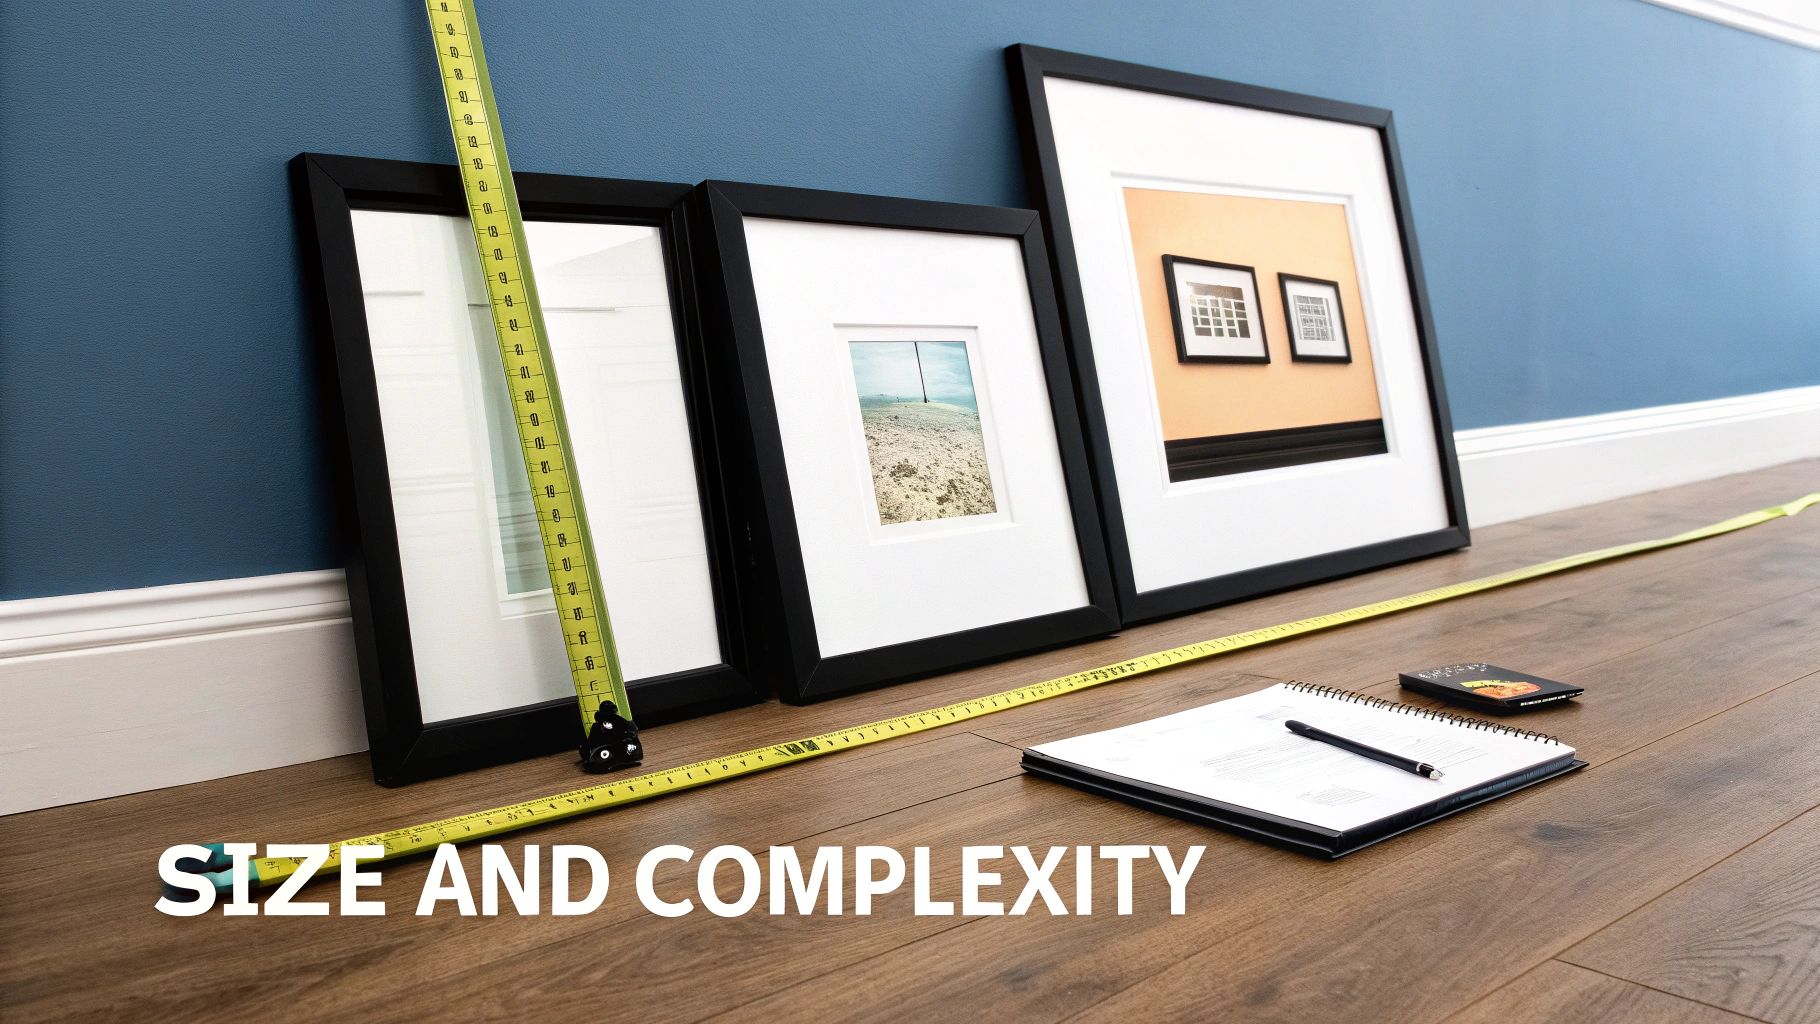
Factoring in Size, Complexity, and Subject Matter
Okay, you’ve got your foundational pricing figured out. Now for the fun part—making that pricing smart enough to handle the real world. Because let's be honest, not all commissions are created equal. A simple 5x7 inch sketch of a daisy is a world away from a massive 24x36 inch oil painting of a crashing wave on a rocky coast.
Your pricing has to reflect that reality.
This is where we build in some flexibility. We're going to create a simple, logical surcharge system that accounts for the specific demands of each project. This ensures your most challenging work also becomes your most profitable.
Size and Medium Tiers: The Easy Win
The most obvious variable is the physical size of the piece. Bigger art uses more paint, a bigger canvas, and almost always takes more time. The cleanest way to manage this is to create a few standard size tiers that you can list right on your website or commission info sheet.
A painter's tiers might look something like this:
- Small (e.g., 8x10"): Base Price
- Medium (e.g., 16x20"): Base Price + 50%
- Large (e.g., 24x36"): Base Price + 120%
This approach does two brilliant things: it gives potential clients an instant idea of your pricing, and it saves you from having to invent a new quote from scratch for every single inquiry. It shows you're a pro who has put thought into your business.
How to Price for All Those Fiddly Details
Complexity is a bit more subjective, but it’s absolutely critical for protecting your bottom line. How complex is a piece? It all comes down to the level of detail, the number of subjects, and how intricate the background is.
Imagine you're a pet portrait artist. Your base fee might cover a single animal against a simple, solid-colored background. But what happens when the client wants their two dogs, Fido and Sparky, sitting in their favorite armchair in front of the fireplace? Every one of those extra elements adds hours to your workload.
So many artists fall into the trap of just absorbing the extra work, thinking it's all part of the "job." That's a fast track to burnout and feeling undervalued. A surcharge system isn't about being greedy; it's about getting paid fairly for the extra hours and skill you pour into a more demanding piece of art.
Think of it like a menu of add-ons. It’s transparent for the client and helps them understand exactly what they're paying for. This approach can be a real eye-opener for them, too. For artists still dialing in their pricing, seeing what goes into hiring a custom pet portrait artist from a client's perspective can offer some great insights.
Real-World Examples of Surcharges
Let's make this tangible. These aren't just random numbers; they're a starting point you can tweak for your own art style and process. The goal is to tie every surcharge to a real increase in your working time.
If you're a Portrait Artist:
- Adding a Second Person/Pet: This is a big one. You're nearly doubling the most difficult part of the painting. A surcharge of +50% to +75% of the base price is perfectly reasonable.
- Detailed Background (Architecture, a forest, a cityscape): A complex background can take just as long as the main subject. Charging an extra +40% to +60% is fair.
- Hands in the Portrait: Anyone who's ever drawn or painted knows hands are tricky. They take time to get right. Many artists add a small +15% surcharge just for including them.
If you're a Landscape or Wildlife Artist:
- Complex Textures (Crashing waves, dense foliage, rocky cliffs): These details require patience and specialized techniques. An extra +25% makes sense.
- Multiple Animals: Just like with portraits, each additional creature adds significant work. Consider +40% for each extra primary subject.
- Man-Made Objects (Boats, cabins, bridges): Getting perspective and straight lines right adds a layer of technical challenge. A +20% surcharge is a good way to cover that extra effort.
Here’s a simple table to show how you can visually organize these ideas for your clients, making your pricing clear and easy to understand.
Example Surcharge Tiers for Art Commissions
| Factor | Tier 1 (Base Price) | Tier 2 (+20%) | Tier 3 (+40%) |
|---|---|---|---|
| Size | 8x10 inch | 11x14 inch | 16x20 inch |
| Subject | Single Subject | Full Body Subject | Two Subjects |
| Background | Simple/Tonal | Moderate Detail | Highly Detailed |
By combining these factors, a 16x20 inch painting of two pets with a detailed background would be priced significantly higher—and more fairly—than a simple 8x10 headshot. This tiered system is the key to creating a pricing model that actually scales with your effort.
Let's Talk About Commercial Use and Licensing (This is Where the Real Money Is)
When a client commissions a piece, what are they really buying? This is a question I see so many artists trip over, and it's one of the most financially important parts of pricing your work. It's easy to think you're just selling a physical painting or a digital file, but in doing so, you might be giving away valuable intellectual property for free.
Getting this right is how you unlock serious new income streams. The secret is knowing the massive difference between a commission for personal use and one meant for commercial use. Nail this distinction, and you’ll not only protect yourself but also get paid for the full value of your creativity.
Personal vs. Commercial Use: The Core Difference
It’s pretty simple when you break it down. Personal use means the art is purely for private enjoyment. Your client is hanging that pet portrait in their living room, gifting a landscape to their mom, or maybe using an illustration as their personal social media avatar. The key is that no one is making money from your art.
Commercial use is the complete opposite. This is when your client uses your artwork to promote a product, service, or brand to make a profit. Think t-shirt designs, book covers, a logo for their small business, or an illustration for their company's website.
If your art helps someone else make money, you absolutely deserve a bigger piece of that pie.
Forgetting to price for commercial use is like a musician selling a song to a movie studio for the price of a single CD. You're not just selling the file; you're selling the right to use that song to attract millions of viewers and generate box office revenue. The value is exponentially higher.
This isn't just a small detail; it's fundamental to how the art world operates. The global art market was valued at about $67.8 billion, with a huge chunk of that coming from primary sales where the potential value of the art is a massive factor. Once your art enters the commercial world, its value is tied to its power to generate revenue, not just how nice it looks. You can get more insights on the state of the art market to see how these sales shape the industry.
How to Actually Price for Commercial Rights
Okay, so how do you turn this concept into real numbers on an invoice? The industry standard is to apply a multiplier to your base commission price. This isn't just a random number you pull out of a hat; it's a calculated way to account for the extra value your art brings to a business.
This multiplier usually falls somewhere between 2x to 10x your base price, all depending on how the client plans to use the art.
Let's look at some real-world examples:
- A small, local coffee shop wants to use your art on their paper cups? That might be a 2x multiplier.
- A national brand wants to use your illustration in a major advertising campaign? You're easily looking at a 5x to 10x multiplier, or even a completely custom licensing agreement.
The multiplier you choose will depend on a few key things you need to ask about:
- Exclusivity: Are they the only ones who can ever use this image? Or can you resell it or license it to others down the line? Exclusive rights always cost more.
- Duration: Are they buying the rights for one year, or forever (in perpetuity)? The longer they get to use it, the higher your fee should be.
- Territory: Will the art be used just in their city, across the country, or globally? A wider reach means more value, which means a higher price.
- Type of Use: Is this for a single banner on their website, or will it be printed on thousands of t-shirts and mugs? The more extensive the use, the more you charge.
Negotiating Royalties for Long-Term Wins
For some projects, especially anything involving merchandise, a simple flat multiplier might not be the best approach for you. In these situations, you can often negotiate an ongoing royalty agreement. This means you get a percentage (typically 5-15%) of the revenue from every single product they sell that features your art.
This can be an incredibly smart move for popular products. While you might get a smaller payment upfront, you create a passive income stream that could literally pay you for years to come. If you go this route, just make sure your contract clearly spells out the royalty percentage, the payment schedule, and your right to audit their sales records to make sure you're getting paid fairly.
Crafting Your Commission Contract and Payment Terms
https://www.youtube.com/embed/HFVe4AdiO3w
All that work you did figuring out your pricing doesn’t mean a thing if you don't have a professional process to seal the deal. This is where a clear contract and solid payment terms come in—it’s what separates a working artist from a hobbyist.
This isn’t about hitting clients with intimidating legal paperwork. It's about building trust and making sure everyone is on the same page from day one. A simple, straightforward agreement is your best friend here. It protects you from the classic headaches of scope creep, never-ending revisions, and clients who ghost you. Even better, it shows clients you’re a serious professional, which gives them confidence in their decision to hire you.
The Non-Negotiable 50% Deposit
Before you so much as sketch a thumbnail or squeeze a tube of paint, you need to get a deposit. The gold standard across the industry is a 50% non-refundable deposit. You should treat this as a golden rule for your business.
Why is this so important? It does two critical things. First, it immediately covers your upfront costs for materials and a chunk of your time. This way, you’re not left empty-handed if the client bails. Second, it gets a real commitment from the client. Someone who has put money down is invested in the process and is much more likely to be a fantastic partner to work with.
Think of the deposit as the official handshake that kicks things off. It's the client's way of saying, "I'm all in," and it's your green light to start pouring your creative energy into their artwork.
If a potential client balks at paying a 50% deposit, that’s usually a big red flag. Standing your ground on this policy protects your time and quietly reinforces the value of your work.
Building Your Commission Agreement
Your agreement doesn't need to be 20 pages of dense legalese. It just needs to clearly lay out the "who, what, when, and how" of the entire project. When you're putting your contract together, be sure to spell out the payment terms and exactly what you'll be creating. You can find helpful resources online, including a great artist contract template, to get you started.
Make sure your contract clearly covers these key areas:
- Detailed Scope of Work: Get really specific here. What’s the exact size, medium, subject, and color scheme? Don't just write "pet portrait." Instead, describe it like this: "One 16x20 inch acrylic painting of a single golden retriever, head and shoulders only, against a solid royal blue background, based on the approved reference photo." That's the level of detail you're aiming for.
- Project Timeline: Give them an estimated completion date and outline any key milestones. For example, let them know when they can expect to see an initial sketch for approval.
- Revision Policy: This one is huge. State exactly how many rounds of changes are included in the price. A common approach is one initial sketch review and one minor color tweak on the final piece. Any changes beyond that should be billed at your standard hourly rate.
- Cancellation Terms: What happens if the client needs to cancel? Your contract should clearly state that the 50% deposit is non-refundable to cover your time and materials. On the flip side, if you have to cancel for any reason, you should refund their deposit in full.
Payment Schedules for Larger Projects
For bigger, more involved commissions, a simple 50/50 payment split might not be the best fit. If you're looking at a project that will stretch over several months, think about breaking the payments into milestones. This is great for your cash flow and lowers the risk for everyone on a high-value piece.
For example, on a major project like a large-scale custom acrylic painting, you could structure the payments like this:
- 50% Deposit: Paid right at the beginning to book the work.
- 25% Milestone Payment: Paid once the final sketch or underpainting is approved.
- 25% Final Payment: Paid upon completion, right before you package and ship the artwork.
Using a milestone approach keeps you compensated as you move through the major stages of the project, making the whole experience feel more secure and professional for both you and your client.
Answering Your Top Commission Pricing Questions
Even with a solid pricing strategy, some real-world situations can feel a little tricky to navigate. When you're dealing with clients and galleries, new questions always pop up. Let's walk through some of the most common ones I hear from other artists so you can handle them with confidence.
What Should a Beginner Charge for a Commission?
When you're just starting out, your main goal is simple: cover your costs and pay yourself something fair for your time. The most important rule? Never work for free.
Calculate what you actually spend on materials, then set a modest hourly rate for your labor. Even if you just start with your local minimum wage, it gets you into the crucial habit of valuing your time and talent from day one. As you build your skills and start getting more requests, you can begin raising your rates every six months or so. It's so much better to start with a fair, entry-level price than to undervalue your art from the get-go.
How Do I Handle a Client Who Keeps Asking for More Changes?
This is where a good contract becomes your best friend. Seriously, the best way to handle this is to prevent it from happening in the first place by setting clear expectations upfront.
Your commission agreement needs to spell out exactly how many rounds of revisions are included in the price. A really common and fair approach is to offer:
- One initial sketch review to lock down the composition and all the major elements.
- One final color check-in before you apply the final varnish or seal the piece.
Anything beyond that is extra work, and your contract should state that it will be billed at your standard hourly rate. Mention this politely when you kick off the project and have it written down. This isn't about being difficult; it's about setting professional boundaries and preventing that dreaded "scope creep" from taking over your schedule and your profits.
Think of your contract as a communication tool, not a barrier. It lays out the creative partnership for everyone to see, protecting both you and your client by making sure there are no surprises.
Should My Studio Prices Match My Gallery Prices?
Yes, one hundred percent. Consistency here is critical for maintaining the value of your art and your reputation. The price for a piece should be the same whether a collector finds it in a gallery or buys it directly from your studio.
If a gallery takes a 50% commission on a sale, the retail price they list is the price you should be charging for a similar piece. It’s tempting to offer a "studio discount," but this can really backfire. It not only signals to serious collectors that your work's value is negotiable, but it can also sour your relationships with the galleries that work hard to represent you. Always price your work for its full value, no matter where it's being sold.
Is It a Good Idea to Post My Prices on My Website?
Absolutely! I can't recommend this enough. Putting your prices out there is a smart, professional move. It acts as an instant filter, attracting potential clients who already understand and can afford your work. This one simple step will save you so much time writing emails back and forth with people who were never going to be the right fit.
You don't need to list every single price for every possible option. A great way to do it is by listing "starting at" prices for different commission types (like pet portraits vs. landscapes) or offering a link to a more detailed PDF price list. This kind of transparency tells people you're a confident, established artist, and that builds trust right away.
Feeling inspired to commission a piece that captures the spirit of wildlife or the soul of a beloved pet? William Tucker Art specializes in creating vibrant, detailed portraits that become treasured heirlooms. Explore the collections and start your own commission journey at https://williamtuckerart.com.