
Your dog has just done something perfect. Maybe it was the sideways head tilt after you said their name, the relaxed open mouth after a walk, or the quiet look they give you from the sofa. You lift your phone, but the result shows a soft eye, a bright window behind them, and half a laundry basket in the background. The moment was real. The photo doesn't show it.
That's the difference between a snapshot and a source image for wall art. A strong reference photo gives an artist enough information to preserve your dog's expression, coat, proportions, and personality. The camera still matters, but the bigger shift is learning to photograph what your dog looks like, not just what they happen to be doing.
What Makes a Dog Portrait Photo Different
A busy dog can turn a simple portrait attempt into a sequence of blurred ears, disappearing tails, and treat crumbs on the floor. You might get twenty frames and still find that the one with the best expression has a leash crossing the chest or a sharp patch of sunlight over one eye. That's normal. Dogs move, sniff, blink, and lose interest quickly.
A portrait-worthy reference image has a different job from a casual record. It should let an artist read the dog's face immediately. The eyes need visible detail, the nose should have a clear shape, and the expression should communicate something beyond “the dog was present.” A slight head turn, a lifted ear, or a calm direct gaze can tell more about character than a perfectly centered pose.
Read the face before the frame
Artists need more than overall resemblance. They need clean eye and nose detail, coat color that hasn't been distorted by glare, and an expression that can hold attention once enlarged on a wall. A technically sharp photo can still make weak art if the dog looks tense, distracted, or emotionally blank.
Start by slowing down. Kneel to eye level, remove obvious distractions, and wait for a natural pause instead of photographing through every movement. Fewer deliberate frames often produce more useful options than a long burst taken from standing height.
Practical rule: If you can describe what the dog is feeling from the eyes and mouth alone, the photo is probably giving an artist something valuable.
A source image doesn't have to be formal. A dog looking toward a familiar person, resting after play, or standing alert in a favorite place can all work. The key is that the pose, light, and expression reveal the dog clearly enough for the final artwork to feel like that individual animal, not a generic breed portrait.
Lighting That Flatters Every Coat
Light determines whether a coat looks dimensional or like a flat block of color. For most dog portrait photos, open shade is the safest starting point. Stand under the edge of a tree canopy, beside a building, or in another bright shaded area where the dog faces the open sky. The light stays soft, while the face remains bright enough for the eyes to read.
Overcast weather works in much the same way. Clouds spread the light across the scene, reducing hard shadows around the muzzle and eyes. This is especially useful for black coats, which can lose facial detail in deep shade, and white or cream coats, which can show harsh clipped highlights in direct sun.
Use warm light with control
Golden hour can add a warm rim along the ears, shoulders, and back. Position the dog so the low sun comes from the side or slightly behind, then turn their face toward the brighter open part of the sky. That arrangement gives the coat a gentle edge glow without putting the sun directly into the eyes.
Midday sun usually creates problems rather than drama. Overhead light can leave dark hollows under the brow and muzzle, while direct reflections bleach pale fur. If you have no choice but to work outside at that time, move into shade and check the face before shooting. The dog should be able to look toward you without squinting.
For indoor reference photos, place the dog near a bright window, preferably with one consistent daylight source. A north-facing window can provide soft illumination, and a simple white reflector or sheet opposite the window can lift shadows under the chin. Turn off nearby lamps if their warmer color mixes with daylight. Mixed color temperatures make coat color harder to judge later.
Photographers who want a deeper technical foundation can review this guide to top photography lighting for creators before adapting the principles to a moving subject.
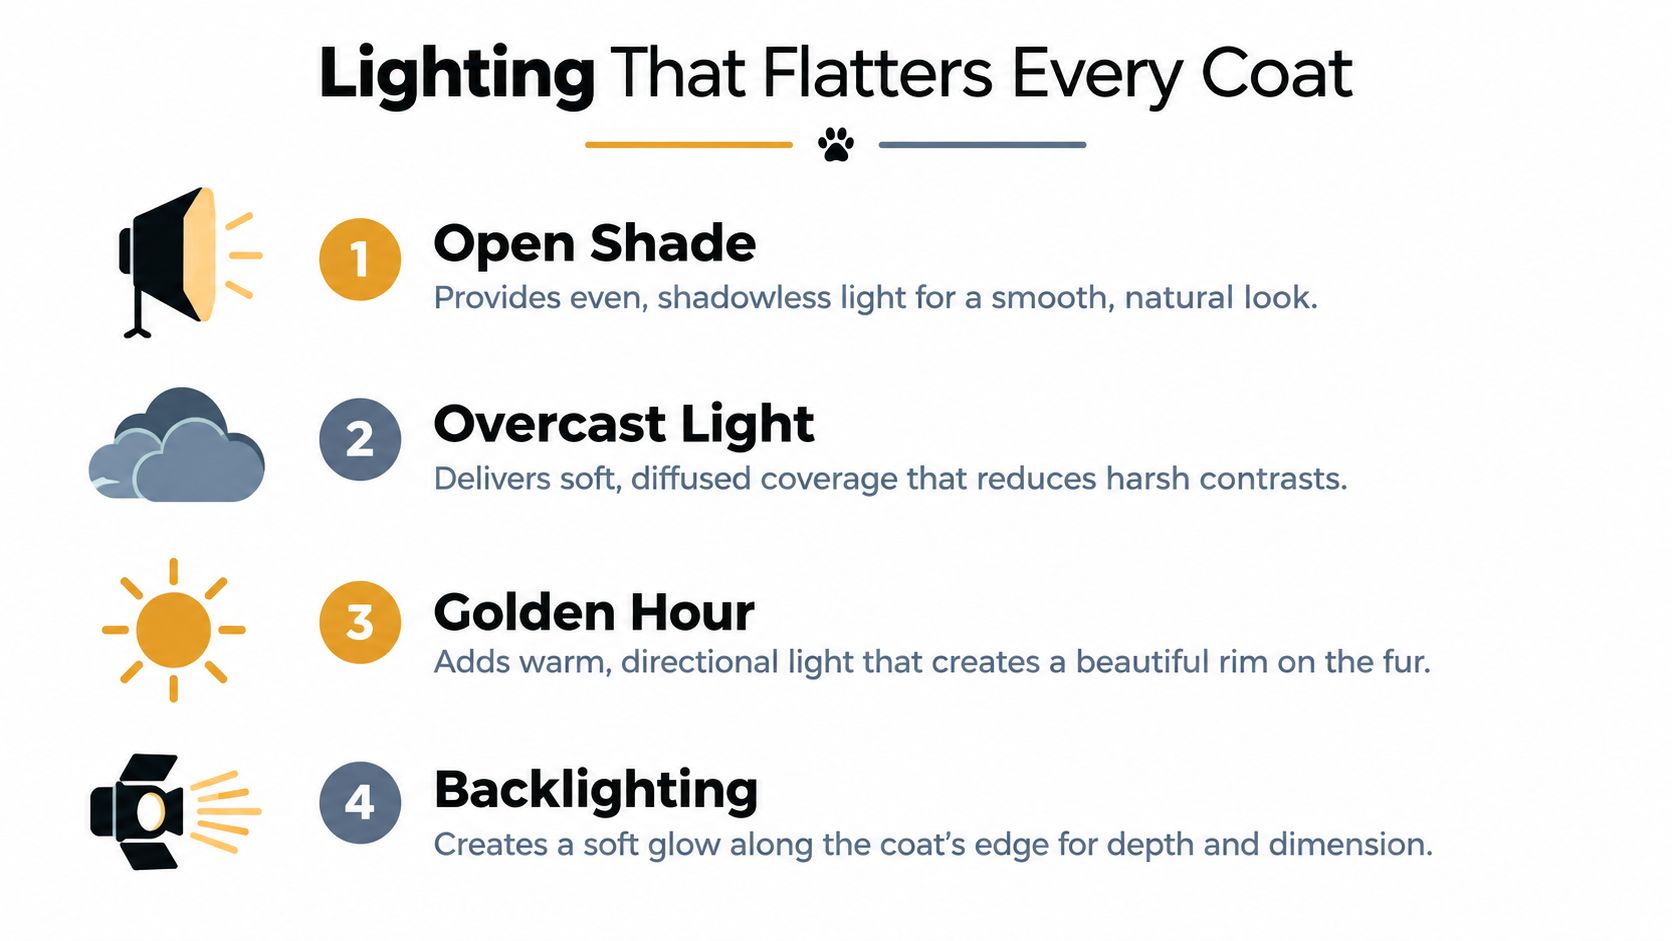
Soft, directional light from the front or side almost always beats overhead light or a fully backlit face when the image will guide a painting.
Posing and Getting Real Expressions
Dogs rarely hold a pose because you asked for one. They hold it because something interests them, something rewards them, or they've become comfortable enough to stop managing the situation. Your job is to create a brief window in which their natural expression faces the camera.
Get low first. Eye-level framing gives the viewer a direct relationship with the dog and shows the shape of the muzzle without exaggerating the chest or forehead. Place a small treat near the lens rather than waving it high above the camera. The dog's eyes will come forward, and the face will stay more balanced in the frame.
Invite the expression instead of forcing it
Use the dog's name, a quiet kissy sound, or a soft squeaker to lift the ears. Make the sound once, then wait. Repeating it rapidly teaches the dog to ignore it, while a single unexpected cue can create the alert look you need.
A relaxed open mouth often appears after a short walk or a few seconds of gentle play. A closed mouth can work beautifully when the dog's eyes remain soft and engaged. The most useful expression isn't always the biggest smile. It's the one that feels recognizably theirs.
Watch for common near-misses:
- Blinking: Keep shooting through the moment, but don't choose the frame with closed eyes just because the ears look perfect.
- Tongue flicks: A quick tongue can change the mood of the entire portrait, so check the mouth at full image size.
- Sound chasing: If the dog turns toward every noise, use a familiar cue from directly beside the camera instead of calling from across the room.
- Pinned ears: Ears pulled back can signal different emotional states, so this guide to what dog ears pinned back means can help you read the pose rather than mislabeling it as calmness.
Capture short bursts when the dog reaches the expression you want, especially at the top of a tail wag or just after the head turns toward you. Reward between attempts, then pause. A thirty-second settling period often works better than adding more sounds and treats to a dog who has already tuned out.
For more ideas on preparing a pet for the camera, see these tips for photographing pets.
The sequence below shows how small changes in attention and timing can affect the finished frame.
Composition and Background Choices
A dog can have a wonderful expression and still disappear inside a poor composition. Before you press the shutter, look past the face. Check for fence shadows, bright patches, leash loops, bins, toys, and wall edges that compete with the subject.
The rule of thirds gives you a useful starting point. Place the dog's eyes near an upper intersection rather than forcing the face into the exact center. If the dog turns left, leave a little more space on the left side of the frame. That lead room lets the pose breathe and gives the viewer somewhere to follow the gaze.
Choose backgrounds that support the subject
Eye-level framing usually creates the strongest sense of connection. A slightly higher angle can suit a puppy because it shows more of the small body and creates a gentle, protective viewpoint. Neither angle is automatically right. Choose the one that explains the dog's character and preserves useful body shape.
Simple textures often work better than blank studio walls. Grass, a plain door, weathered barn wood, or a softly blurred hedge can add context without competing with the face. Keep strong lines away from the head, and move the dog rather than trying to repair every distraction later.
Cropping matters for artwork because the source image may become much larger than a phone screen. Preserve enough of the paws and tail to understand the pose, and avoid cropping directly through joints when you can. If the composition is tight, crop with intention around the chest or shoulders instead of accidentally cutting off a foot.
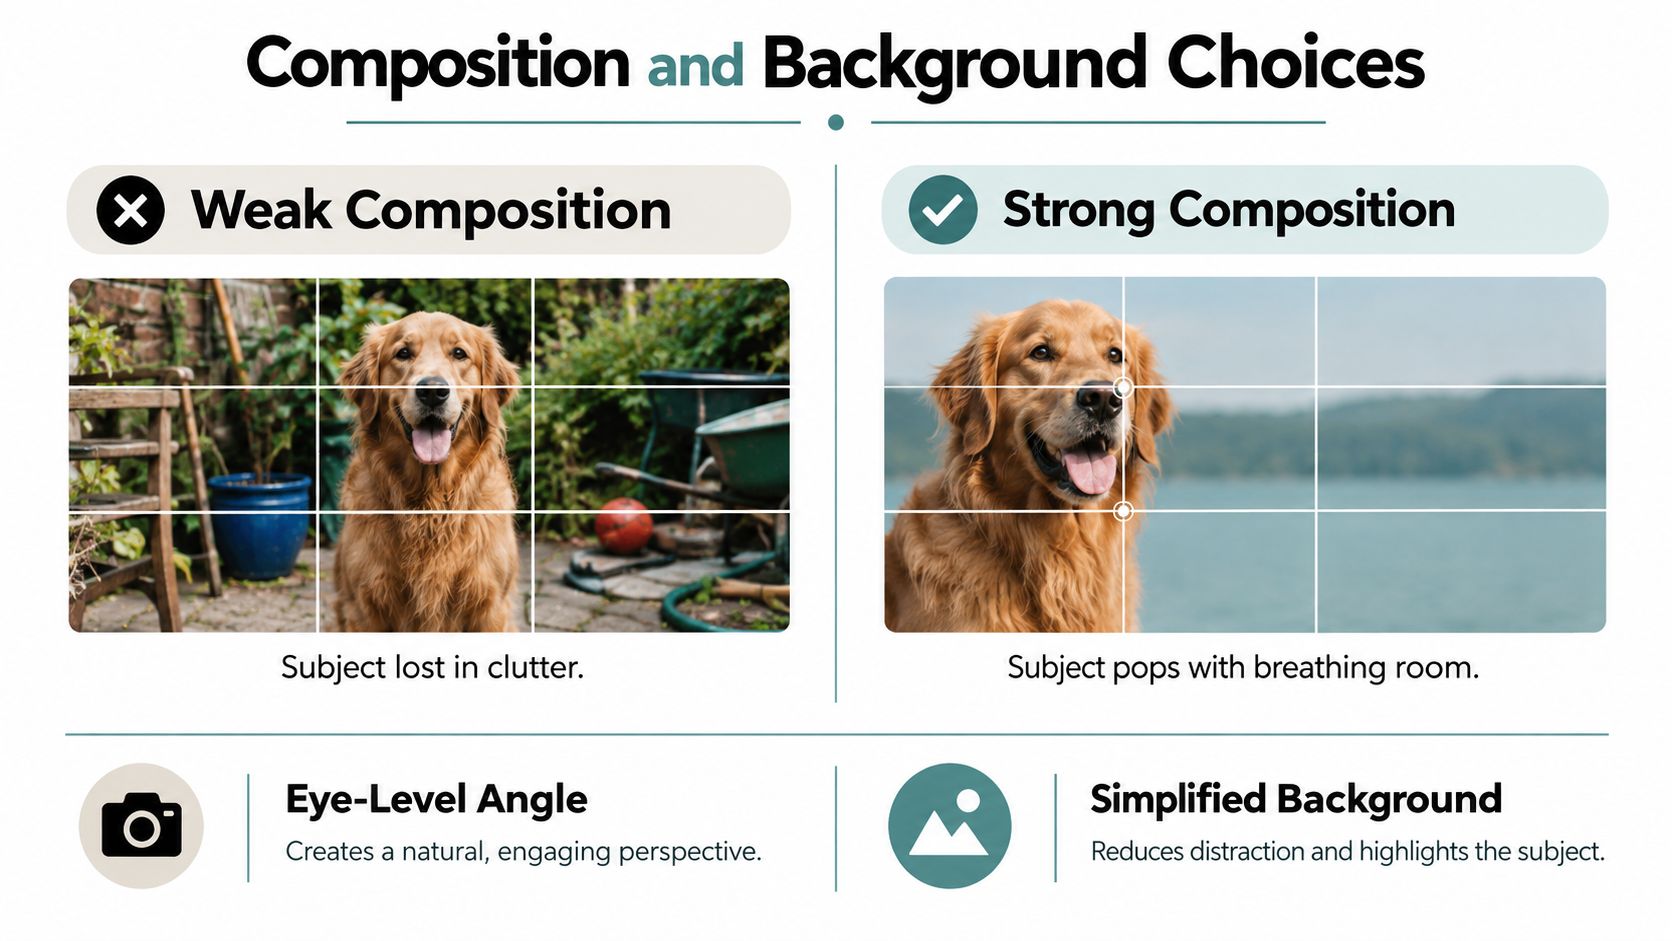
A useful reference image balances face clarity, body language, and breathing room. The best background is often the one you stop noticing after a few seconds because the dog has taken over the frame. Artists working from photographs can also use these animal reference photos for artists to compare how different framing choices support a finished piece.
Camera Settings That Tame a Moving Subject
Set the camera for the dog in front of you, not for an imaginary studio subject. A calm older dog may hold still long enough for a slower shutter speed, while a young retriever can move from sit to sprint between blinks.
For a soft background with enough depth to keep the face usable, start around f/2.8 to f/4. This range can separate the dog from the setting, but it still demands accurate focus. If the head is angled, one eye may sit farther from the camera than the other. A wider aperture can leave the far eye soft, so stop down when both eyes need equal clarity.
Match shutter speed to behavior
For an active dog, use at least 1/500s, and often 1/1000s when the subject is running or jumping, as recommended in this expert guidance on photographing dogs. A calm sitter may tolerate 1/250s, but that setting gives you less protection against a sudden head turn or wagging tail.
Choose continuous autofocus or subject-tracking autofocus instead of single-shot focus. Place the focus point on the nearest eye and keep the camera moving with the dog. Burst mode helps because the useful expression may last for only a fraction of a second.
Exposure needs attention on pale coats. Bright fur can fool the meter into producing an image that looks washed out, so check the highlights and reduce exposure compensation when necessary. Dark coats need the opposite review. Zoom into the eyes and muzzle before deciding that the exposure is acceptable.
Phone cameras can produce strong source images, but portrait mode may blur ears, whiskers, or the edge of a tail when the software misreads the outline. Tap the face to focus, lower exposure slightly if the coat looks too bright, and avoid digital zoom when you can move closer safely. The motion-control recommendations for pet photography also reinforce the value of fast shutter speeds, burst shooting, and tracking focus for unpredictable movement.
Picking the Photo That Becomes Art
Taking a technically good photo and choosing a strong art reference are separate tasks. Start your review at full size, not as a grid of tiny thumbnails. Check the eyes first, because a slightly soft paw is often harmless while a soft nearest eye can make the entire portrait feel disconnected.
Then look at the expression. Does the dog seem engaged, relaxed, curious, or plainly serious? A frame with genuine character can be more valuable than a perfectly sharp image in which the dog looks over-trained or emotionally absent.
Use a shortlist, not a single winner
Compare images by asking a few practical questions:
- Face: Can you see the eye color, eyelid shape, nose texture, and muzzle structure?
- Expression: Does the look feel like the dog at home, or like a moment of forced attention?
- Edges: Are ears, whiskers, paws, and tail separated clearly from the background?
- Light: Does the direction of light describe the planes of the face without hiding important features?
- Story: Would this pose still feel meaningful if the viewer knew nothing else about the dog?
Lighting also suggests an artistic direction. Soft, wraparound light supports a realistic treatment because it gives even information across the face and coat. Strong side light can support a more painterly interpretation, with deeper shadow and clearer shape changes. A dramatic source image may be less useful for a naturalistic portrait but excellent for expressive wall art.
Don't discard every imperfect frame. A tiny movement can add life, and a slightly open mouth or uneven ear position may reveal more personality than formal symmetry. The final choice should give the artist enough information to work accurately while leaving room for interpretation.
If you're considering a commissioned piece, this overview of a portrait from photos shows why the source image affects the direction of the finished work. Build a shortlist of several related frames rather than chasing one supposedly flawless photograph.
Putting It All Together on Your Next Shoot
Treat the next session as a short sequence, not a marathon. Scout the location before bringing the dog into place, find the softest light, and remove the background distractions you can fix in advance. Once the dog arrives, let them sniff and settle before raising the camera.
A simple rhythm works well:
- Set the scene. Choose shade, overcast light, or a controlled window position, then check the background from the dog's eye level.
- Let the dog settle. Give them time to investigate instead of demanding eye contact immediately.
- Find the first expression. Use a treat near the lens, the dog's name, or one familiar sound.
- Shoot briefly. Capture a short burst when the head turns toward you, then reward and lower the camera.
- Change one thing. Move your body, not the dog, to test a cleaner angle or a little more lead room.
- Stop while cooperation remains. A willing dog gives you better expressions than a tired dog enduring one more attempt.
A low blanket or wooden stool can help adjust the body line and hide a distracting patch of ground. Keep props quiet and familiar. The object should support the composition, not become the most interesting thing in the frame.
The two habits that make the biggest practical difference are simple: get down to the dog's eye level, and take several frames whenever the dog turns back toward you. Those choices reveal the face, preserve natural personality, and give an artist more than a record of where the dog happened to stand.
Dog portrait photos became commercially significant within the wider pet photography market, with one industry report estimating the dog segment at about $828 million in 2025, or 46.0% of global pet photography revenue (Dataintelo's pet photography market report). The history is just as established. Pet photography dates to the earliest decades of the medium, with early dog-related images and portraits appearing in the 1840s and 1850s, as documented by the Science and Media Museum's history of pet photography. A thoughtful source photo connects that long tradition with something personal, your dog's particular face, posture, and presence.
William Tucker Art creates custom wildlife and pet artwork from reference photos, using detailed subjects and expressive backgrounds to preserve the character that makes an animal memorable. If you have a source image with a meaningful expression, visit William Tucker Art to explore the available pet portrait work and begin planning a piece for your home.