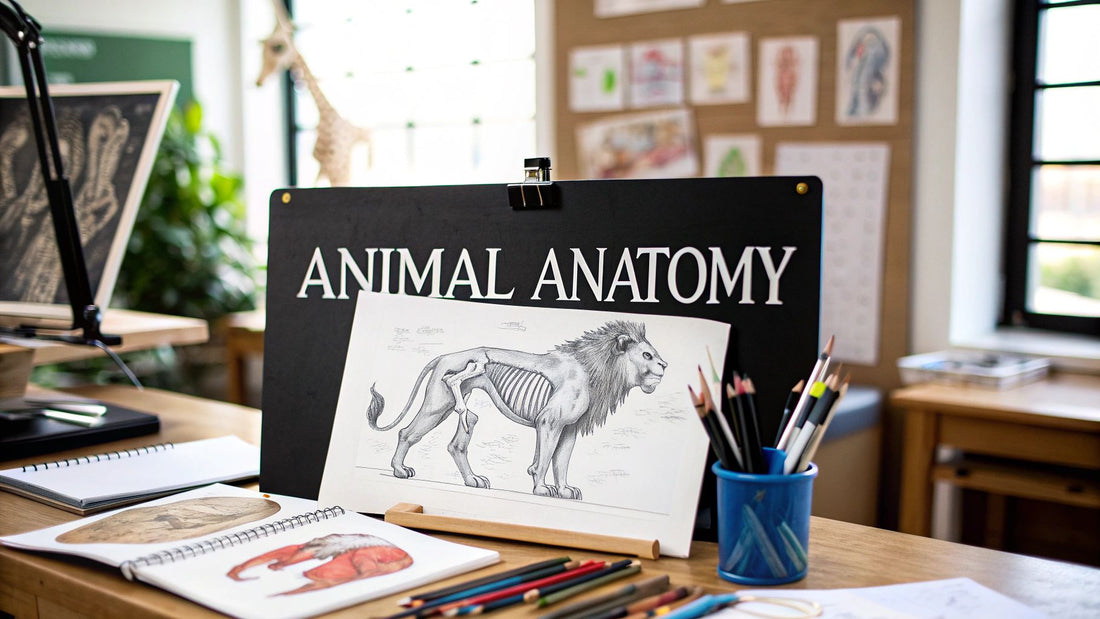
Studying animal anatomy is the secret to taking your wildlife drawings from stiff and generic to something truly alive. It’s not about becoming a biologist or memorizing every single bone. It's about getting a feel for the underlying structures—the skeleton and muscles—that control how an animal looks, stands, and moves. Once you have that, you can draw from your imagination and really capture a creature's spirit.
Why Anatomy Is Your Secret Weapon
Let's be real for a second. We've all been there. You set out to draw a powerful wolf, but it comes out looking like a lanky, slightly off-kilter dog. That’s not a failure of talent; it’s usually a sign that you’re drawing what you think you see instead of what’s actually there under the skin and fur.
Think of it like getting a superpower: x-ray vision. Instead of just tracing the outline from a photo, you start seeing the ribcage that gives the torso its volume. You notice how the angle of the pelvis determines the position of the hind legs. This one shift in how you see is a total game-changer. Suddenly, you can dream up dynamic poses that look real because they follow the rules of a believable skeleton.
From Copying to Creating
Once you understand how a shoulder blade actually connects to the spine and the upper leg bone, you’re free. You're no longer a slave to your reference photo. You can draw that bear turning its head or that eagle landing on a branch with total confidence, even if your source image is completely static. This is the foundation that lets you truly create from your imagination.
This isn't a new idea, either. Back in the Renaissance, Leonardo da Vinci was obsessed with this stuff. He meticulously dissected horses, bears, and even monkeys to figure out how they worked on the inside. His detailed sketches of muscle and bone were a perfect blend of art and science, and they set a standard for realism that we're all still chasing today.
Building Believable Forms
Anatomy is also your best friend when it comes to showing form and weight. When you know where the big muscle groups are—the powerful haunches of a lion or the thick neck of a bull—your drawings gain a real sense of mass. Your animals stop looking like flat cutouts and start feeling like they have powerful bodies that occupy real space.
The goal isn't to become a veterinarian. It's to learn the 'why' behind the shapes, giving you the confidence to draw any animal, in any pose, with authenticity and life.
This knowledge is what makes for truly compelling art. By understanding the structural logic of an animal, you can capture its energy and personality in a way that just isn't possible otherwise. To see what I mean, take a look at how these principles come to life by exploring the captivating world of wildlife art. It’s this deep understanding that makes a drawing feel like it could leap right off the page.
Building a Believable Skeletal Framework
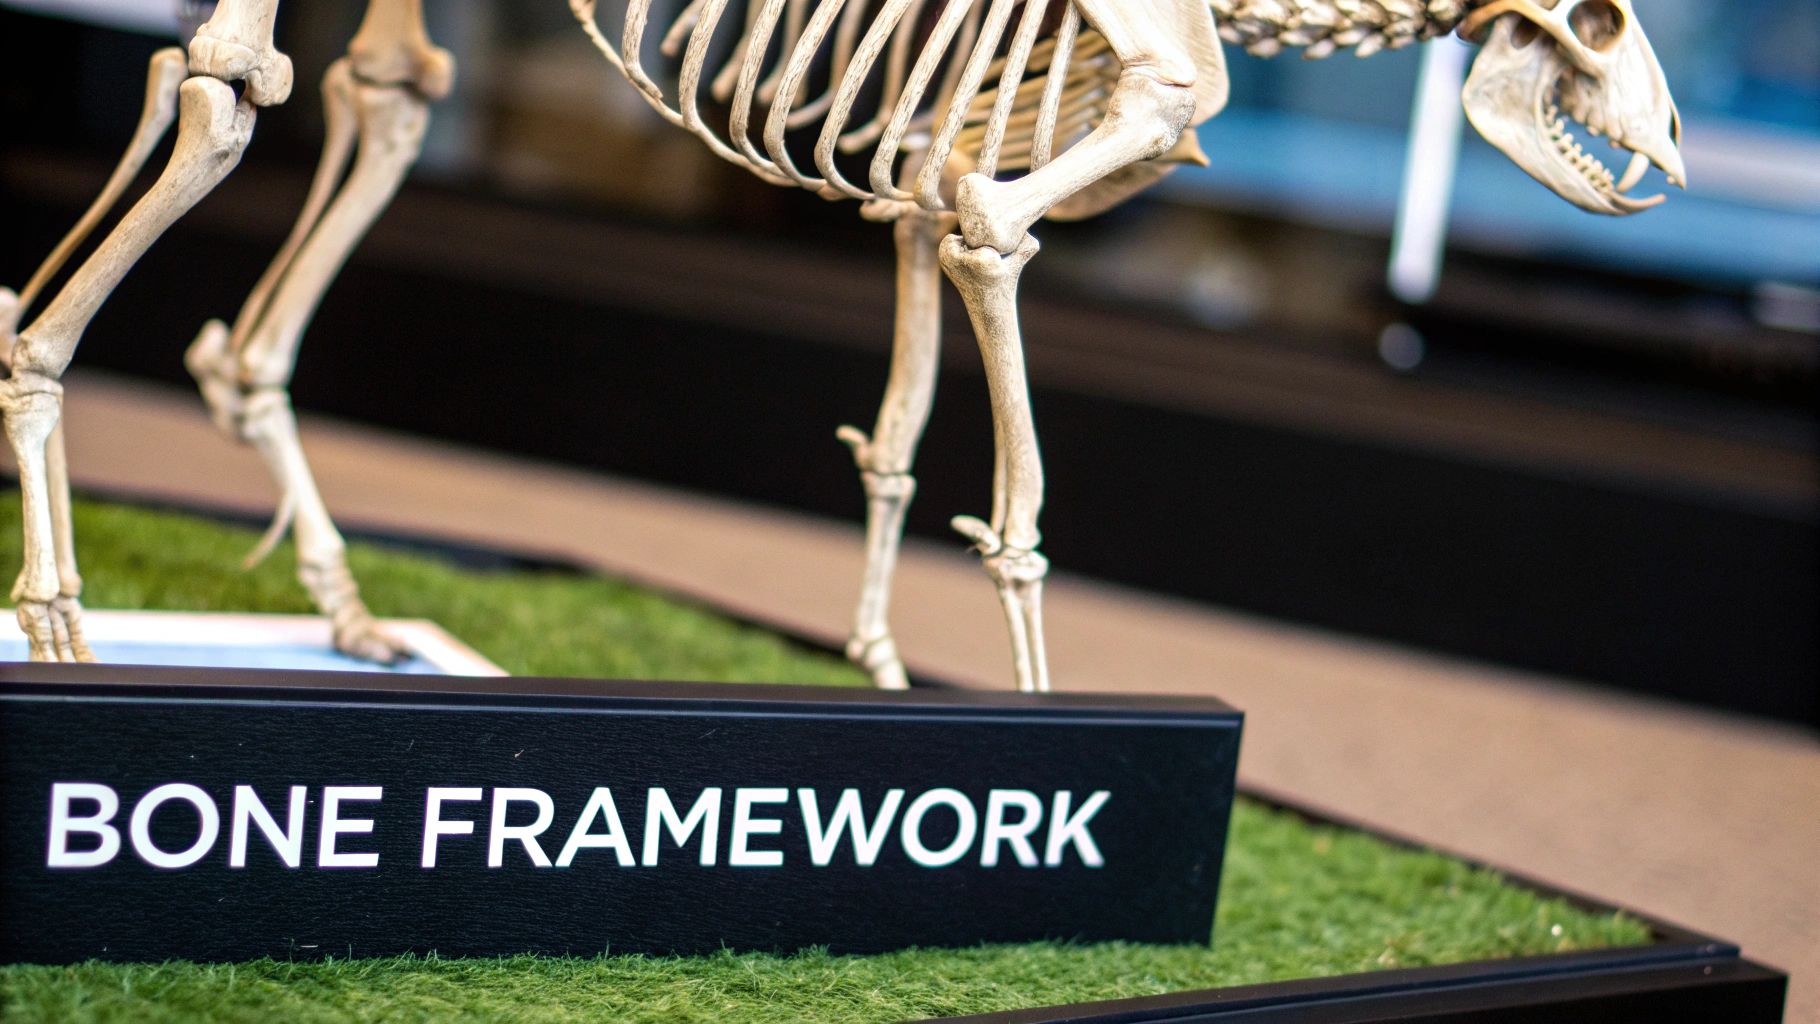
Every powerful animal drawing has an invisible secret: a solid, believable skeleton. Before you get scared off by complex biology charts, let's look at this differently. We're not trying to memorize every single bone. We're just learning to see the simple, foundational shapes that give an animal its structure.
Think of it like building a wire armature before you start sculpting. You wouldn't just slap a blob of clay on the table and hope for the best, right? You'd build a frame first. The skeleton is that frame for your drawing, and once you get the hang of it, everything that comes after—muscles, fur, tiny details—becomes so much easier and more convincing.
The best part? Most four-legged animals share a surprisingly similar blueprint. Once you grasp the core components, you can adapt them to draw almost anything from a tiny field mouse to a massive grizzly bear.
Simplifying the Core Components
For now, forget all the Latin names. We're going to focus on four primary masses that define any animal's body. These are your absolute building blocks, and you can sketch them out with simple spheres, ovals, or boxes.
- The Skull: This sets the stage for the head and the animal's identity. I usually start with a simple sphere for the cranium and then add a box or a wedge for the snout or jaw.
- The Ribcage: Think of this as a big, barrel-like or egg-shaped form. Its size and shape dictate the volume of the chest and play a huge role in the animal's overall posture.
- The Pelvis: This is a smaller, often blocky or wedge-shaped form at the rear. It’s the anchor for the hind legs and is critical for capturing powerful, dynamic stances.
- The Spine: This is the flexible connector. Just visualize it as a simple, curving line that links the skull, ribcage, and pelvis. This line dictates the entire flow and energy of the pose.
Starting with these simple shapes lets you establish proportion and gesture almost instantly. You can quickly block out an animal in motion by just drawing these four elements, creating a dynamic foundation in seconds.
Identifying Key Bony Landmarks
Once you're comfortable sketching the big masses, the next step is to find a few key bony landmarks. These are simply the points on the skeleton that are close to the surface, creating visible bumps or angles on the living animal. Think of them as anchor points for muscles and guides for your drawing.
Spotting these landmarks is what helps you place the limbs correctly and understand how they actually move. Instead of just guessing where a leg begins, you can pinpoint the top of the shoulder blade or the point of the hip.
A really common mistake I see is artists attaching the legs to the bottom of the torso's outline. In reality, the legs connect high up on the body—at the shoulder blade and the pelvis. Recognizing this one thing is a huge step toward more realistic animal art.
This isn't a new challenge, by the way. For centuries, artists struggled to depict anatomy accurately, with early illustrations often looking more symbolic than realistic. It wasn't until the 16th century that pioneers like Andreas Vesalius began championing direct observation, completely changing anatomical art with his 1543 masterpiece, De humani corporis fabrica. That shift toward scientific accuracy laid the groundwork for how we approach anatomy today. If you're curious, you can explore this artistic evolution in the history of anatomical illustration.
From Blueprint to Animal Proportions
This is where the magic really happens. You can take that same basic skeletal blueprint and transform it by simply adjusting the proportions. The fundamental structure of a cat and a horse is shockingly similar—the difference is all in the length and thickness of their bones.
Just look at how small changes create totally different animals:
| Feature | Cheetah (Sprinter) | Bear (Brawler) |
|---|---|---|
| Spine | Extremely flexible, allowing for a massive stride. | Thicker and more rigid for strength and stability. |
| Leg Bones | Long and slender for speed. | Short, thick, and powerful for digging and fighting. |
| Ribcage | Deep and narrow to accommodate huge lungs. | Wide and robust, providing a solid core. |
By simply tweaking the size of the ribcage or the length of the leg bones, you can turn your basic skeleton into a completely different species. This method, which is all about understanding animal anatomy for artists, frees you from just copying photos. It gives you the power to construct any animal you can imagine from the inside out, making sure your final drawing feels grounded, alive, and full of energy.
Adding Form with Major Muscle Groups
Okay, you’ve got a solid skeletal frame sketched out. Now for the fun part: sculpting the body and bringing your animal to life. This is where your drawing starts to feel like it has real weight, power, and presence.
The secret to animal anatomy for artists isn't about memorizing a textbook full of Latin names. Trust me, nobody has time for that. It’s about learning to see the large, functional muscle groups as simple, tangible forms that you can easily draw.
Think of it this way: muscles are just shapes that wrap around the skeleton you've already built. They stretch, they bunch up, they overlap, and they create all the beautiful, flowing contours of a living creature. We're going to zero in on these major muscle masses because they’re what define the animal's silhouette and tell the story of its power.
From Skeleton to Silhouette
Your goal is to train your eye to see these muscles as distinct, simplified shapes. Take a tiger's powerful hind leg, for instance. It's not just one big, complicated lump. It's really a series of teardrop and oval shapes that represent the quads, hamstrings, and calves, all anchored to the bones of the pelvis and leg.
When you simplify like this, you can block in the mass of an animal with speed and confidence. It helps you keep all that energy from your initial gesture sketch while adding believable volume. You're basically a sculptor working with a pencil, adding clay to your armature.
The best part? This method works for almost any animal. The major muscle groups are surprisingly consistent across different species. What changes are their size and proportions, which are dictated by how that animal lives and moves.
This image really breaks it down, showing how these foundational muscle layers are arranged on a basic animal form.
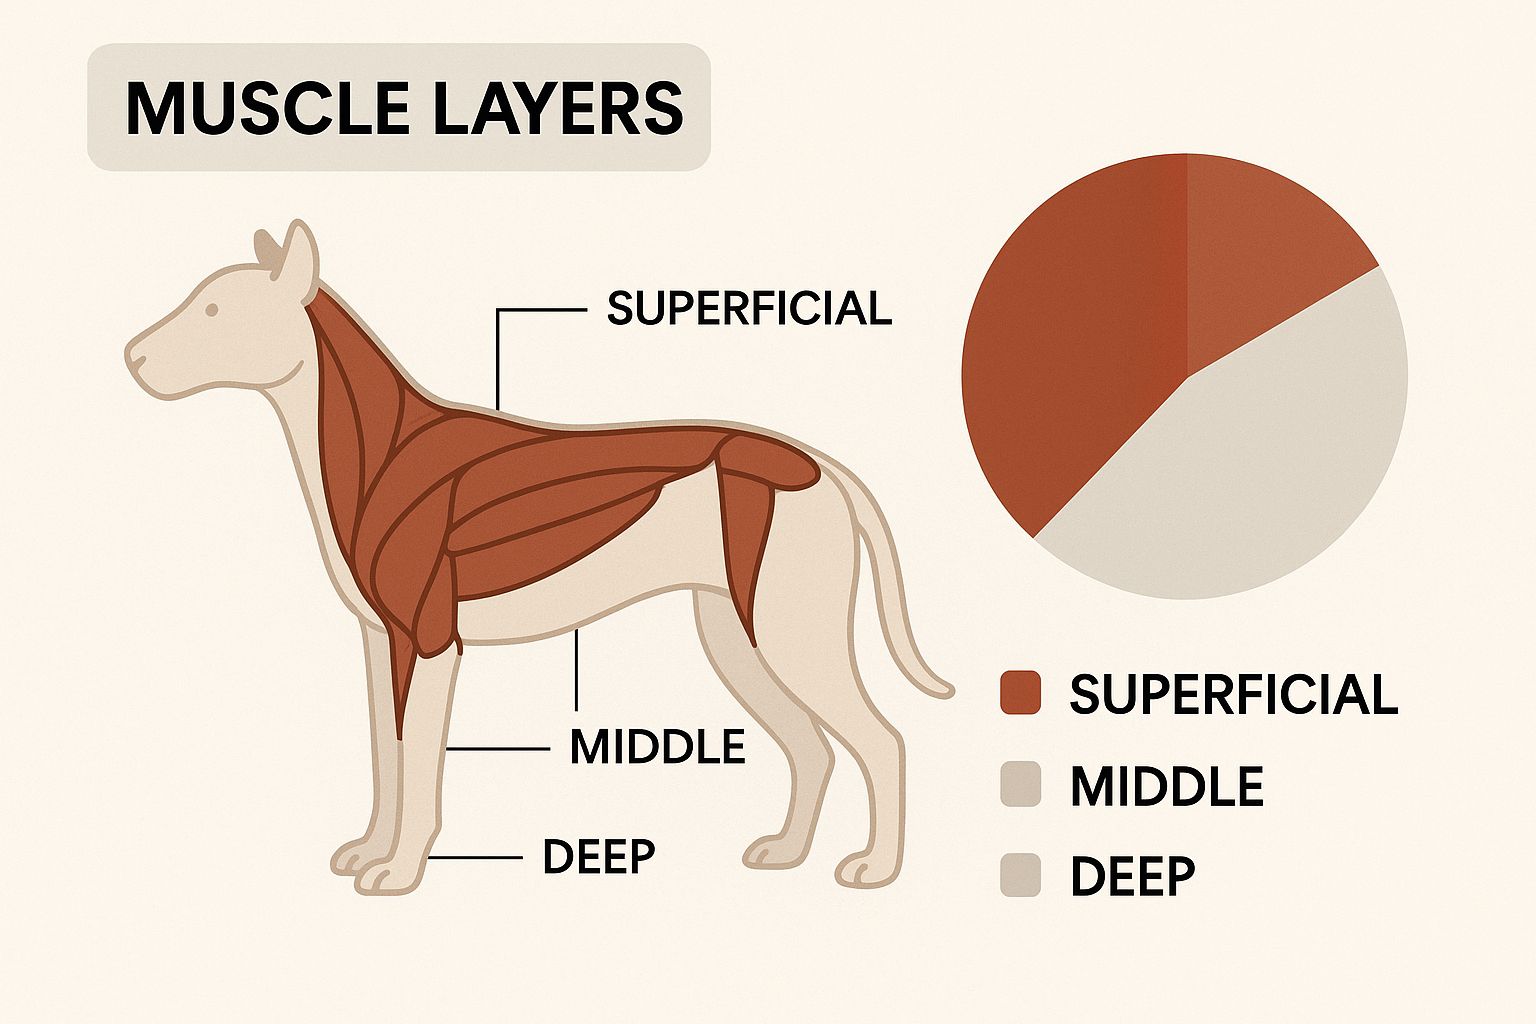
When you can visualize these major groups as distinct but connected shapes, you're on your way to building a logical and believable body structure every time.
Focusing on Function, Not Latin
Let’s not get bogged down in terminology. Instead, let's focus on what the muscles do and how their function shapes their appearance. An animal's lifestyle is literally sculpted onto its body. A cheetah’s muscles are long and lean, built for explosive sprints. A bear's muscles, on the other hand, are thick and bulky for sheer, raw power.
As you draw, think about these key functional areas:
- The Haunches (Hind Legs): This is the engine. Look for the massive muscles of the thigh and glutes that propel the animal. On predators like lions or wolves, these are incredibly well-defined.
- The Shoulder Girdle: Here’s a cool fact: many four-legged animals don't have a collarbone like we do. Their shoulder blades essentially "float," held in place by a sling of powerful muscles. This gives them a much longer stride, which is crucial to capture if you're drawing an animal on the run.
- The Neck and Back: The muscles running along the spine and connecting the neck to the shoulders are vital. A grazing horse will have a very different neck structure from a bull that's built for fighting.
My own "aha!" moment came when I stopped trying to draw every single muscle and started thinking in terms of "muscle envelopes." I just visualize a simple, single shape that contains an entire group, like wrapping all the shoulder muscles in one flowing form. It keeps my drawings fluid and stops them from looking stiff or lumpy.
This idea of simplifying complex anatomy isn't new. Artists have always looked for better ways to see what’s under the skin. Back in the 18th and 19th centuries, anatomists like Honoré Fragonard developed incredible "écorché" figures and used colored wax injections to make three-dimensional models. These innovations gave artists an unprecedented look inside the body. You can learn more about these fascinating historical techniques and how they influence our modern anatomical understanding on BodyWorlds.com.
A Quick Look at Key Muscle Groups
To help you visualize this, here’s a simplified breakdown of the muscle groups that have the biggest impact on an animal's shape. Think of these as the major landmarks you'll be looking for.
Key Muscle Group Functions for Artists
| Muscle Group Area | Primary Action (Movement) | Visual Cue for Artists |
|---|---|---|
| Pectorals (Chest) | Pulls the forelimbs inward and forward. | A broad, fan-shaped mass that defines the front of the chest. |
| Latissimus Dorsi (Back) | Pulls the forelimbs backward (propulsion). | A large, flat muscle creating the "V" shape from shoulder to waist. |
| Shoulder Complex (Deltoids, etc.) | Moves the upper arm in all directions. | A prominent, curved bulge over the shoulder joint. |
| Gluteals & Hamstrings (Rump & Thigh) | Extends the leg backward for power. | The largest muscle mass; creates the powerful curve of the hindquarters. |
| Quadriceps (Front of Thigh) | Extends the lower leg forward. | The thick, fleshy part on the front of the hind leg. |
| Neck Muscles (Trapezius, etc.) | Lifts and moves the head. | Creates the powerful arch or sleek line from shoulders to skull. |
Remember, you don't need to know the names, just where to look for these big, form-defining shapes and what they do.
A Practical Exercise for Drawing Muscles
Let's put this into practice right now. Find a good reference photo of an animal in a clear pose—a lion walking or a horse standing in profile would be perfect.
First, quickly sketch in that simplified skeleton we talked about: the skull, ribcage, pelvis, and the line of the spine.
Now, instead of jumping straight to the final outline, start blocking in the major muscle groups right on top of your skeleton. Use simple shapes.
- Start with the biggest masses. Begin with the thigh/haunch area and the shoulder. Ovals and teardrop shapes are your best friends here.
- Look for the overlaps. Pay attention to how the shoulder muscles partially cover the ribcage and the top of the front leg. It’s these overlaps that create a real sense of three-dimensional form.
- Connect the shapes. Use smooth, flowing lines to link these major masses together, suggesting the smaller muscles and tendons that tie everything into a cohesive whole.
By building up your drawing this way, layer by layer, you give it a structural integrity that’s impossible to achieve if you only trace the outside contour. Mastering this is a foundational skill in animal anatomy for artists, and it will absolutely transform your work from flat illustrations into believable, dynamic creatures.
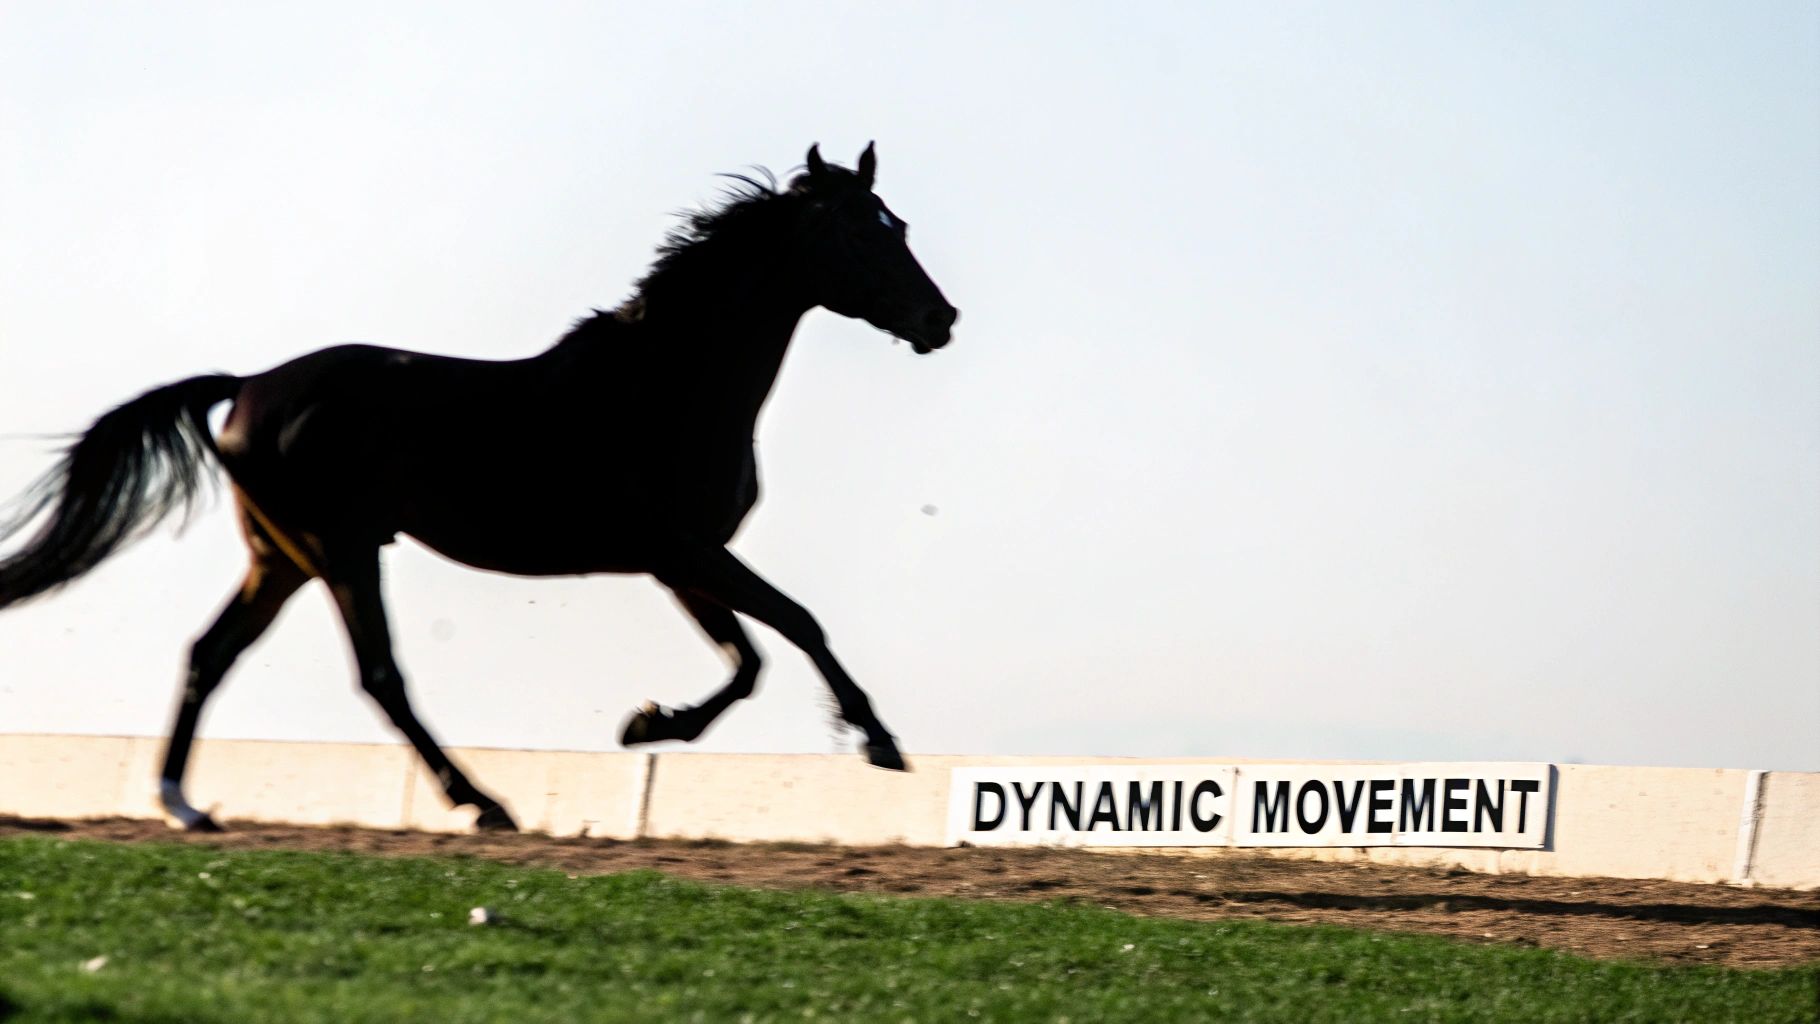
How Anatomy Drives Realistic Animal Movement
This is where all that hard work studying bones and muscles really pays off. Drawing a static animal is one thing, but capturing the fluid, explosive, or graceful energy of an animal in motion? That’s what breathes life into your art.
Knowing animal anatomy isn't just for nailing static poses. It's the secret to unlocking dynamic, believable movement.
Every animal moves in a way that’s completely dictated by its internal hardware. A cat can slink so low to the ground because its spine is incredibly flexible and its shoulder blades literally "float" in a sling of muscle. This setup allows for a longer, completely silent stride. A fox, on the other hand, has a springy trot because its legs are built like shock absorbers, perfect for covering miles with minimal effort.
When you understand these underlying mechanics, you can finally move beyond just copying a photo of an animal running. You start to feel the movement. You can predict how the body will shift, how the weight will transfer, and draw a pose that’s not just accurate, but crackling with energy and intention.
The Power of the Line of Action
Before you sketch a single bone or muscle, you have to find the gesture—the core energy of the pose. The single most powerful tool for this is the line of action. It's a simple, flowing line that maps out the entire direction and rhythm of the animal's movement.
Think of it as the drawing's expressive spine. It's the C-curve of a leaping dolphin, the S-curve of a striking snake, or that sharp, explosive line of a pouncing cheetah.
Starting with this one line forces you to focus on the overall motion before you get bogged down in the details.
A drawing without a strong line of action will almost always feel stiff and lifeless, no matter how perfect the details are. It’s the foundational energy that holds the whole piece together.
This initial gesture is your roadmap. Every other part you draw—the turn of the head, the stretch of a leg, the twist of the torso—should follow and reinforce this primary, energetic curve.
From Static to Dynamic Gesture Drawing
Gesture drawing is your training ground. The goal isn't a finished, polished piece. It's about rapidly capturing the essence of a pose with a flurry of lines, prioritizing rhythm and flow over picky details.
Here’s a practical way I like to approach it:
- Find the Line of Action: First thing's first. Draw that one flowing line to capture the main thrust of the movement.
- Block in Core Masses: Quickly sketch in the big, simple shapes for the skull, ribcage, and pelvis. Just get their placement and general angle right along your line of action.
- Indicate the Limbs: Use simple, sweeping lines for the legs and tail. Pay close attention to the angles of the joints—where do they bend? How are they carrying the animal's weight?
- Feel the Squash and Stretch: This is a classic animation principle that every artist should master. When an animal coils to jump, its body squashes. As it springs forward, it stretches out. Showing this contrast injects a massive amount of energy.
When you practice, set a timer. Give yourself just 30 to 60 seconds per pose. This pressure forces you to work fast and intuitively, training your eye to see the movement first and the details second.
How Joints and Muscles Actually Create Motion
As you’re sketching, constantly think about how the anatomy is working to create that pose. This is where your knowledge of the skeleton and muscle groups becomes dynamic. When an animal moves, some muscles contract and bunch up, while the muscles on the opposite side stretch out.
Keep these mechanical points in mind:
- Joint Articulation: Remember the limits of each joint. A knee can only bend one way, but a ball-and-socket shoulder joint allows for a huge range of motion. Drawing these articulations correctly is the key to a believable pose.
- Weight Shift: An animal’s weight is always in flux. As a wolf lifts its front paw, its entire body weight has to be supported by the other three legs. This causes a subtle but critical tilt in the hips and shoulders. Capturing this makes your animal feel grounded.
- Muscle Contraction: On the compressed or flexed side of the body, muscles will bulge and shorten. On the extended side, they’ll look longer and more streamlined. Indicating this simple push-and-pull gives your drawing a real sense of physical effort.
Practical Exercises and Essential Resources
Alright, theory is great, but getting your hands dirty is where the real learning happens. Understanding bones and muscles is one thing; making them look right on paper is another. This is where consistent, focused practice will make all the difference, turning those moments of frustration into breakthroughs.
Think of this part as your workout plan. We’ll jump into some specific exercises that will sharpen your eye and build that crucial muscle memory. Then, I’ll give you my personal, curated list of the absolute best resources out there—the books and websites I still turn to myself.
Actionable Drawing Drills
Building a solid anatomical foundation comes down to smart, deliberate practice. Instead of just doodling for hours, let's focus on some quick, repeatable drills designed to train your eye and hand to work together.
A game-changer for me was the skeletal overlay. Grab a high-quality photo of an animal—a clear side profile or three-quarter view works best. Then, either on a new digital layer or with tracing paper, draw the simplified skeleton right on top. This forces you to look straight through the fur and skin to see the structure holding everything up.
Another great one is the muscle block-in. Once you've got the skeleton sketched out, use simple geometric shapes like ovals, spheres, and cylinders to map out the major muscle groups. Don't get bogged down in detail here; the goal is to feel the volume and rhythm of the muscles as they wrap around the bones.
My all-time favorite drill is what I call "zoo gesture." I'll head to the local zoo with a cheap sketchbook and a soft pencil, and I give myself just 60 seconds per animal to capture the essence of its pose. It’s less about perfect anatomy and more about pure energy, which breathes life into your more polished drawings later on.
And of course, nothing beats drawing from life. Your sleeping cat or the birds at a feeder are fantastic, free models. Watching how a leg muscle bunches up as it bends or how a spine curves in a stretch provides insights you’ll never get from a static photograph.
When you're ready to take those sketches to the next level, our guide on wildlife painting techniques for beginners is a great next step.
My Curated List of Essential Resources
The internet is flooded with resources, and it can be tough to know where to start. To save you the headache, I’ve put together a list of the books and tools that have genuinely helped me and countless other artists. These aren't just for beginners; they’re staples for continuous growth.
Foundational Anatomy Books
Some books are just non-negotiable for an artist's library. They offer a depth of knowledge you just can't find anywhere else.
- Animal Anatomy for Artists: The Elements of Form by Eliot Goldfinger: This is the bible of animal anatomy. It’s dense, no doubt about it, but the incredibly detailed illustrations and comparative anatomy sections are unparalleled.
- The Art of Animal Drawing by Ken Hultgren: A true classic from a former Disney animator. This book is less about scientific precision and more about capturing gesture, personality, and life. It's fantastic for learning how to build dynamic creatures from simple forms.
High-Quality Digital Tools and Photo Archives
Digital tools give you an endless supply of reference material right at your fingertips.
- Anatomy 3D Apps: Tools like L'Ecorché are incredible. Being able to rotate a 3D model of a skeleton and see how everything connects from any angle is a massive help.
- High-Resolution Photo Websites: A solid reference library is a must. Sites like Unsplash, Pexels, and dedicated archives like Wildlife Reference Photos for Artists give you a treasure trove of clear, well-lit images in countless poses.
Comparing Top Animal Anatomy Resources for Artists
Choosing where to start can feel overwhelming, so I've put together this quick comparison table. It breaks down my top recommendations to help you find the perfect resource based on your learning style, skill level, and budget.
| Resource Type (Book/Website) | Title/Name | Best For (Beginner/Advanced) | Key Feature |
|---|---|---|---|
| Book | Animal Anatomy for Artists | Advanced | In-depth scientific diagrams and comparative anatomy. |
| Book | The Art of Animal Drawing | Beginner | Focuses on gesture, form, and creating dynamic poses. |
| Website | Wildlife Reference Photos | All Levels | Curated, high-quality photos specifically for artists. |
| App | L'Ecorché by Anatomy4Sculptors | Intermediate/Advanced | Interactive 3D models of skeletons and musculature. |
By mixing these hands-on exercises with top-tier resources, you’ll create a powerful learning cycle. Each drawing session will build on the last, steadily sharpening your understanding and bringing you that much closer to drawing wildlife with real confidence and accuracy.
Got Questions About Drawing Animal Anatomy? Let's Talk.
Jumping into animal anatomy can feel like you're trying to drink from a firehose. It's a huge topic, and it's totally normal to have a ton of questions crop up. Let’s go through some of the most common ones I hear from other artists. Think of this as a quick chat to clear up those nagging doubts so you can get back to what matters: creating incredible art.
Do I Really Need to Memorize All Those Scientific Names?
This is probably the number one question, and the answer is a huge, resounding no. Your goal is to be an artist, not a veterinarian.
Honestly, knowing that a powerful cluster of muscles creates the shape of a wolf's haunch is way more useful for drawing than memorizing the term "biceps femoris." Focus on understanding the major masses—the big, form-defining muscle groups and skeletal structures—by their shape and what they do, not what they're called in a textbook.
How Do I Make Sense of Complicated Areas Like Shoulders and Hips?
It's so easy to get lost in the weeds here. Shoulders and hips are complex joints with a lot of moving parts, and they can be a nightmare to draw convincingly.
The trick is to stop thinking about individual muscles and start thinking in terms of simple, overlapping forms and key anchor points. For a shoulder, I always visualize the shoulder blade as a simple triangle that glides over the ribcage. The upper leg bone is just a cylinder attached underneath it. This mental shortcut makes it so much easier to understand how the joint moves and how it will affect the animal's entire pose.
Where Can I Find Good References?
This is a big one. Your reference photos are the foundation of your drawing, and using bad ones is like building a house on sand. A quick Google search is tempting, but you'll often end up with blurry, poorly-lit images that create more confusion than clarity.
Here are a few of my go-to sources for top-notch reference material:
- Artist-Specific Archives: Some websites are built by artists, for artists. They often have fantastic photo sets with multiple angles of the same animal, which is pure gold for figuring out its 3D form.
- Zoo and Wildlife Park Photos: Check out your local zoo's website or social media. They often hire professional photographers to get crisp, clear shots that really show off the animals' forms.
- 3D Anatomy Tools: These are incredible. Having an app where you can spin a 3D model of a wolf's skeleton around to see exactly how the femur fits into the pelvis? It’s a complete game-changer for understanding how everything connects.
My best advice? Never rely on just one source. I use photos for lighting and fur texture, anatomical diagrams for the underlying structure, and videos to see the beautiful, fluid way an animal actually moves.
How Much Anatomical Detail Should I Actually Draw?
Finally, there's the big question of how much of this hard-earned knowledge you should actually put on the page. The answer really comes down to your personal style and, more importantly, your subject.
If you're drawing a big, fluffy bear, you won't be rendering individual muscles. Instead, you'll use your anatomical knowledge to suggest the powerful form underneath, showing it through subtle shifts in the fur's direction and the way light and shadow play across its body.
On the other hand, if you're drawing a sleek, short-haired animal like a greyhound or a horse, those underlying structures become much more visible. The anatomy is always there, serving as the blueprint for your drawing; you just get to decide how much of that blueprint you want to let the viewer see.
At William Tucker Art, we believe that a true understanding of the natural world is the first step to capturing its spirit. Explore our collections of fine art prints and original paintings to see how a deep appreciation for animal form brings wildlife to life on the canvas. Discover more at williamtuckerart.com.